

mybb Support
Creating a new inventory
You can have as many inventories as you like: instruments, uniforms, music library, or something custom to your program!
- Navigate to the myInventory tab on left side of your dashboard.
- In the top right corner, select the blue + Create New Inventory button.
- Navigate to myManager > Inventory
- In the top right corner, select the "Create New Inventory" button.
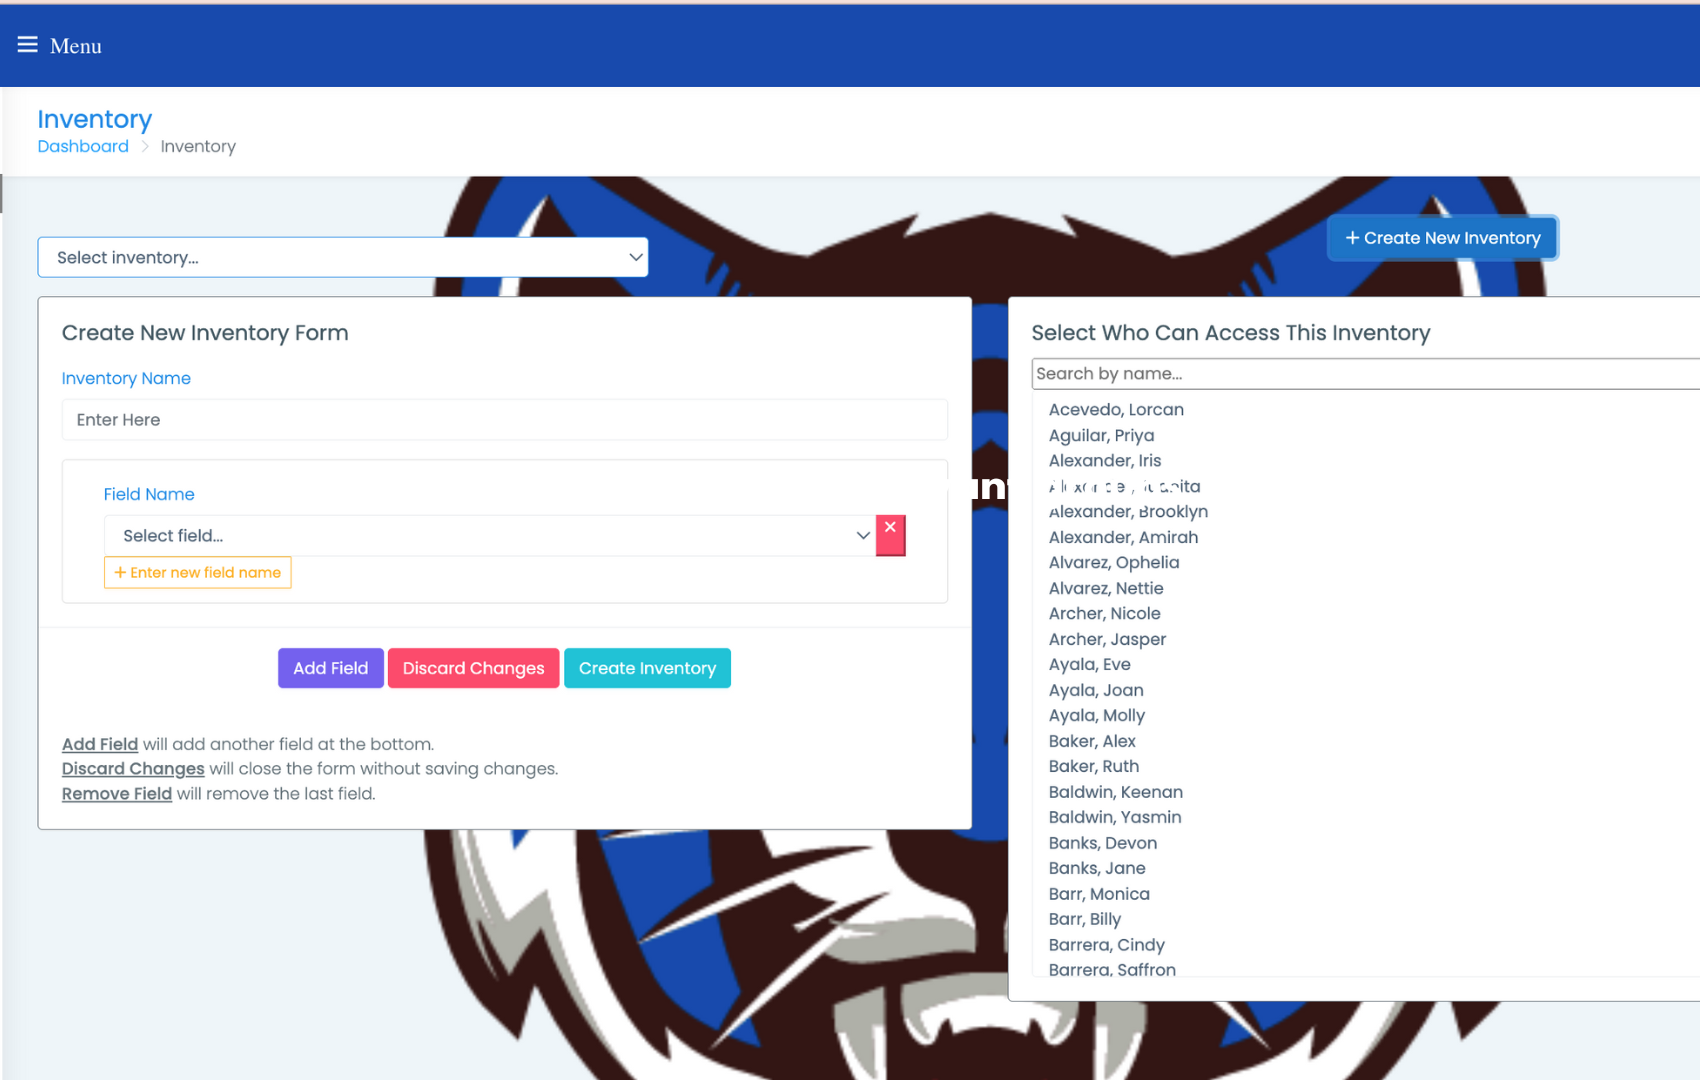
- Enter the name of your inventory.
- Add fields by selecting the "Add field" button and the "+ Enter new field name" button.
- Select the red X to remove a field.
- Give specific members access to this inventory by selecting their name from the right side of your dashboard.
- Remove the selection by clicking on it again.
- Use the search bar above the listings for convenience.
- Select the "Create Inventory" button to finalize. You will be prompted to confirm.
- You can now access your inventory by using the "Select Inventory" dropdown on the left side of the dashboard.
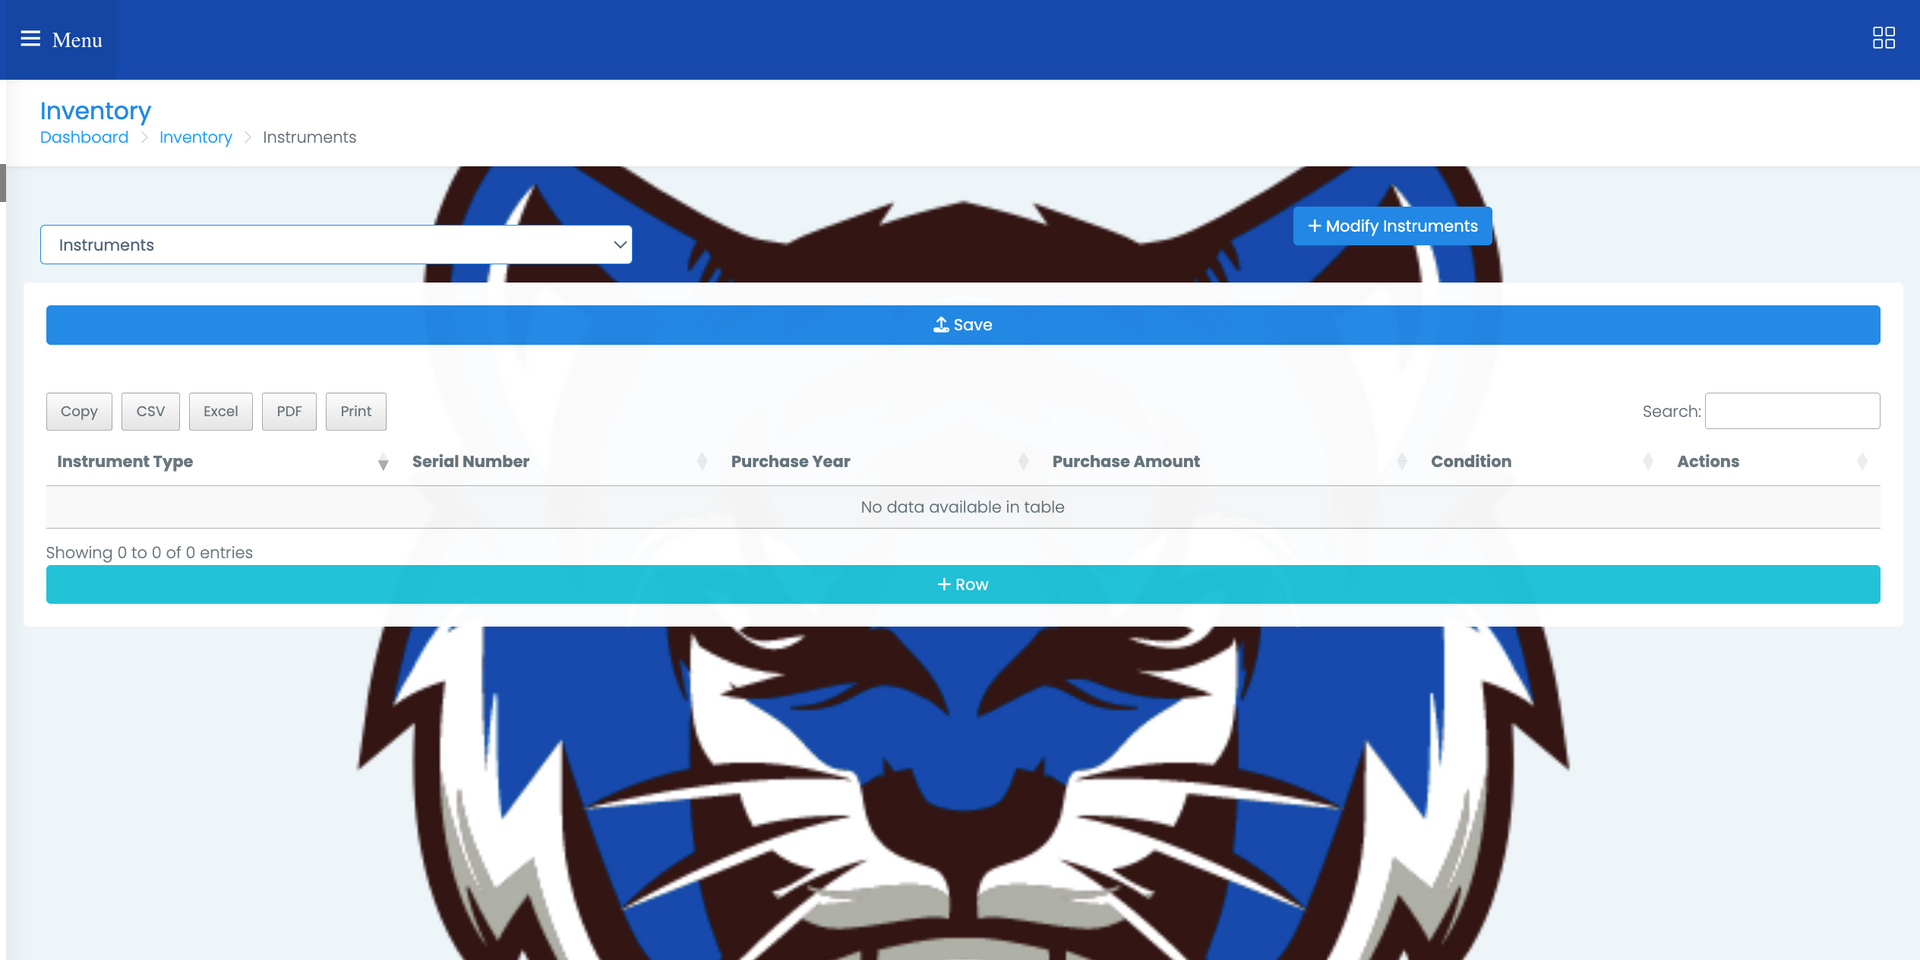
- Add a new row using the teal "+ Row" button.
- Enter your information. You can add multiple rows at a time.
- Remove a row with the red "-" button on the right side.
- Save your work using the blue "Save" button above your inventory.
- Copy, print, or export your inventory as a PDF, CSV, or Excel sheet using the buttons on the top left of your inventory.
- There is a search bar in the top right corner of your inventory.
Editing your inventory
- You can edit rows by selecting the orange "Edit" button on the right side.
- You can edit fields and access by using the "Modify (name of inventory)" button on the top right.
myFiles
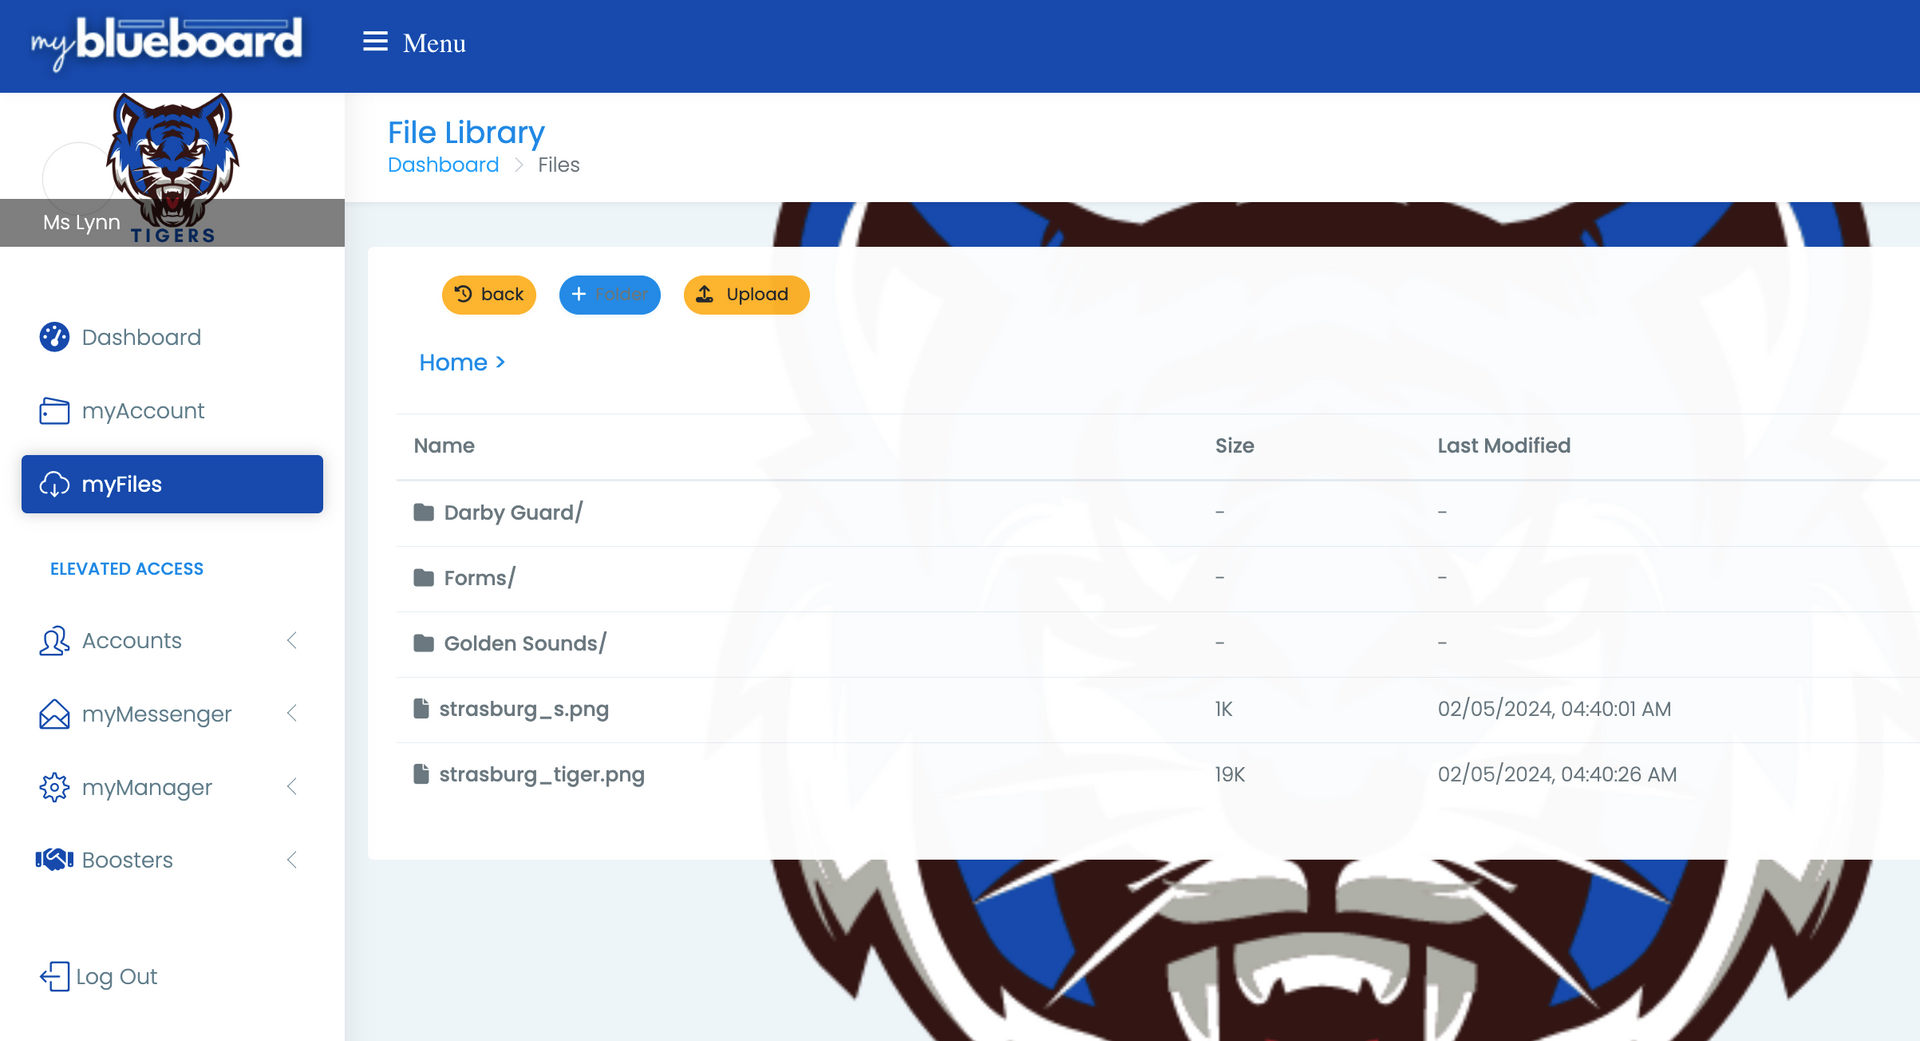
- You must create folders before you add files to them.
- Create a folder by navigating to myFiles > "+ Folder" button.
- Enter the New Folder name and select "Add".
- Open the folder and select the "Upload" button to add files to the folder.
- When the file is opened, it will automatically download the file.
- Use the back button to navigate.
