

mybb Support
Groups
Last updated on August 17, 2025
FAQ's
Why have student groups?
- Grouping students into various groups saves you time when it comes to:
- sending emails
- sending mobile app messages.
- assigning fees
- filtering student accounts
Why have parent groups?
- Parent groups helps organize parents into sub groups such as:
- volunteers
- trip chaperones
- boosters
- booster board members
- You can also send emails and mobile app messages to these sub groups.
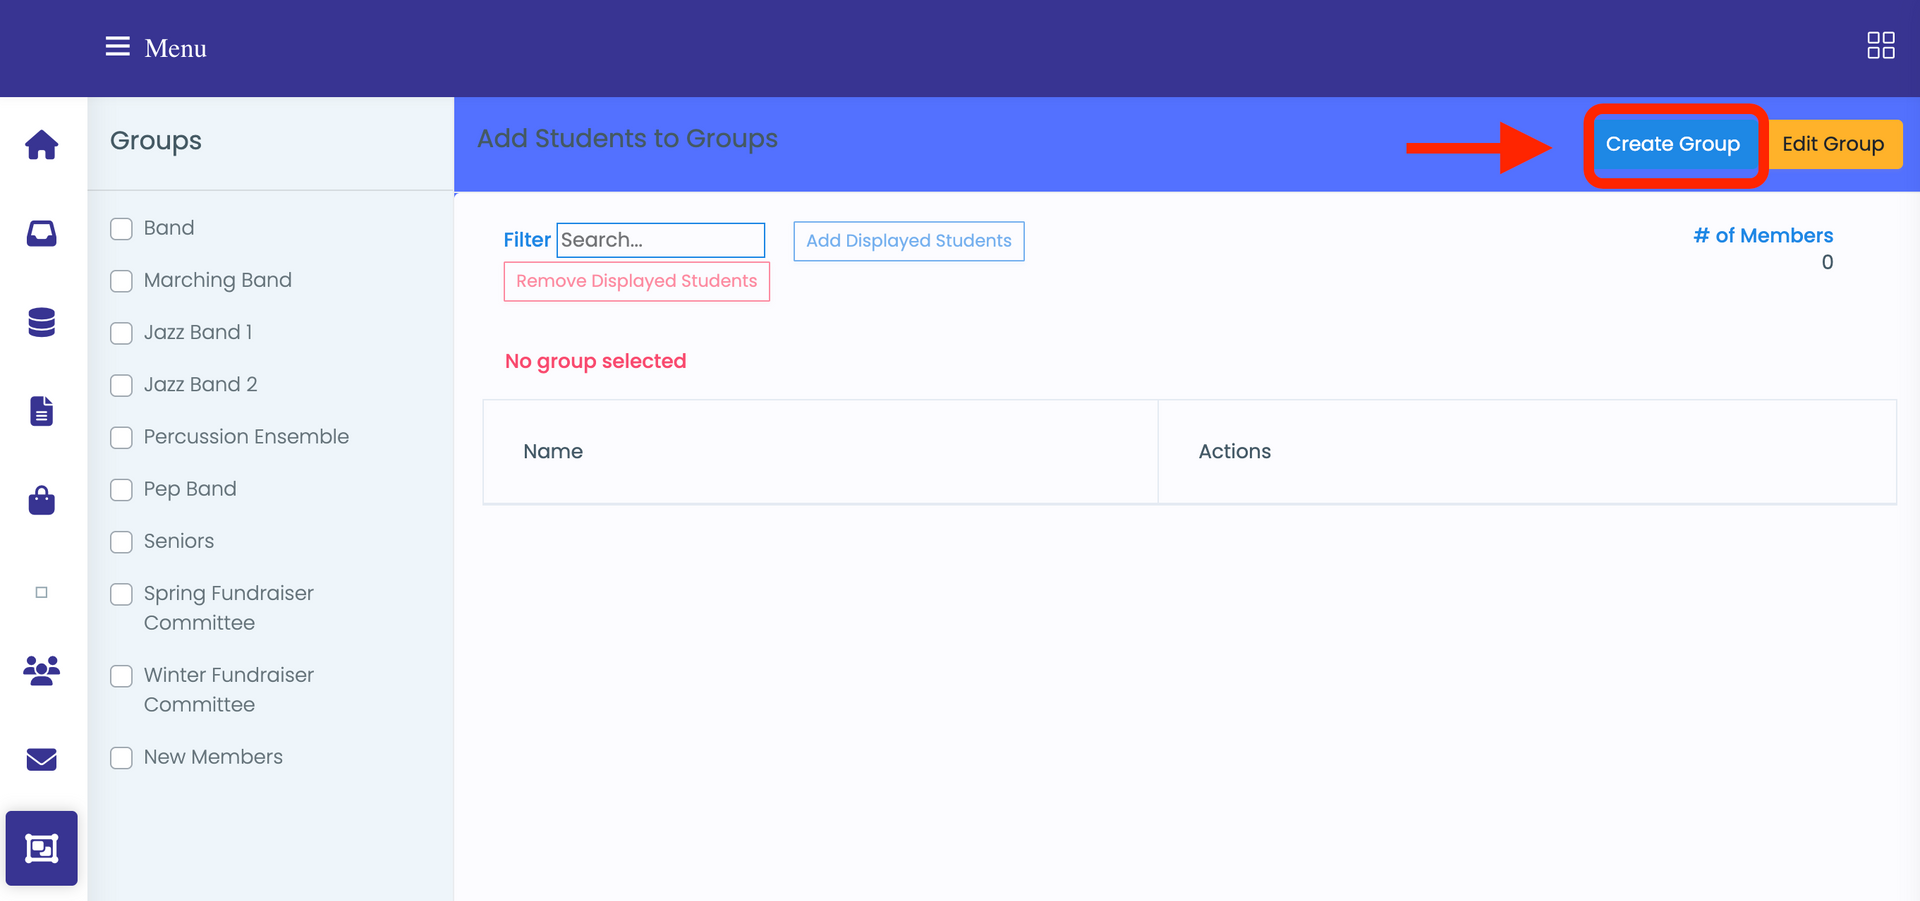
Create Student and Parent Groups
- Navigate to "myGroups" > "Student Groups" or "Parent Groups"
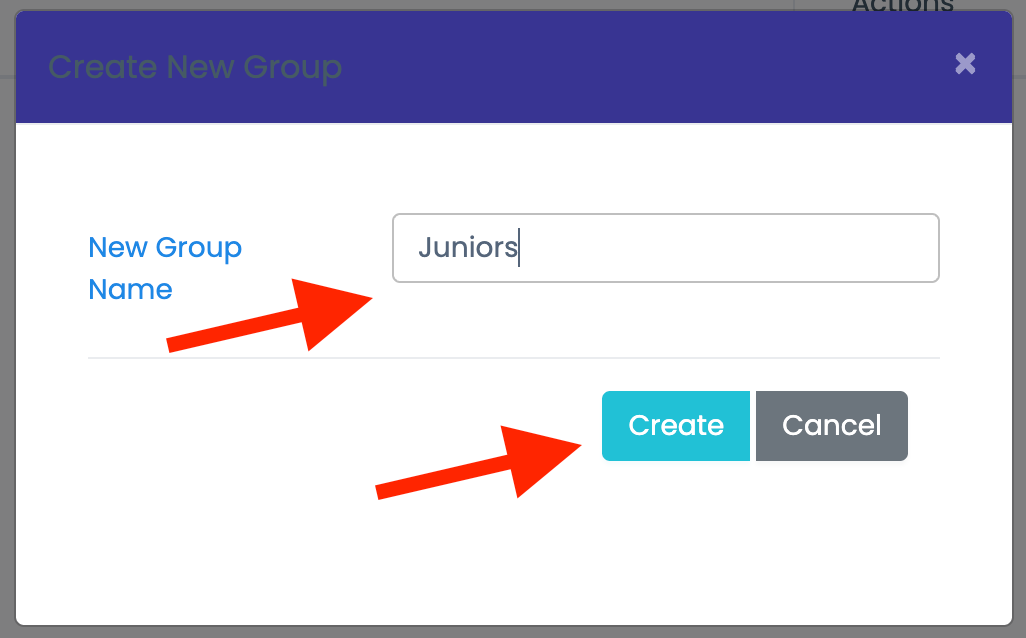
- Select the "Create Group"
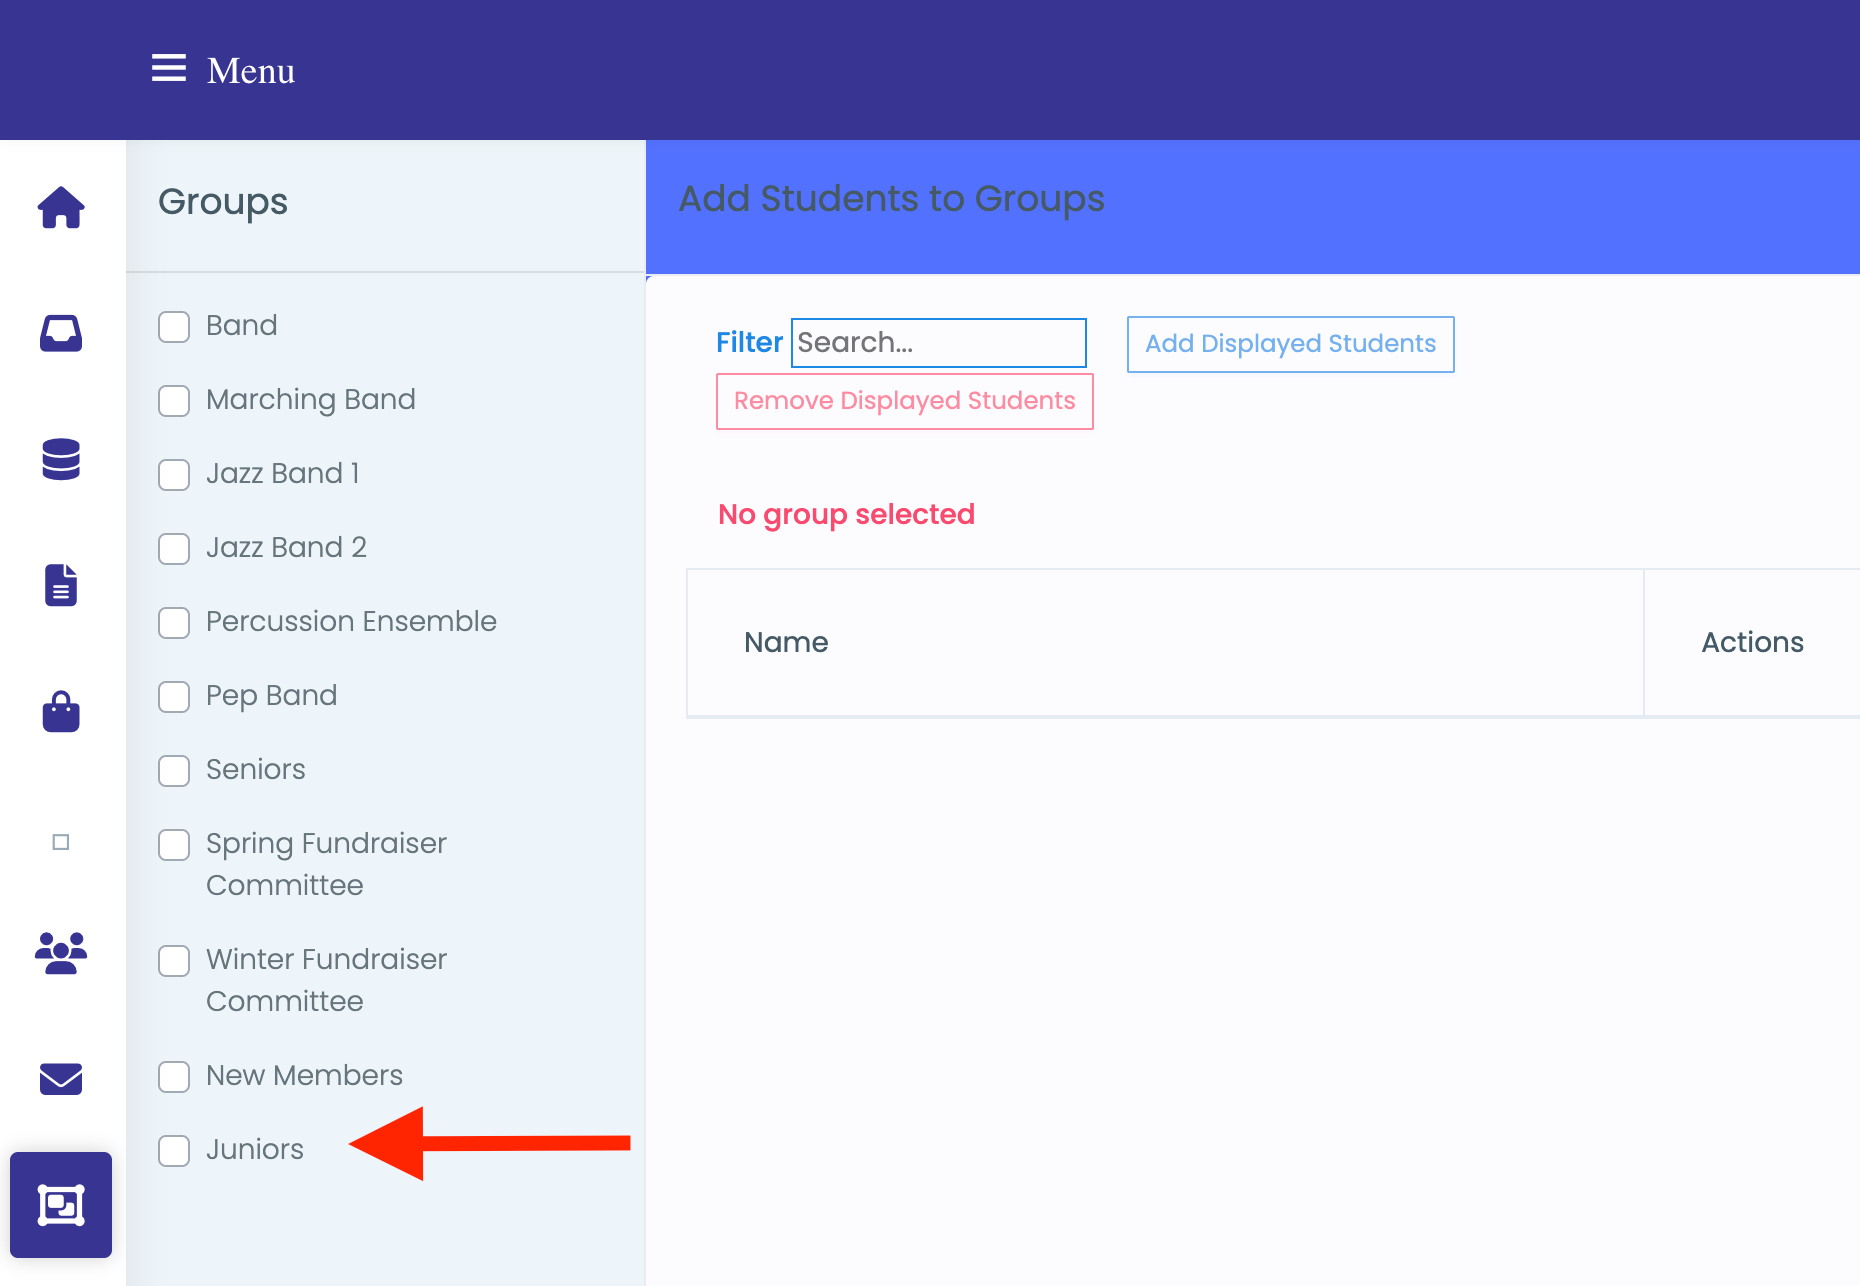
- Enter the name of your new group in the popup and select the Create button.
- Your new group will populate under the Groups field on the left side.
- Use the same process for parent groups.
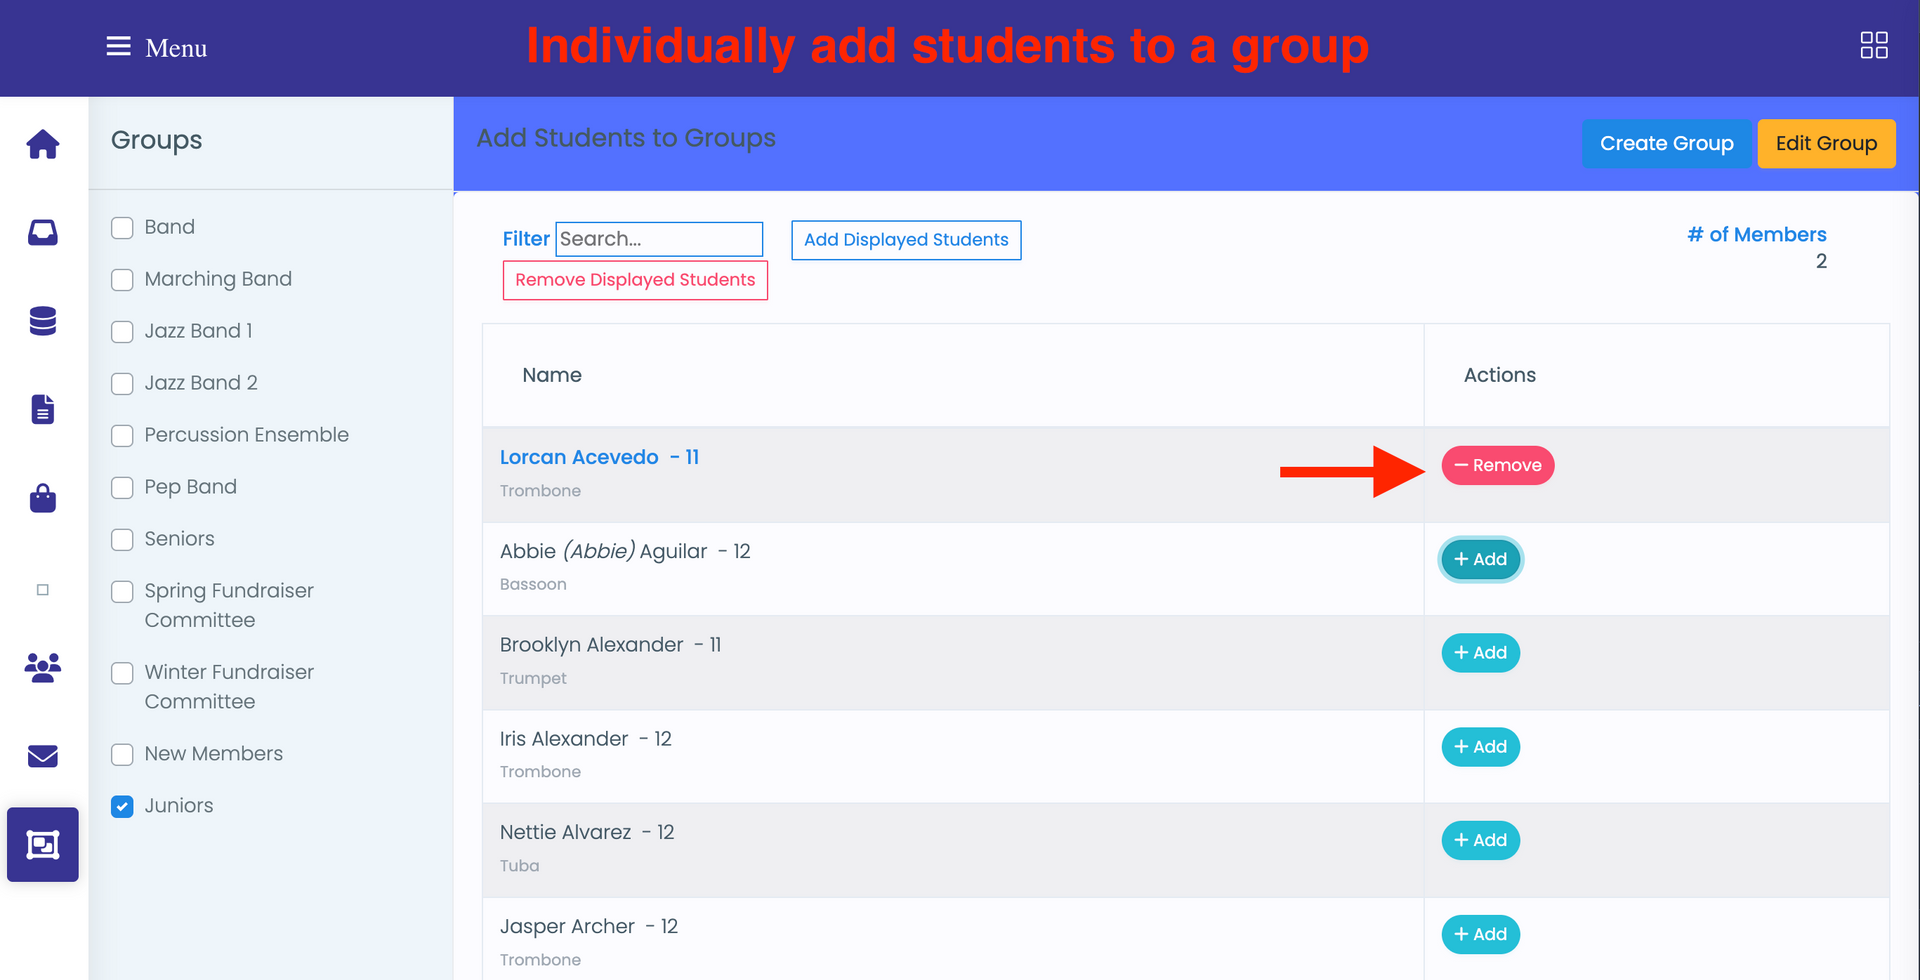
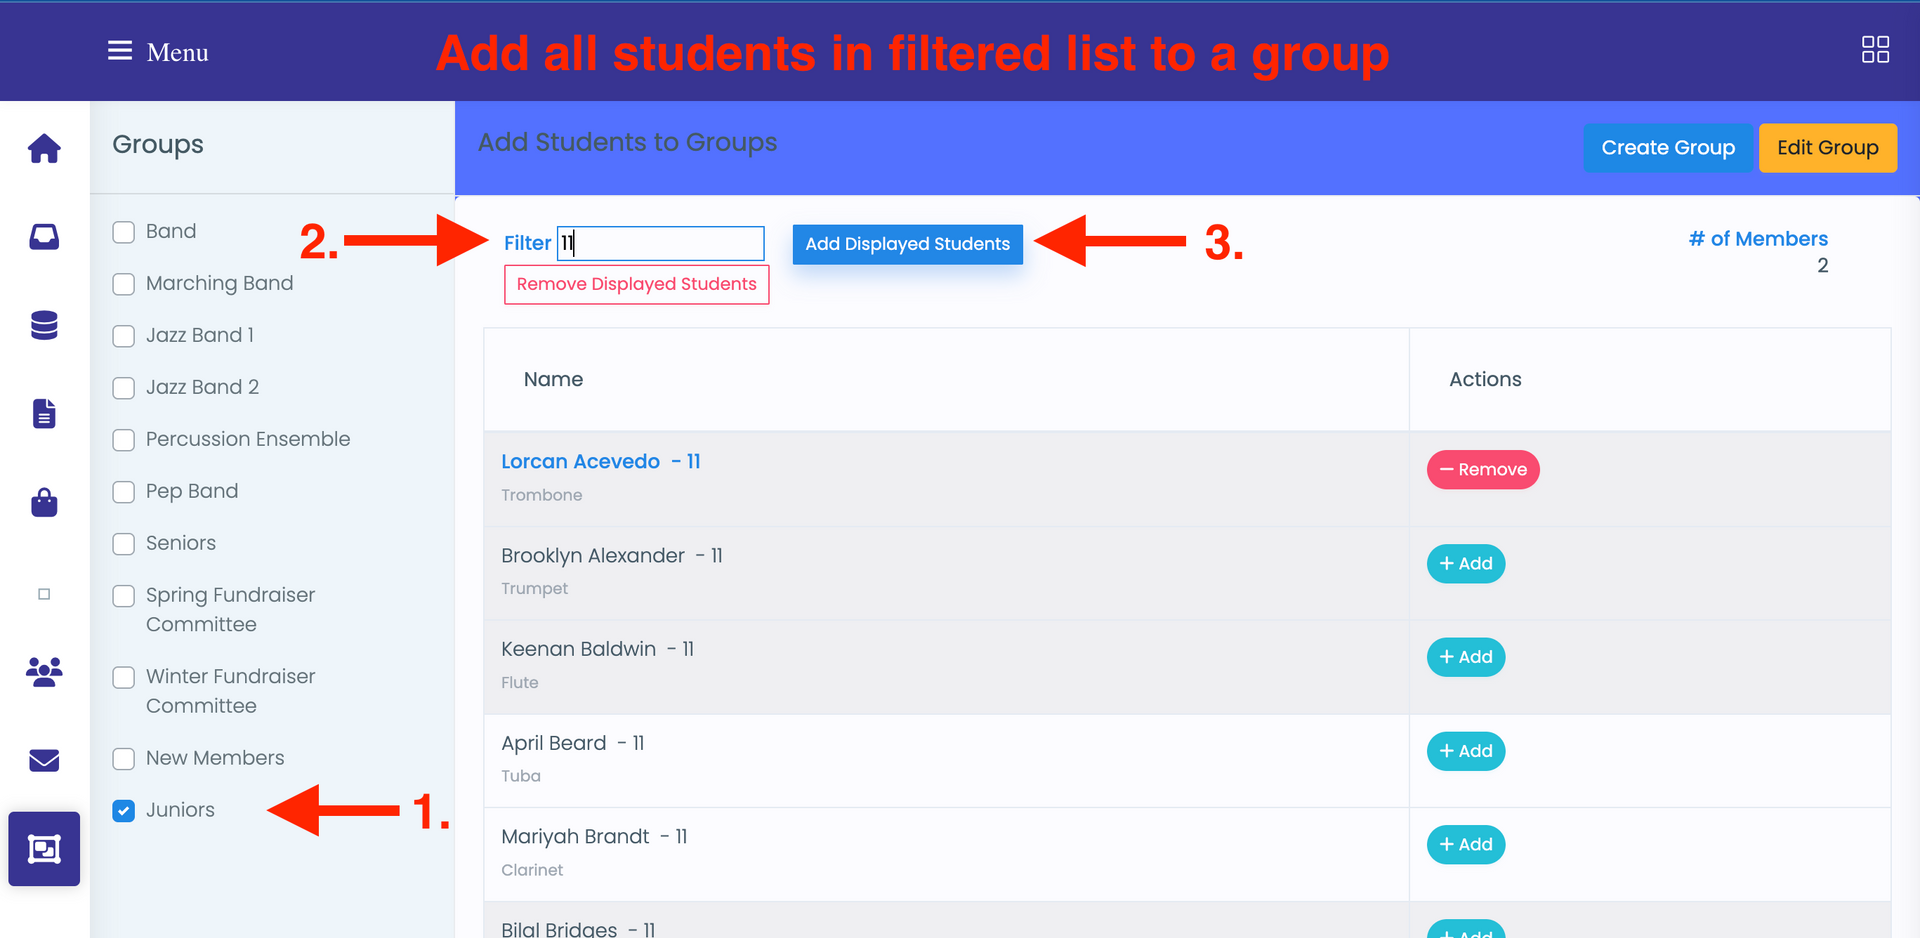
Assigning Students and Parents to Groups
- Search or scroll the member listings and select the Add button on the right side.
- You can remove them from the group by selecting the Remove button.
- Use the checkboxes in the Groups listing to filter your members listing. Members of the group will have a bold, blue listing and you will see a Remove button to the right of their name. Non-members will not be bolded and they will have the Add button next to their name.
- Student and Parent account listings will include all groups the student or parent is a member of.
- Navigate to myGroups > Student Groups to add students to groups.
- Navigate to myGroups > Parent Groups to add parents to groups.
- For both types of groups, select the relevant group from the Group checklist, scroll or search for the student or parent listing, and select the "+ Add" button. To remove from groups, select the "Remove" button.
Editing and Deleting Groups
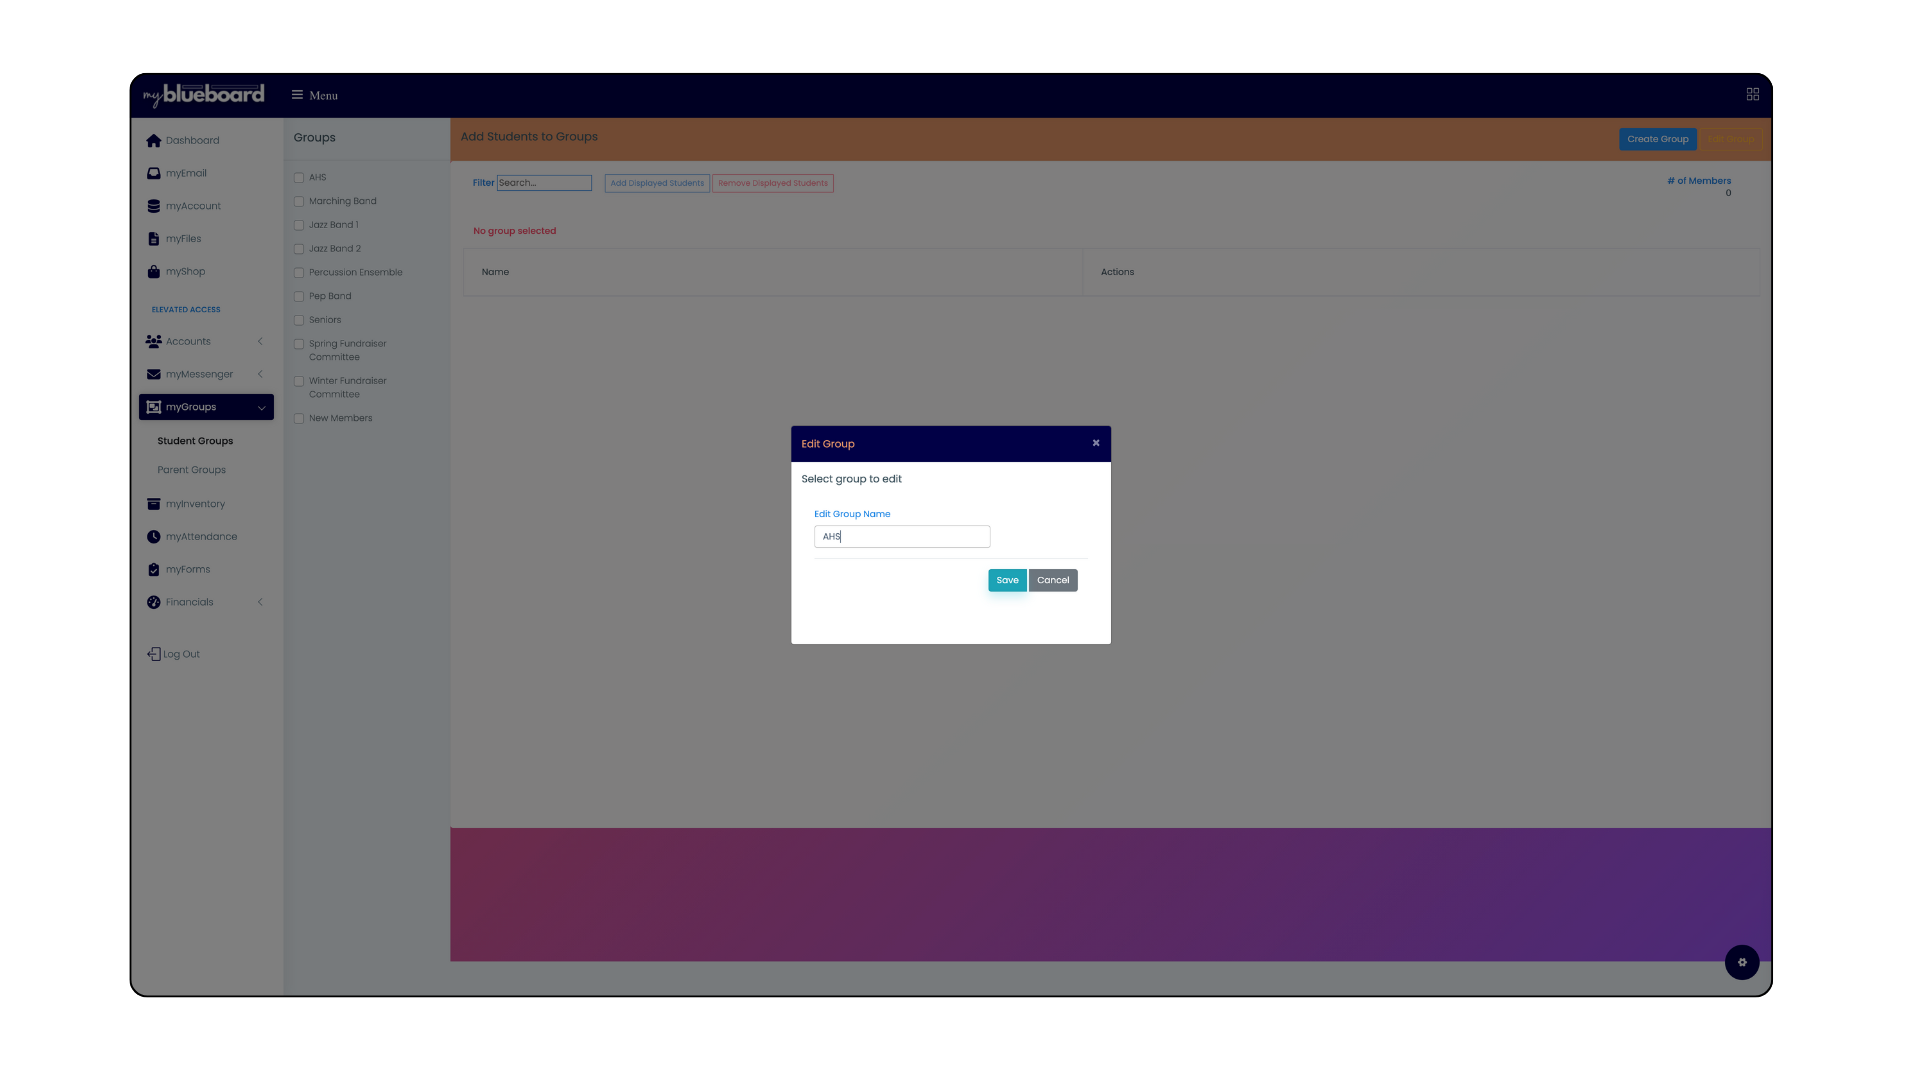
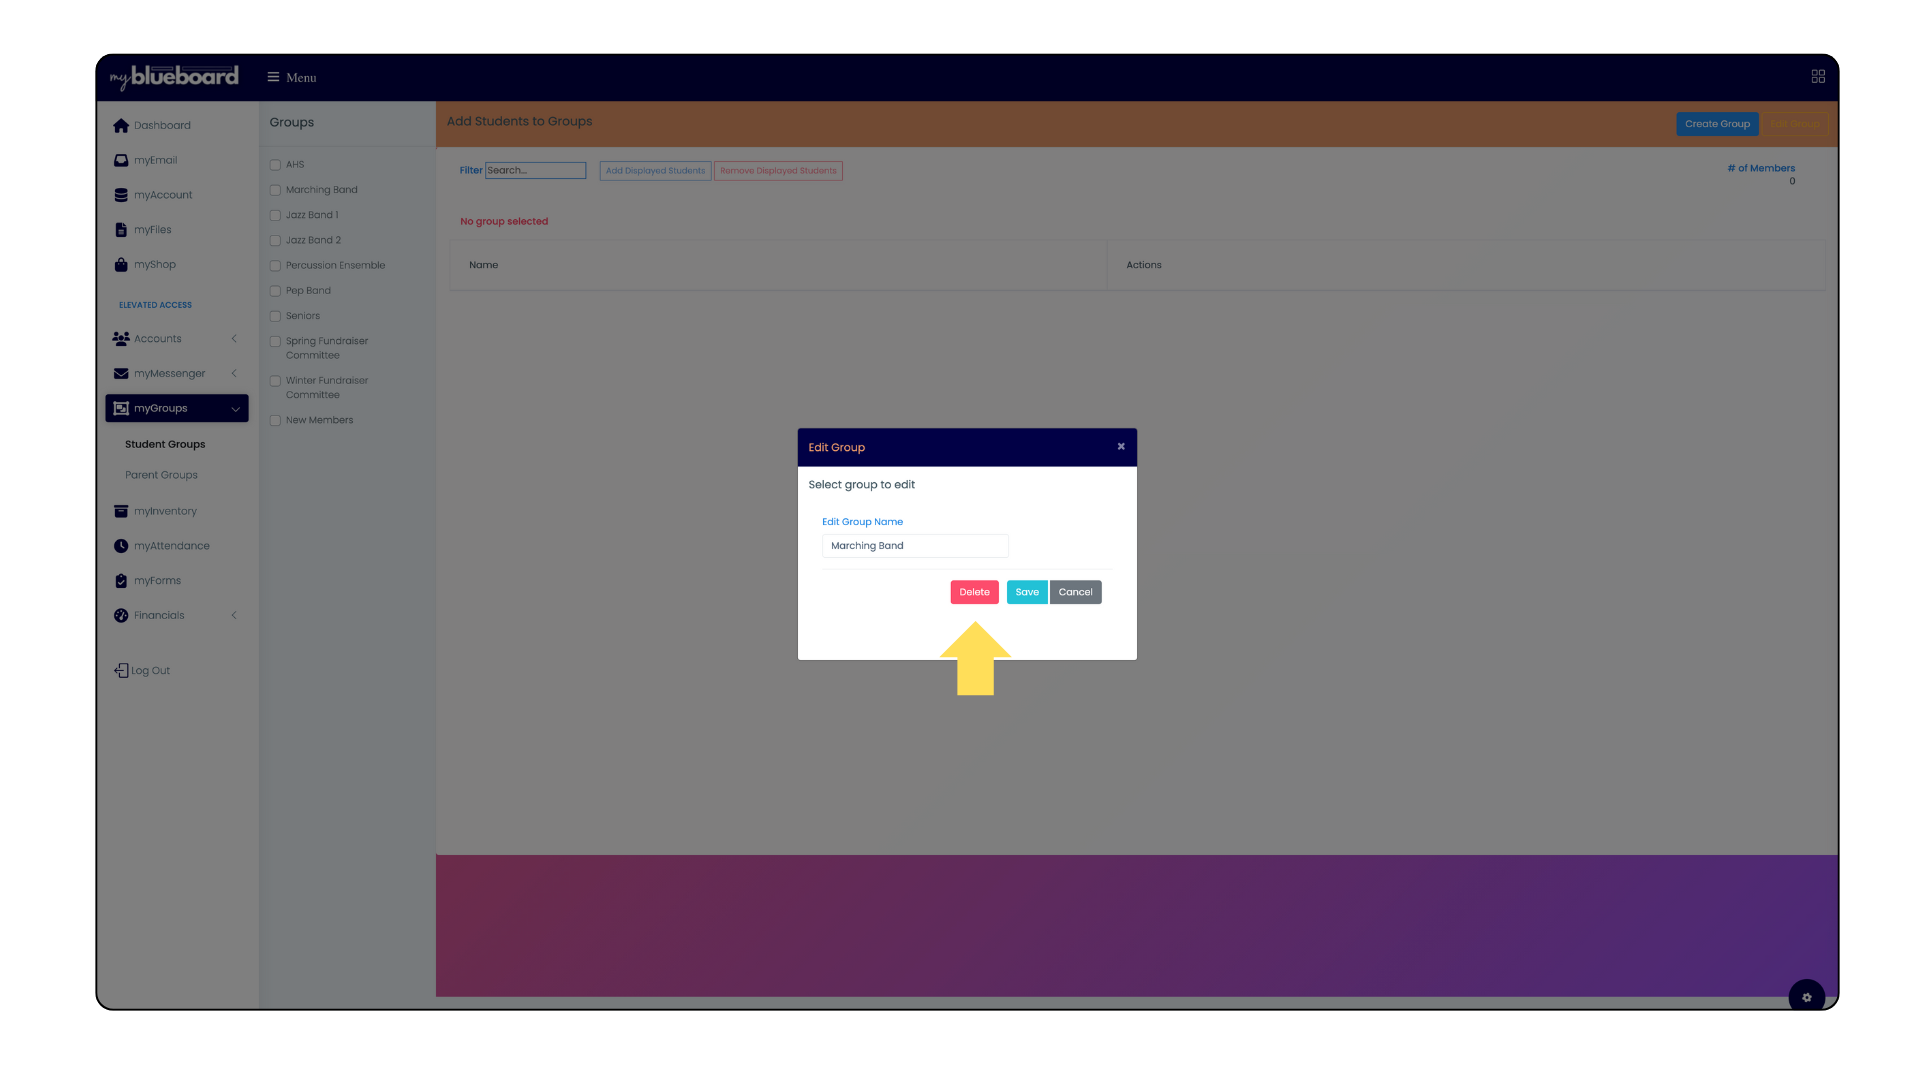
- In the top right corner of your dashboard, select the "Edit Group" button (Image 3).
- You can edit your main group name (the group that includes all members), but you cannot delete this group.
- This group will be listed first in the dropdown. You can edit the name by deleting the current name, typing the new name, and "Save".
- You can edit and delete all other groups by selecting them from the dropdown.

Communicating with Groups

- Emailing or posting messages by group streamlines the communication, eliminating unnecessary messages to non-relevant members, and making sure everyone who is involved is on the same page.
- Select all relevant groups, compose your message, and send (Image 6).
