
mybb mobile app
Updated: January 20, 2026
DIRECTORS AND ADMIN:
Note: You must first establish an account via our website before you can use the mobile app: https://signup.myblueboard.com/signup_form/


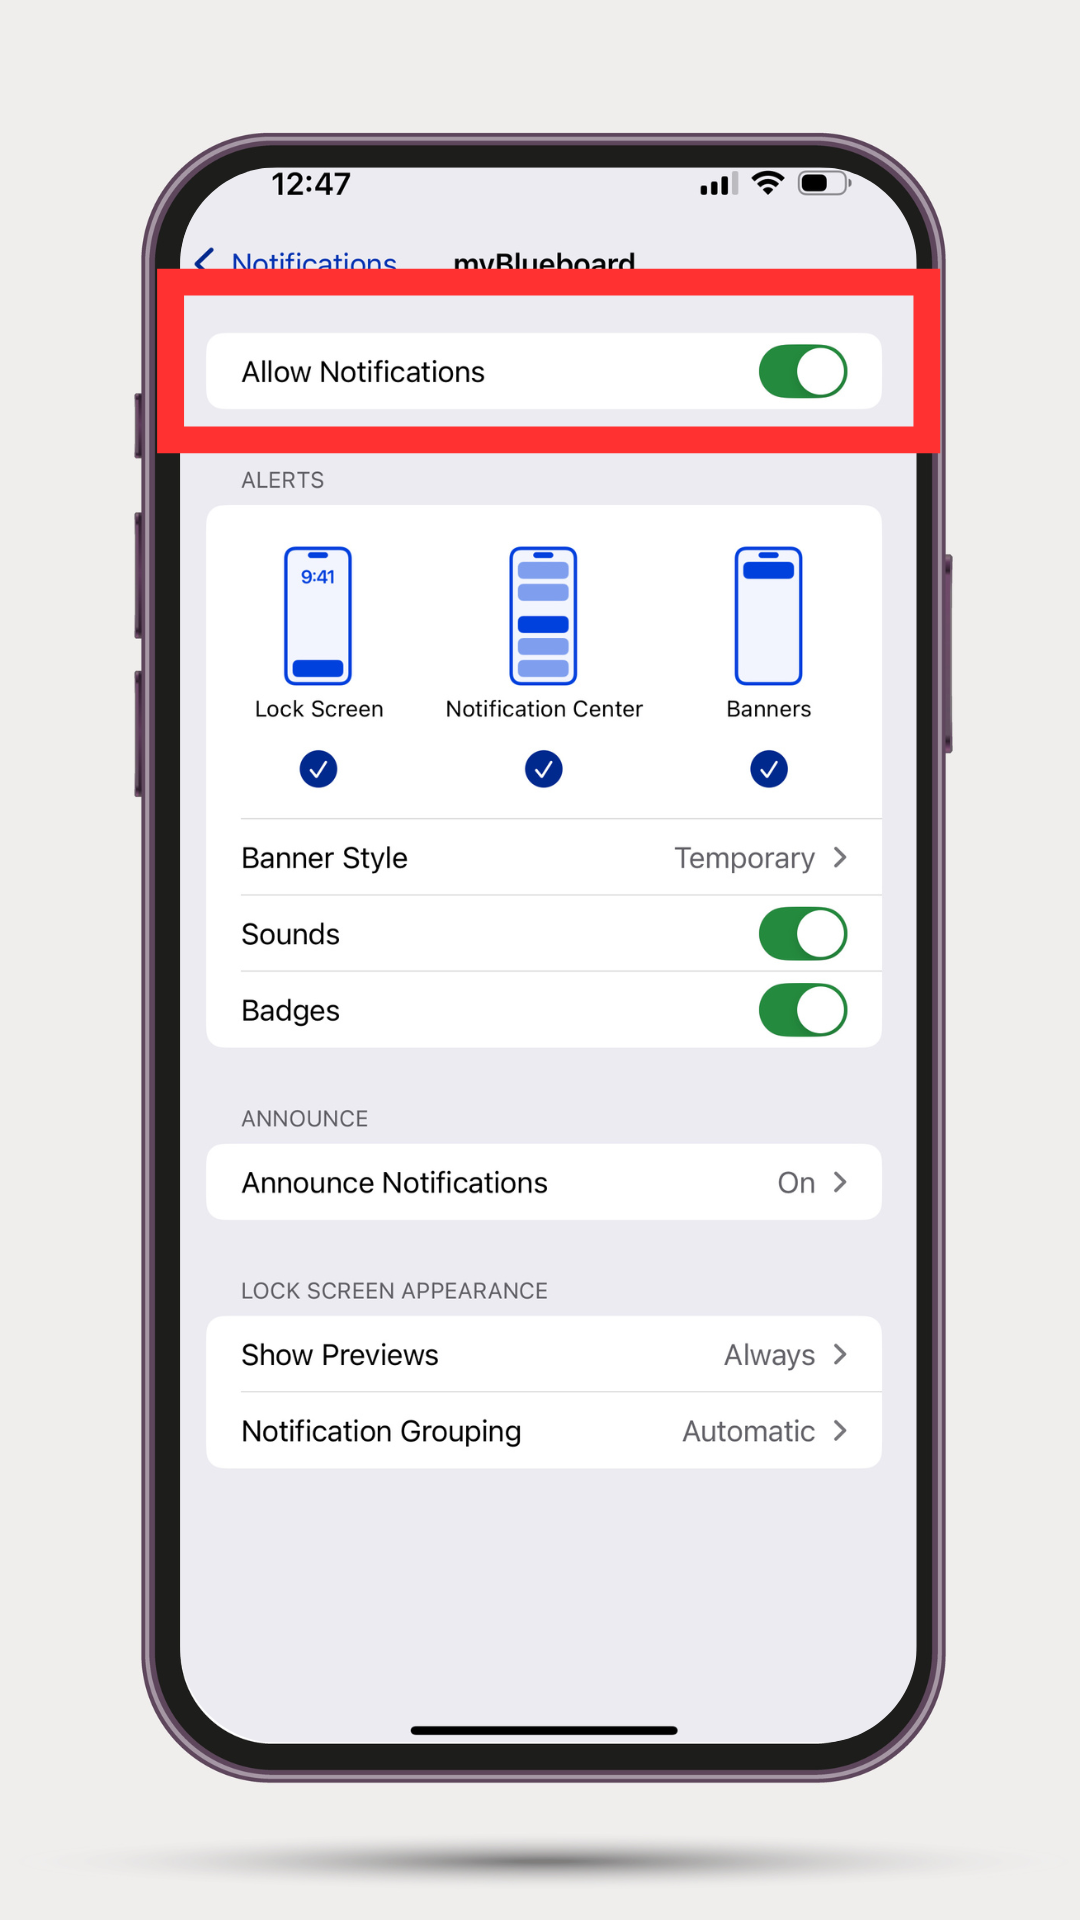
Allow Notifications
To enable notifications (which we highly recommend or you will not receive myChat messages or push notifications from myblueboard), you can navigate to your device's Settings > Notifications > myBlueboard.
Select the toggle to Allow Notifications (Image 2).
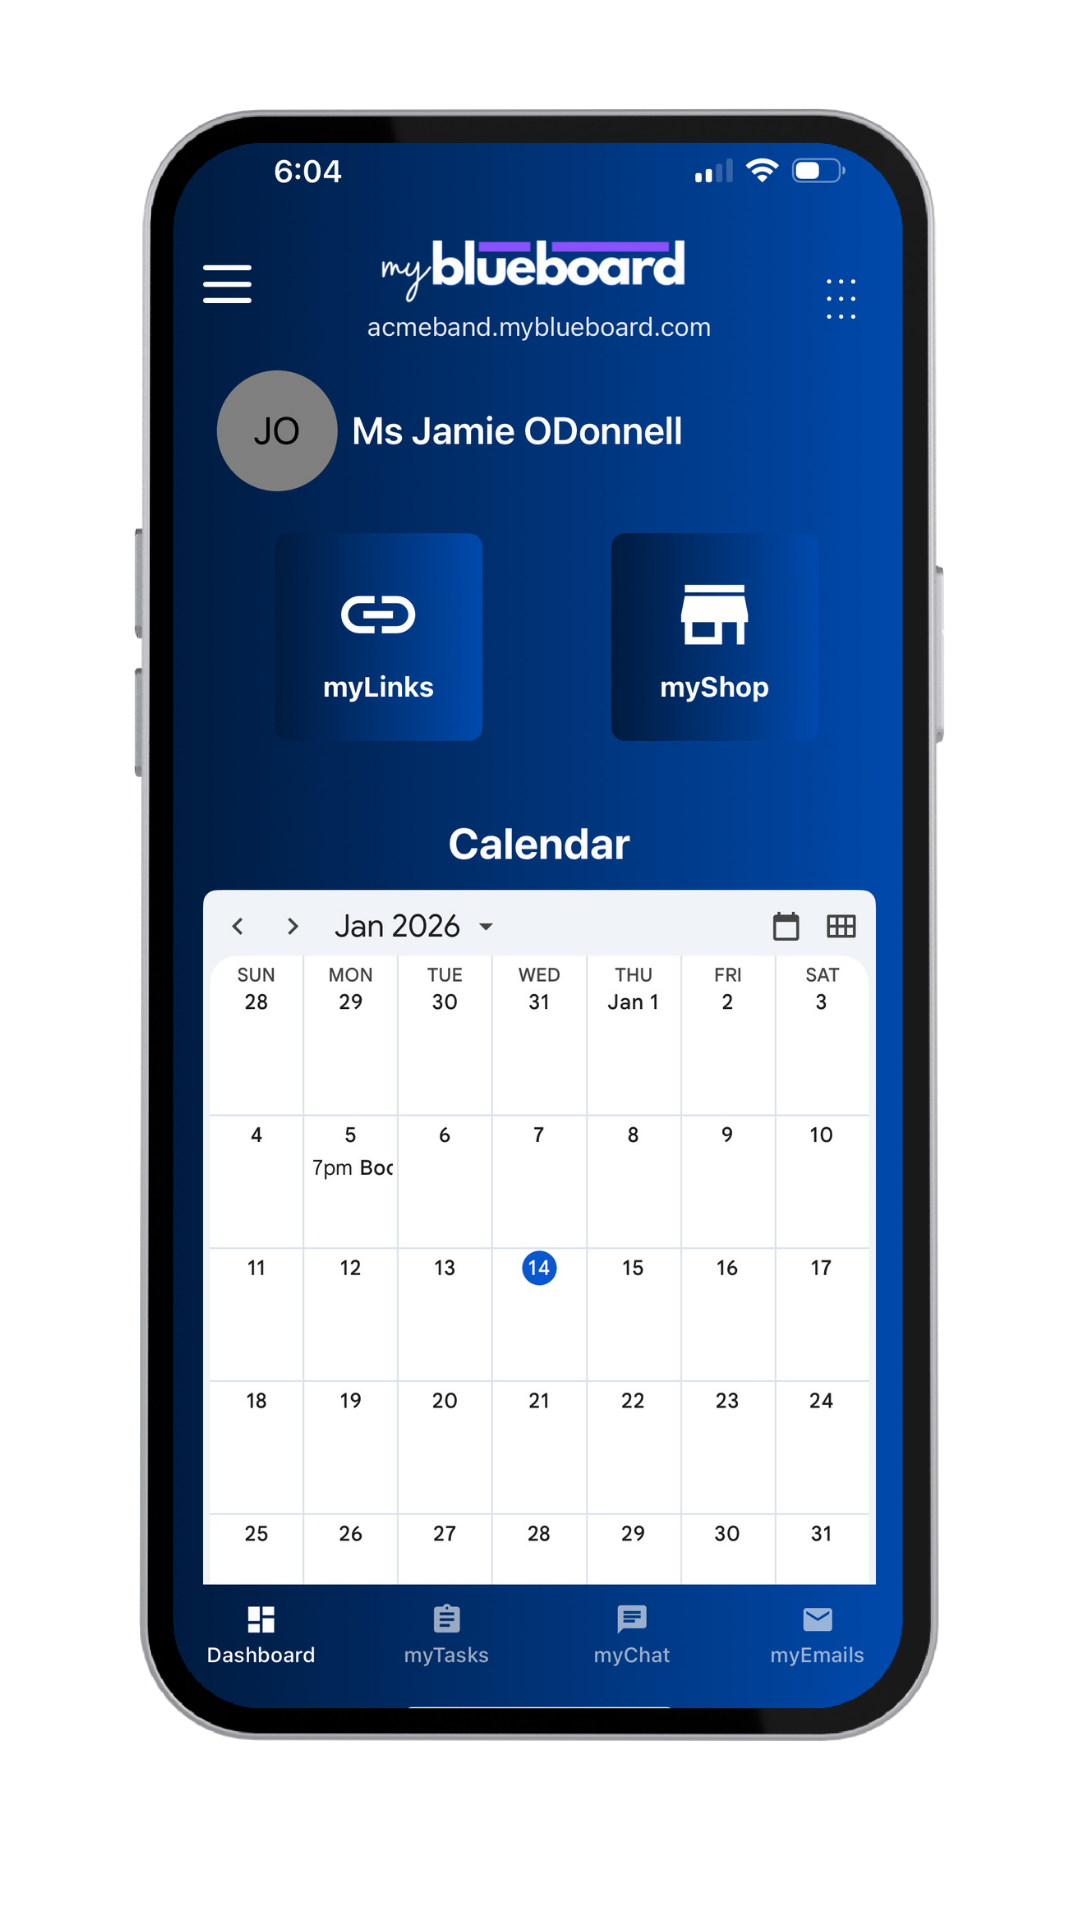
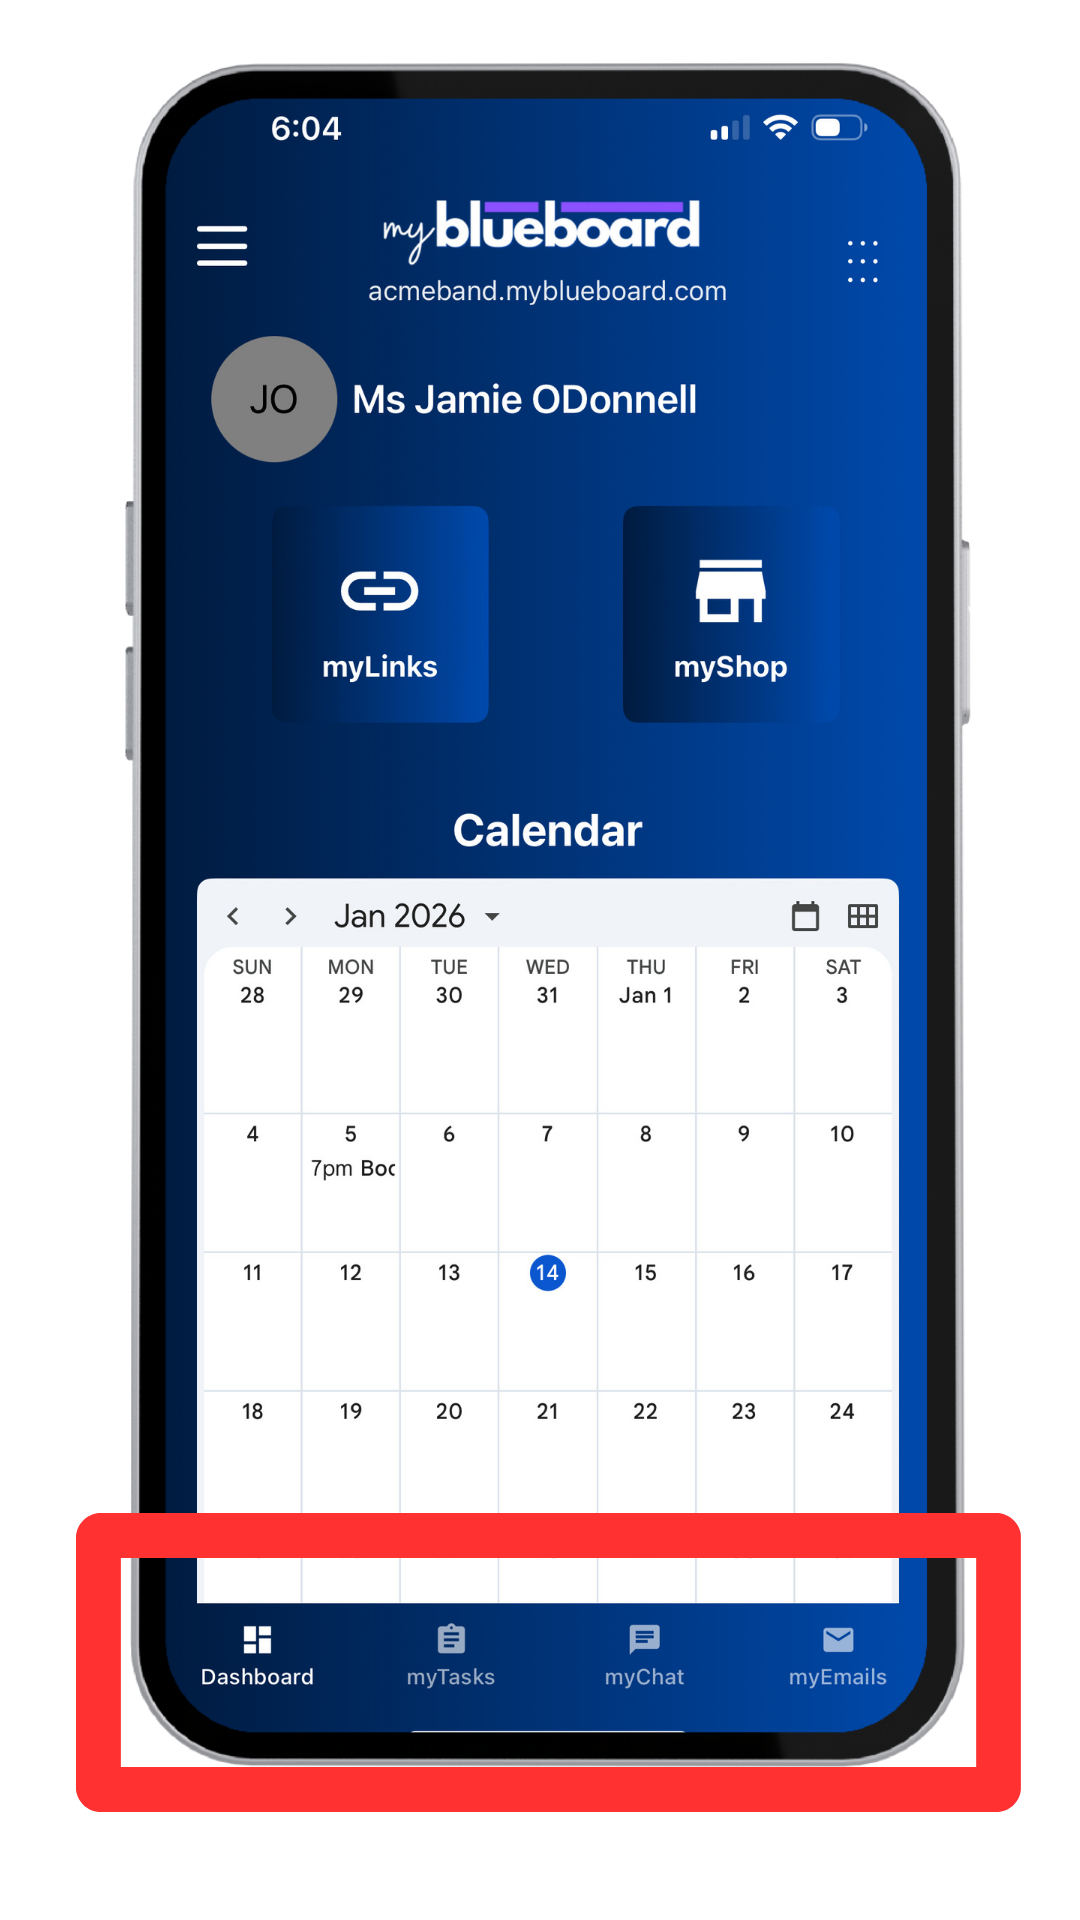
Navigating the Dashboard
The Dashboard (Image 3) brings everything together in one place, with two sidebar menus (top left and top right), your program’s Google Calendar, quick access to MyLinks and myShop, and four bottom navigation icons: Dashboard Home, myTasks, myChat, and myEmails.
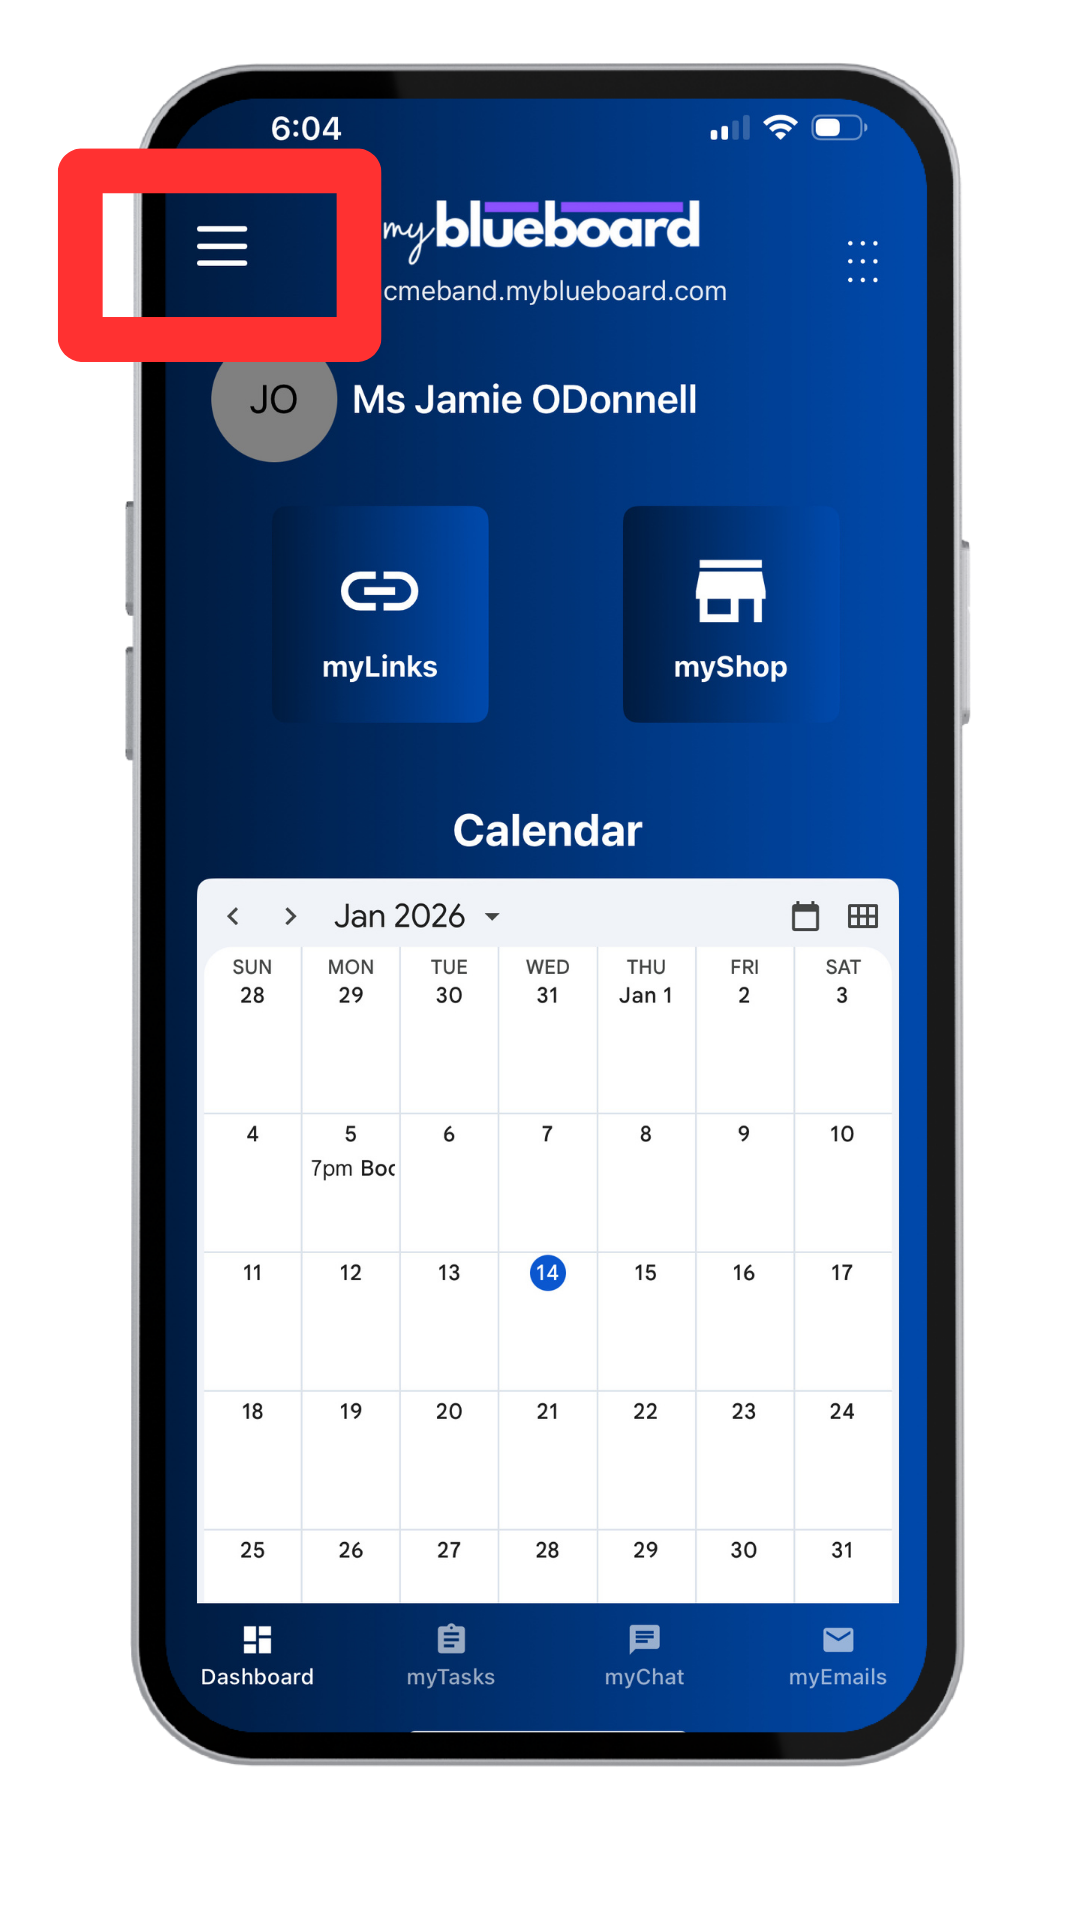
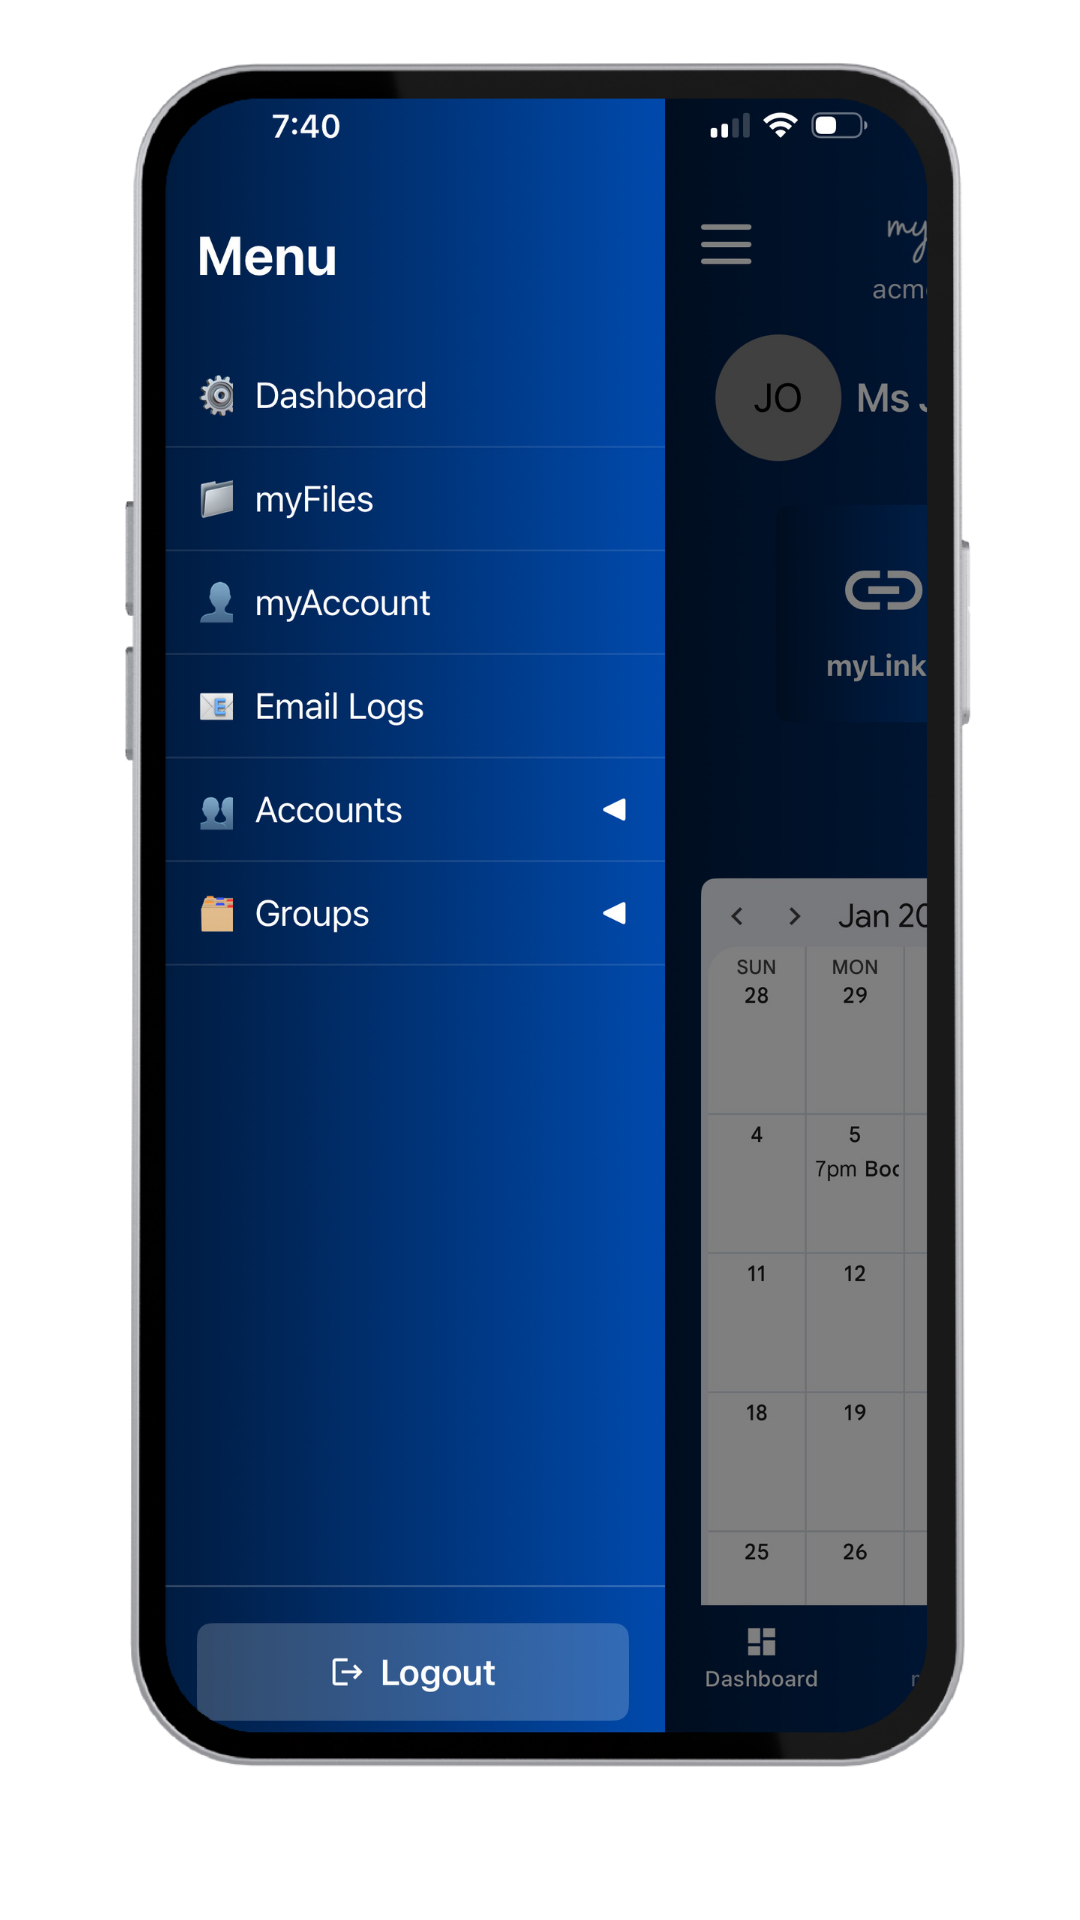
Use the Main Menu icon (Image 4) to open the side panel navigation. From here you can access myFiles, myAccount, Email Logs, Student/Parent/Director Accounts, and Groups.
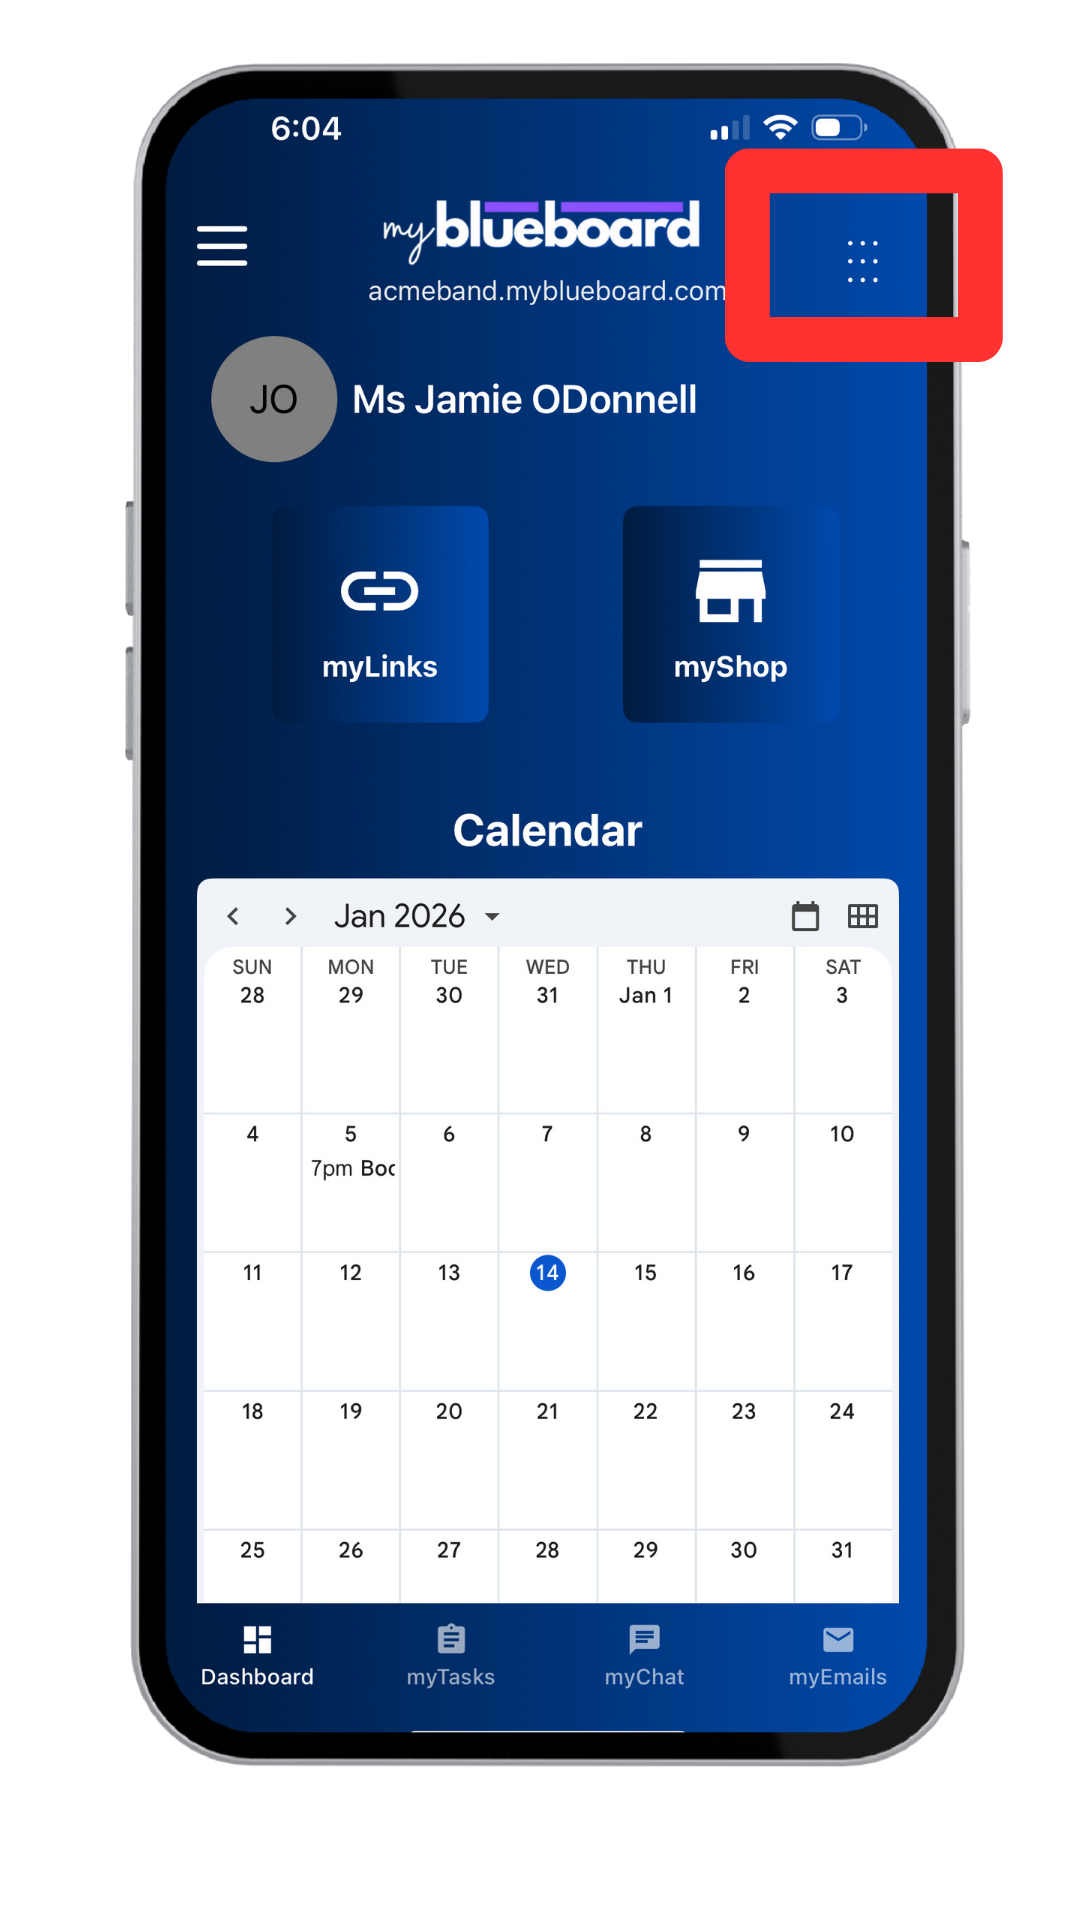
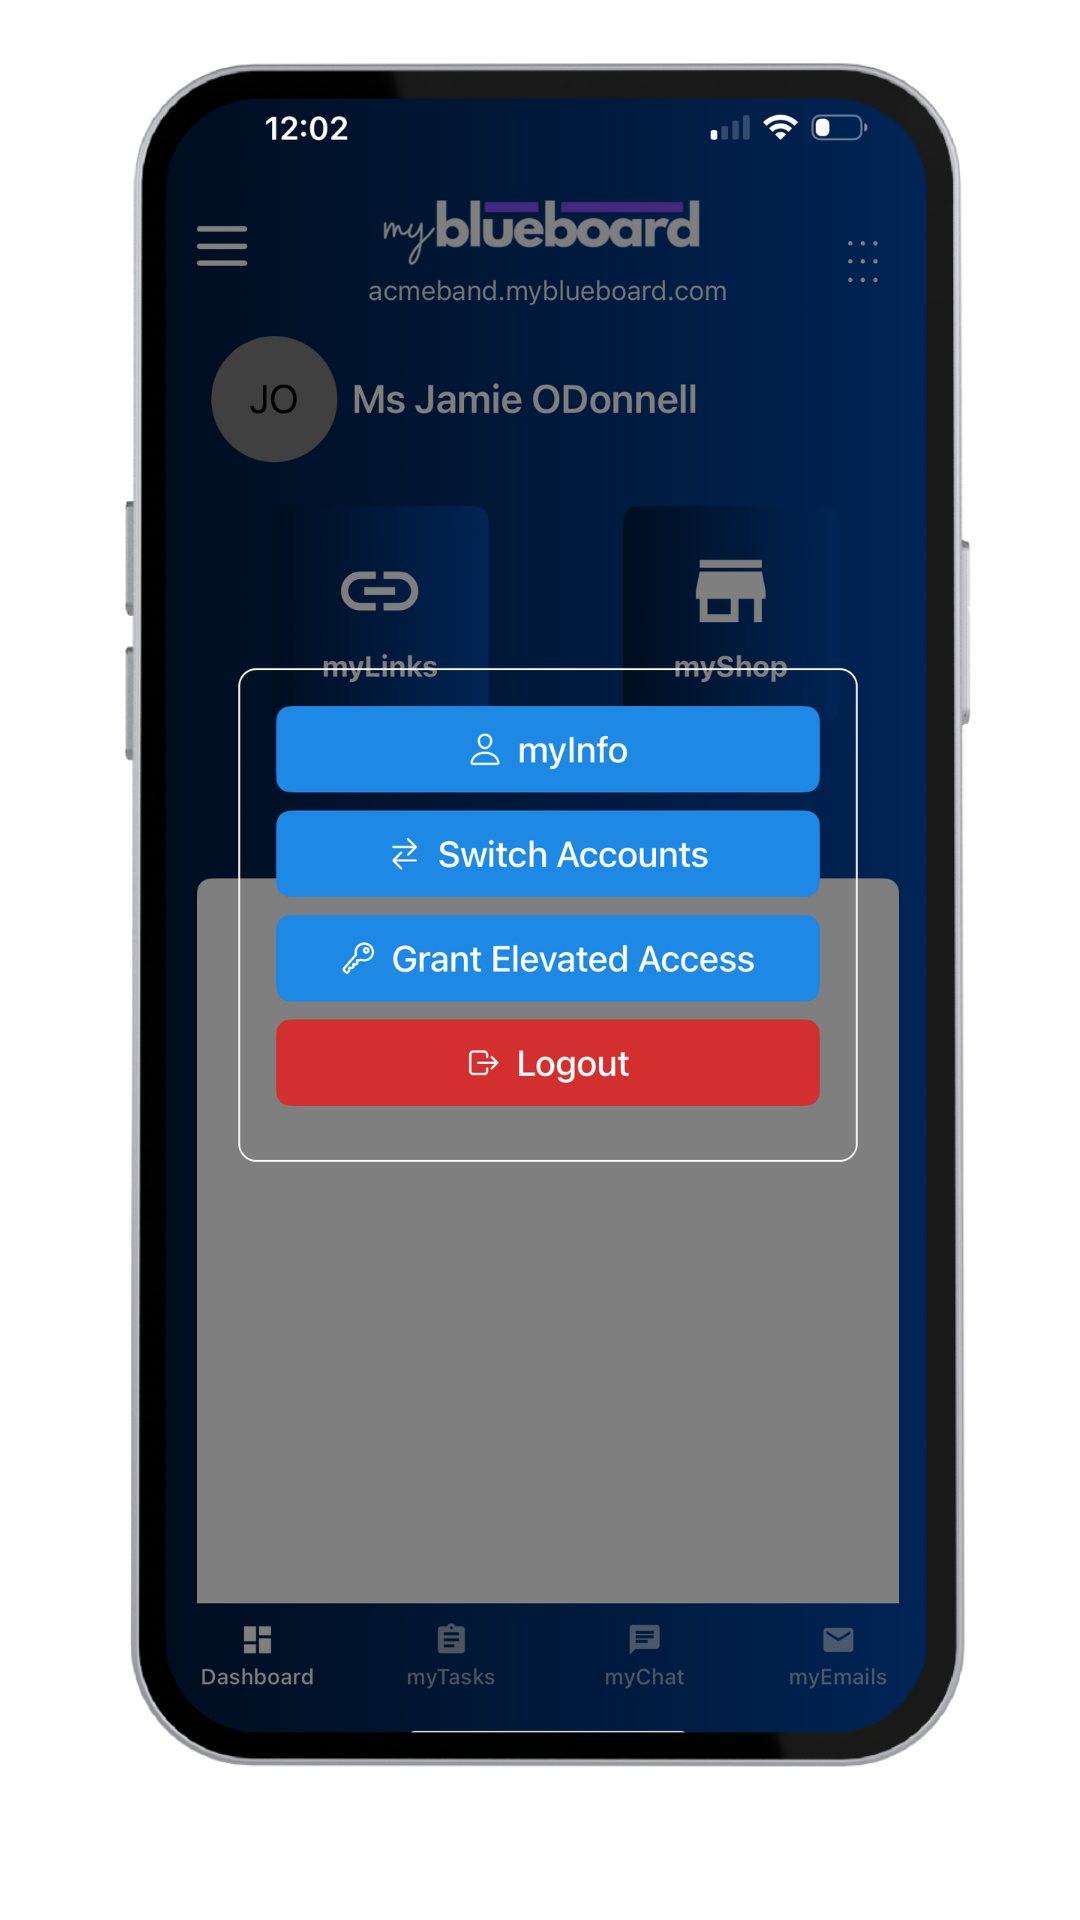
Grid Icon
Use the Grid icon (Image 6) to find links to myInfo, Switch Accounts, Grant Elevated Access, and Logout (Image 7).
Bottom Row Navigation
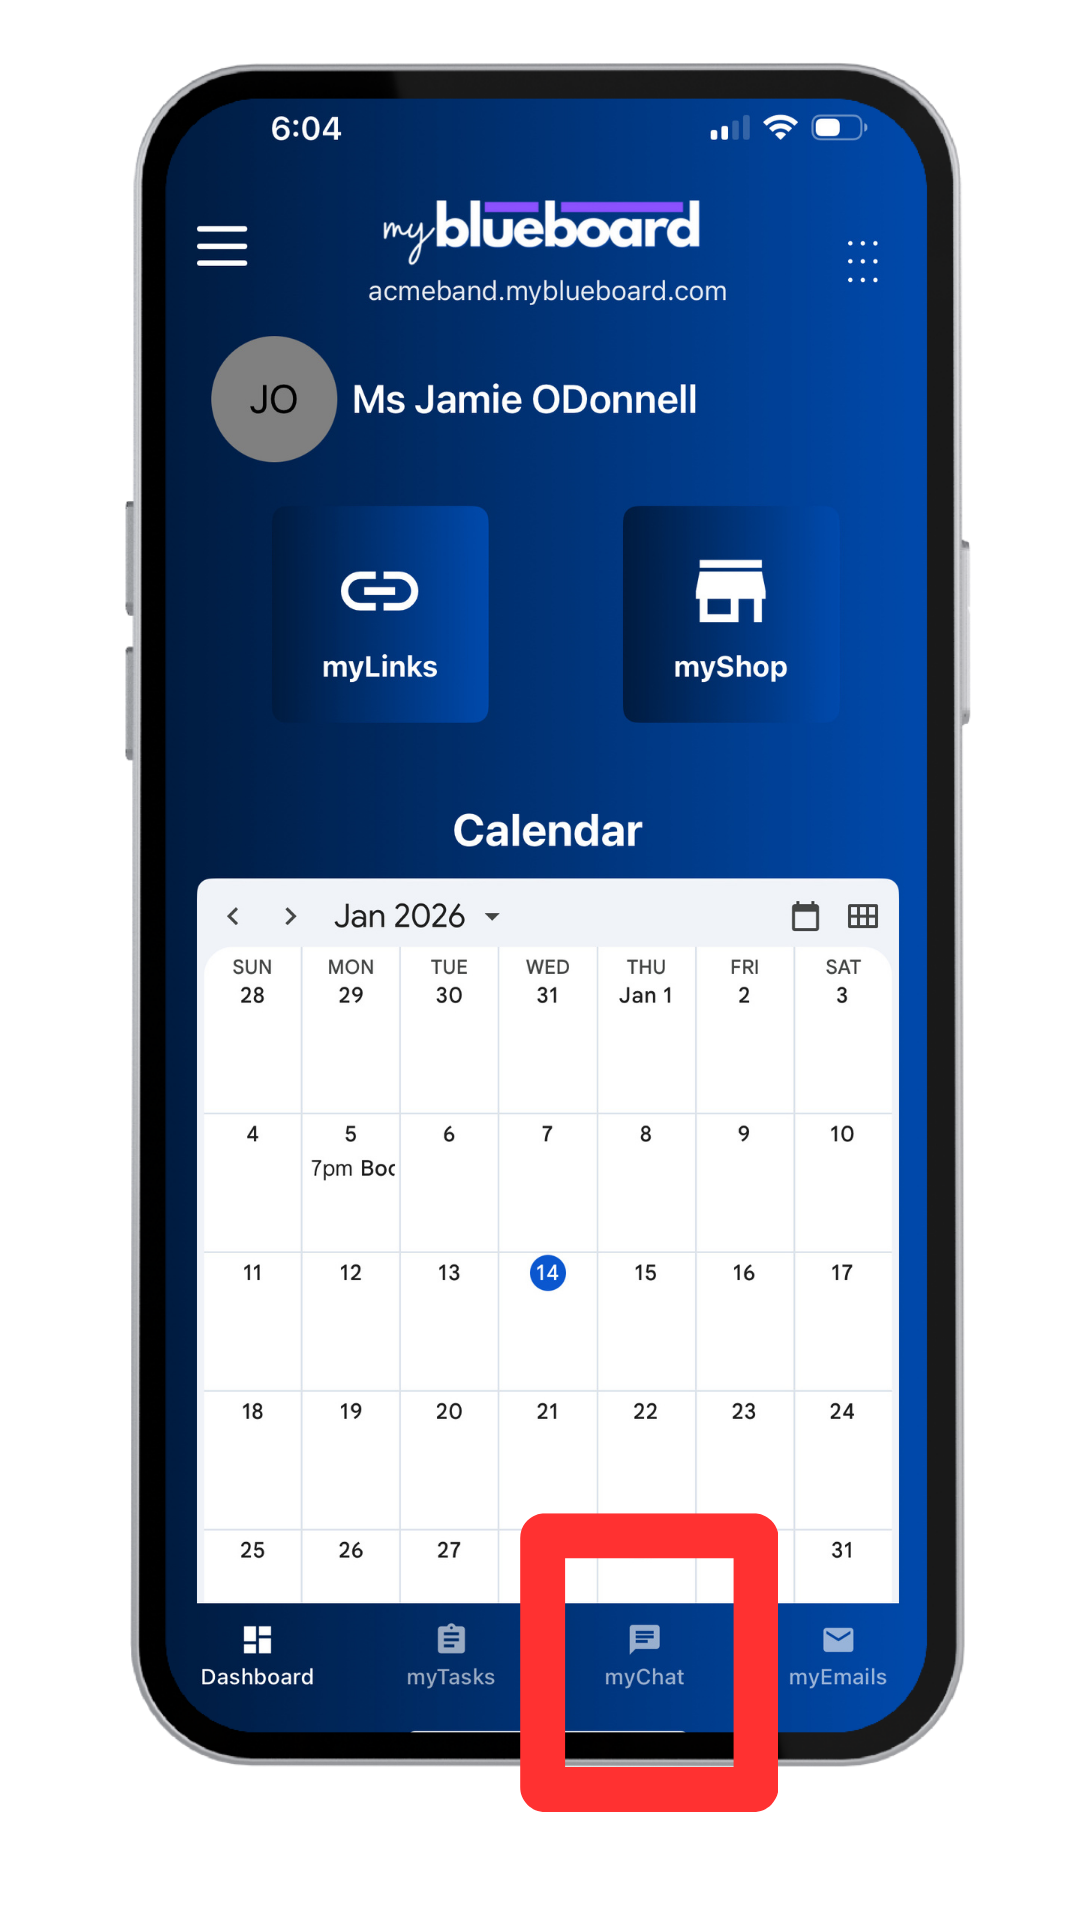
On the bottom of your screen, you will find links to Dashboard home, myTasks, myEmail, and myChat (Image 8).
myChat
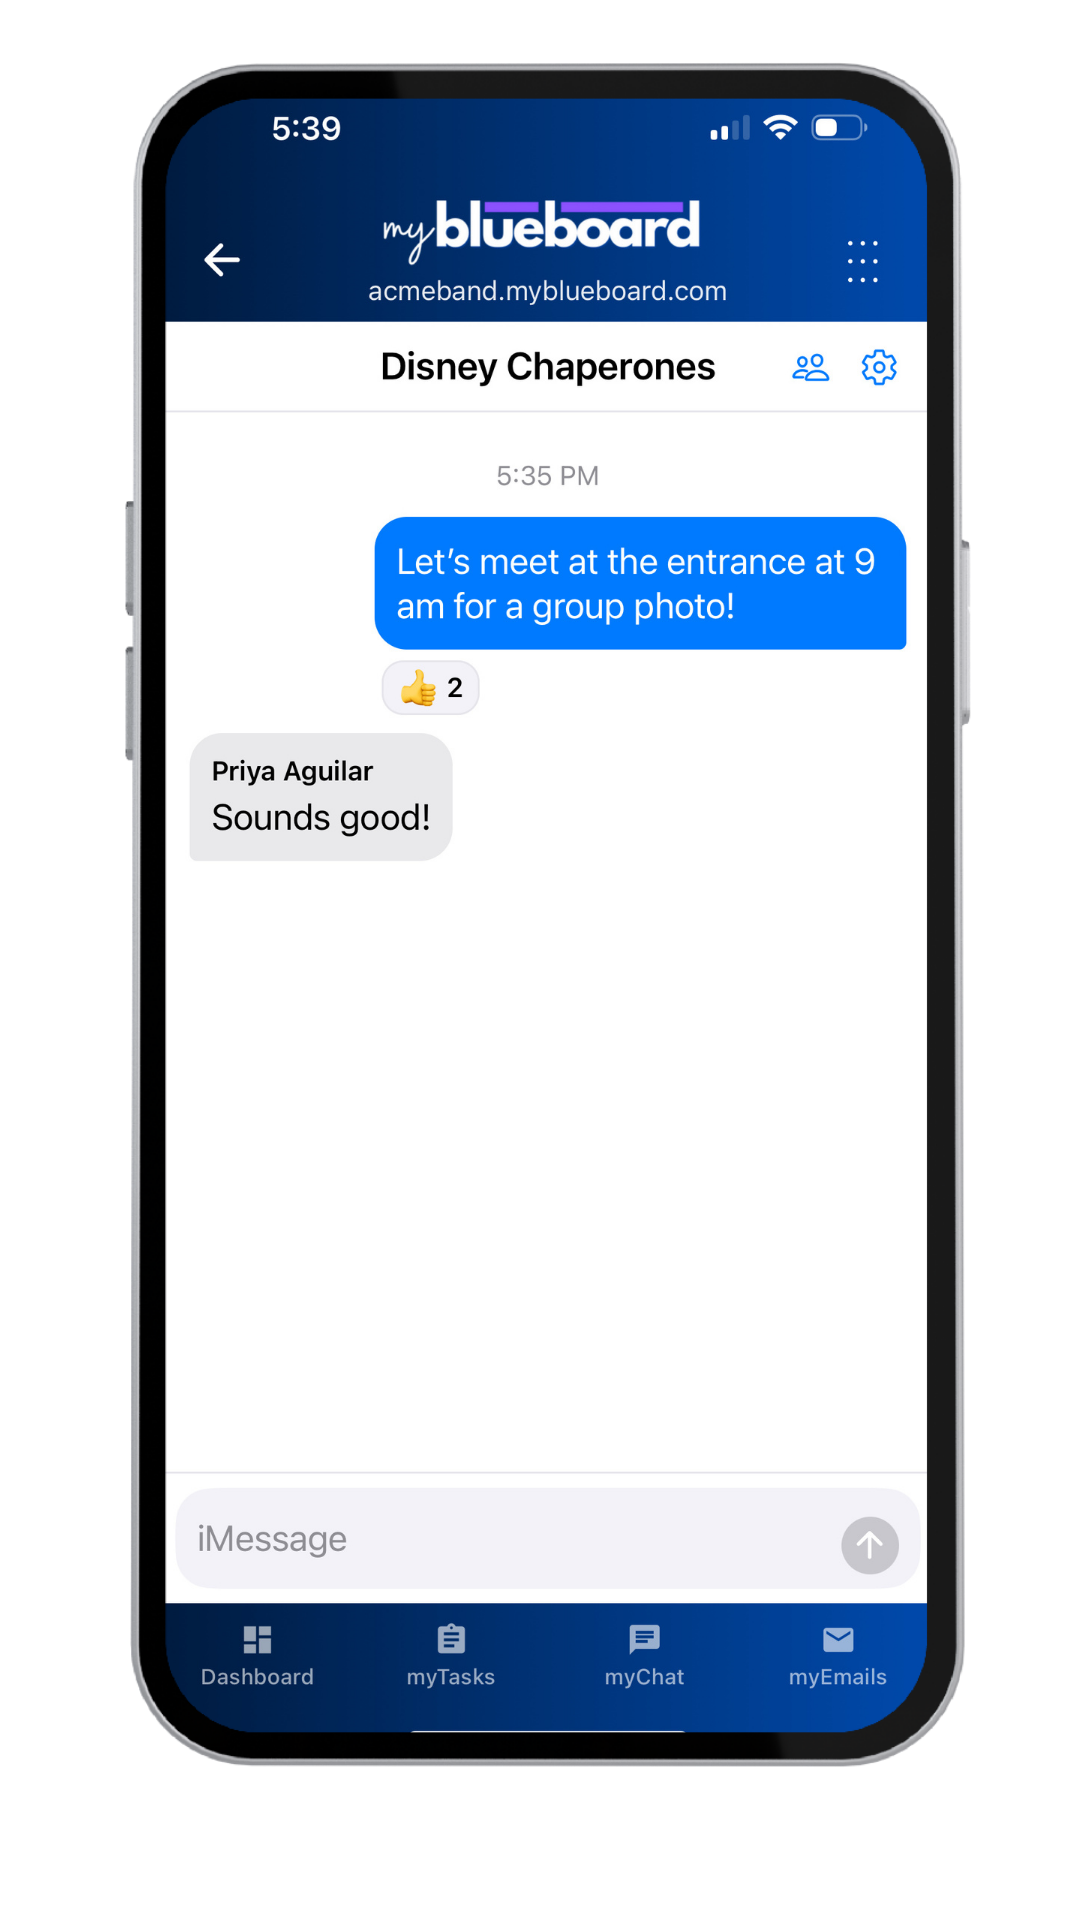
myChat (formerly myBoard) allows you to create custom group chats with any student group, parent group, or individual (Image 9). Any student, parent, or director in the group you message will receive a notification if they have the mobile app with their devices set to Allow Notifications from the myblueboard app.
How to create a new chat
- Select the myChat icon from the bottom row navigation (Image 10).
- Select the Edit icon to create a new chat (Image 11).
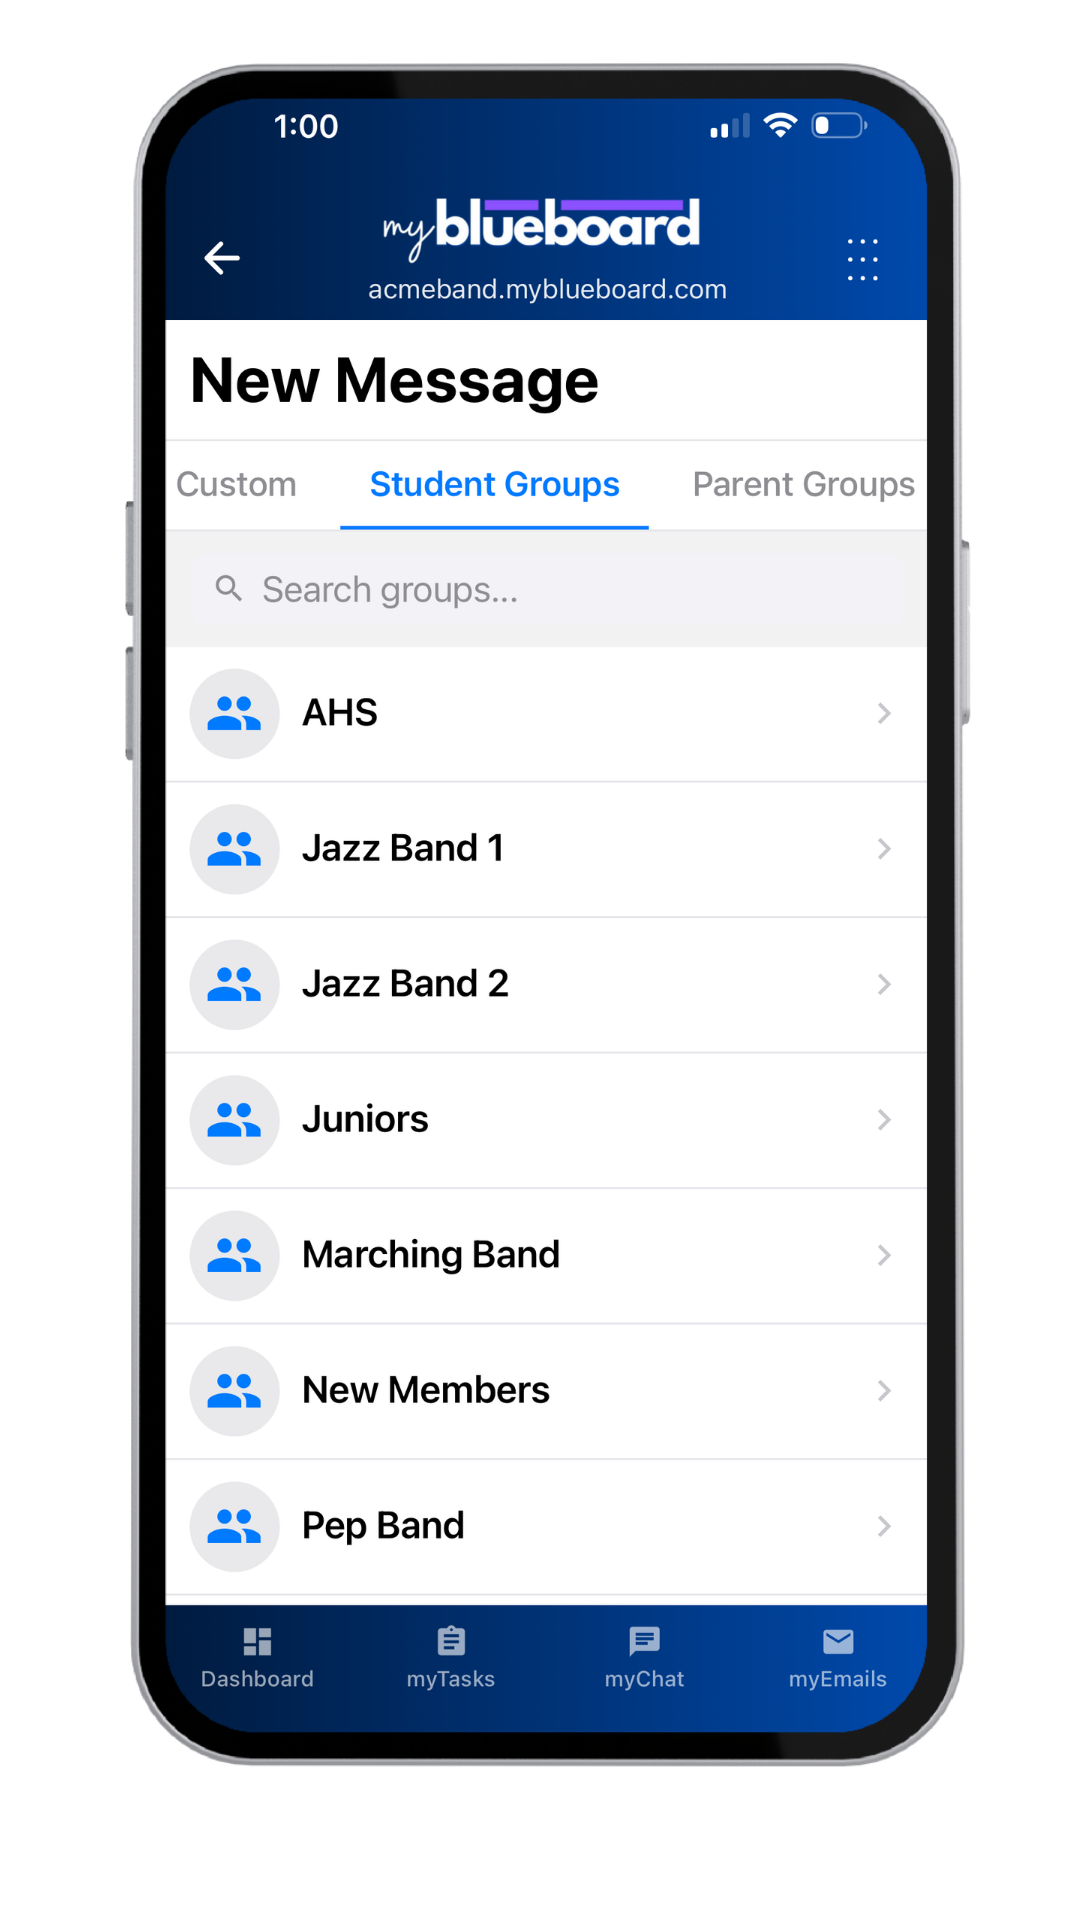
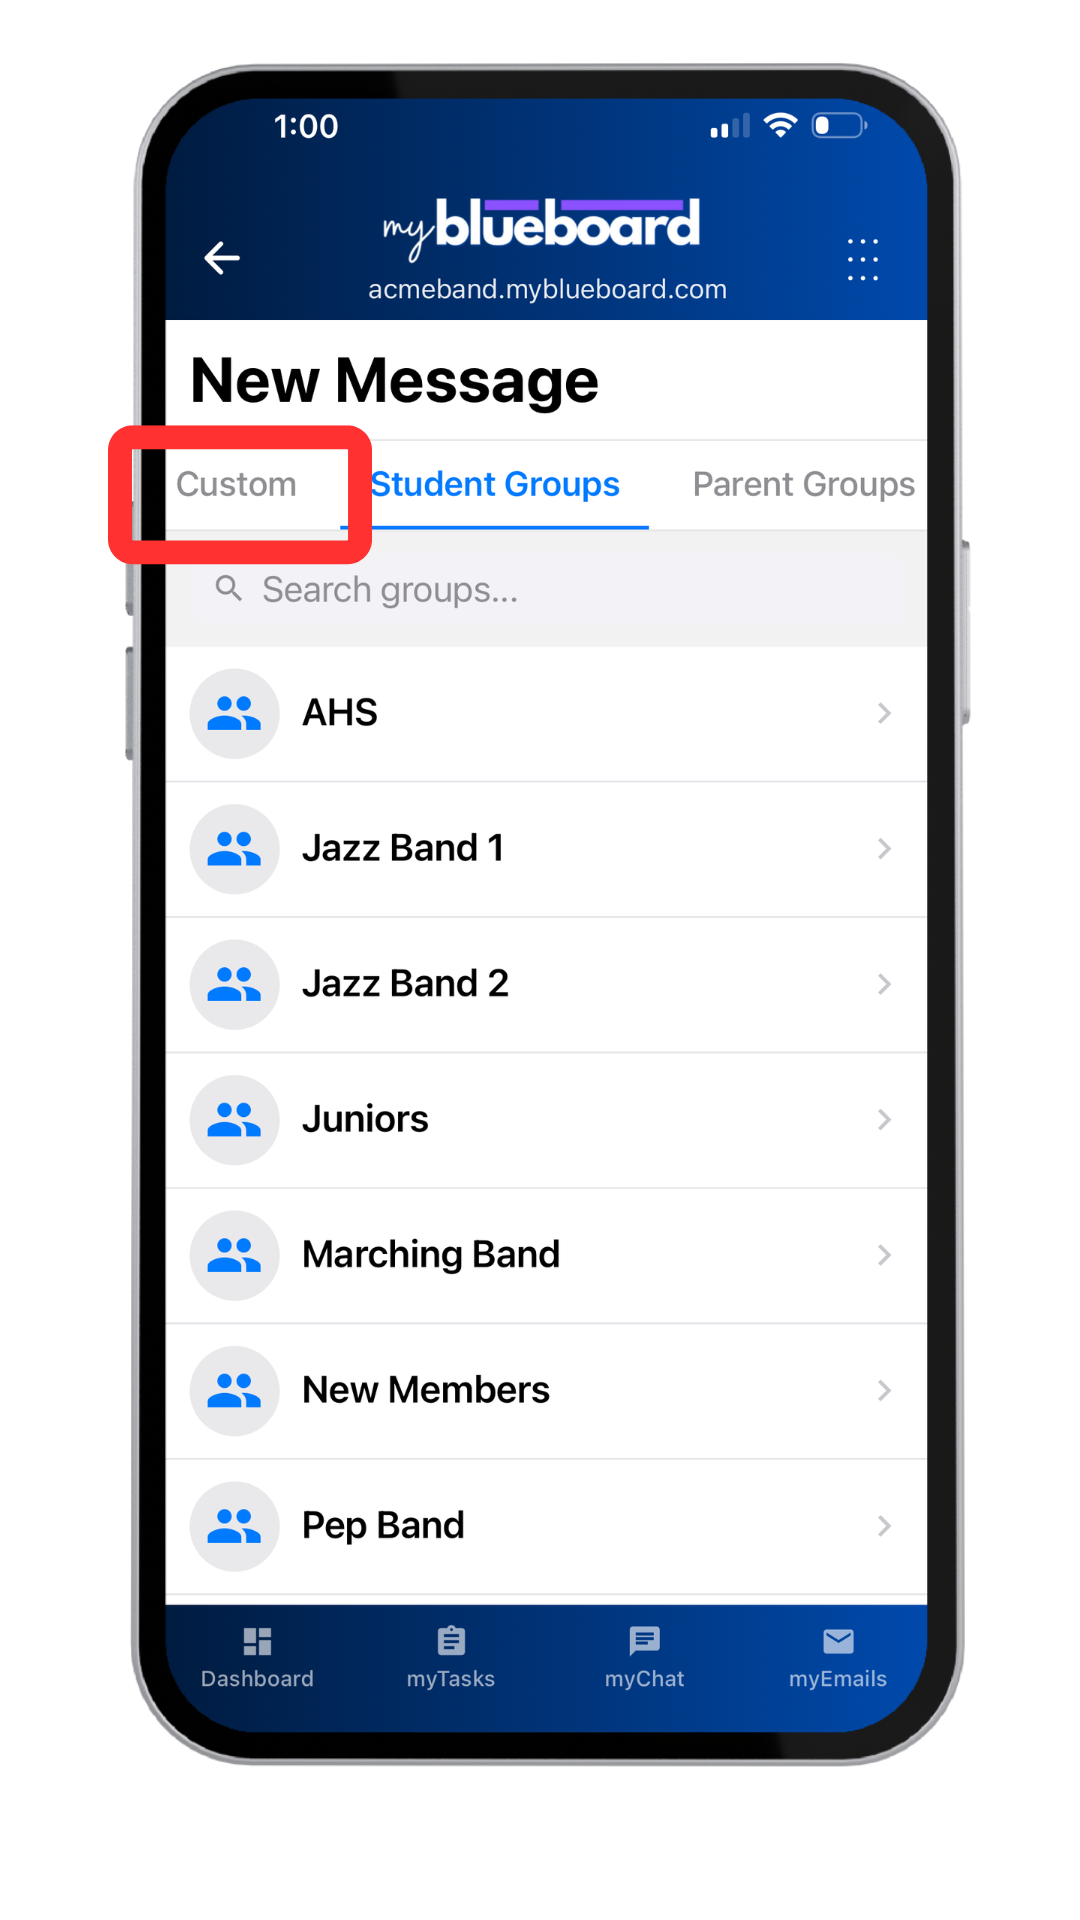
- From the top row, select Student Groups or Parent Groups (Image 12).
- Select the group you would like to message (Image 13). To find a group, scroll or use the Search bar.


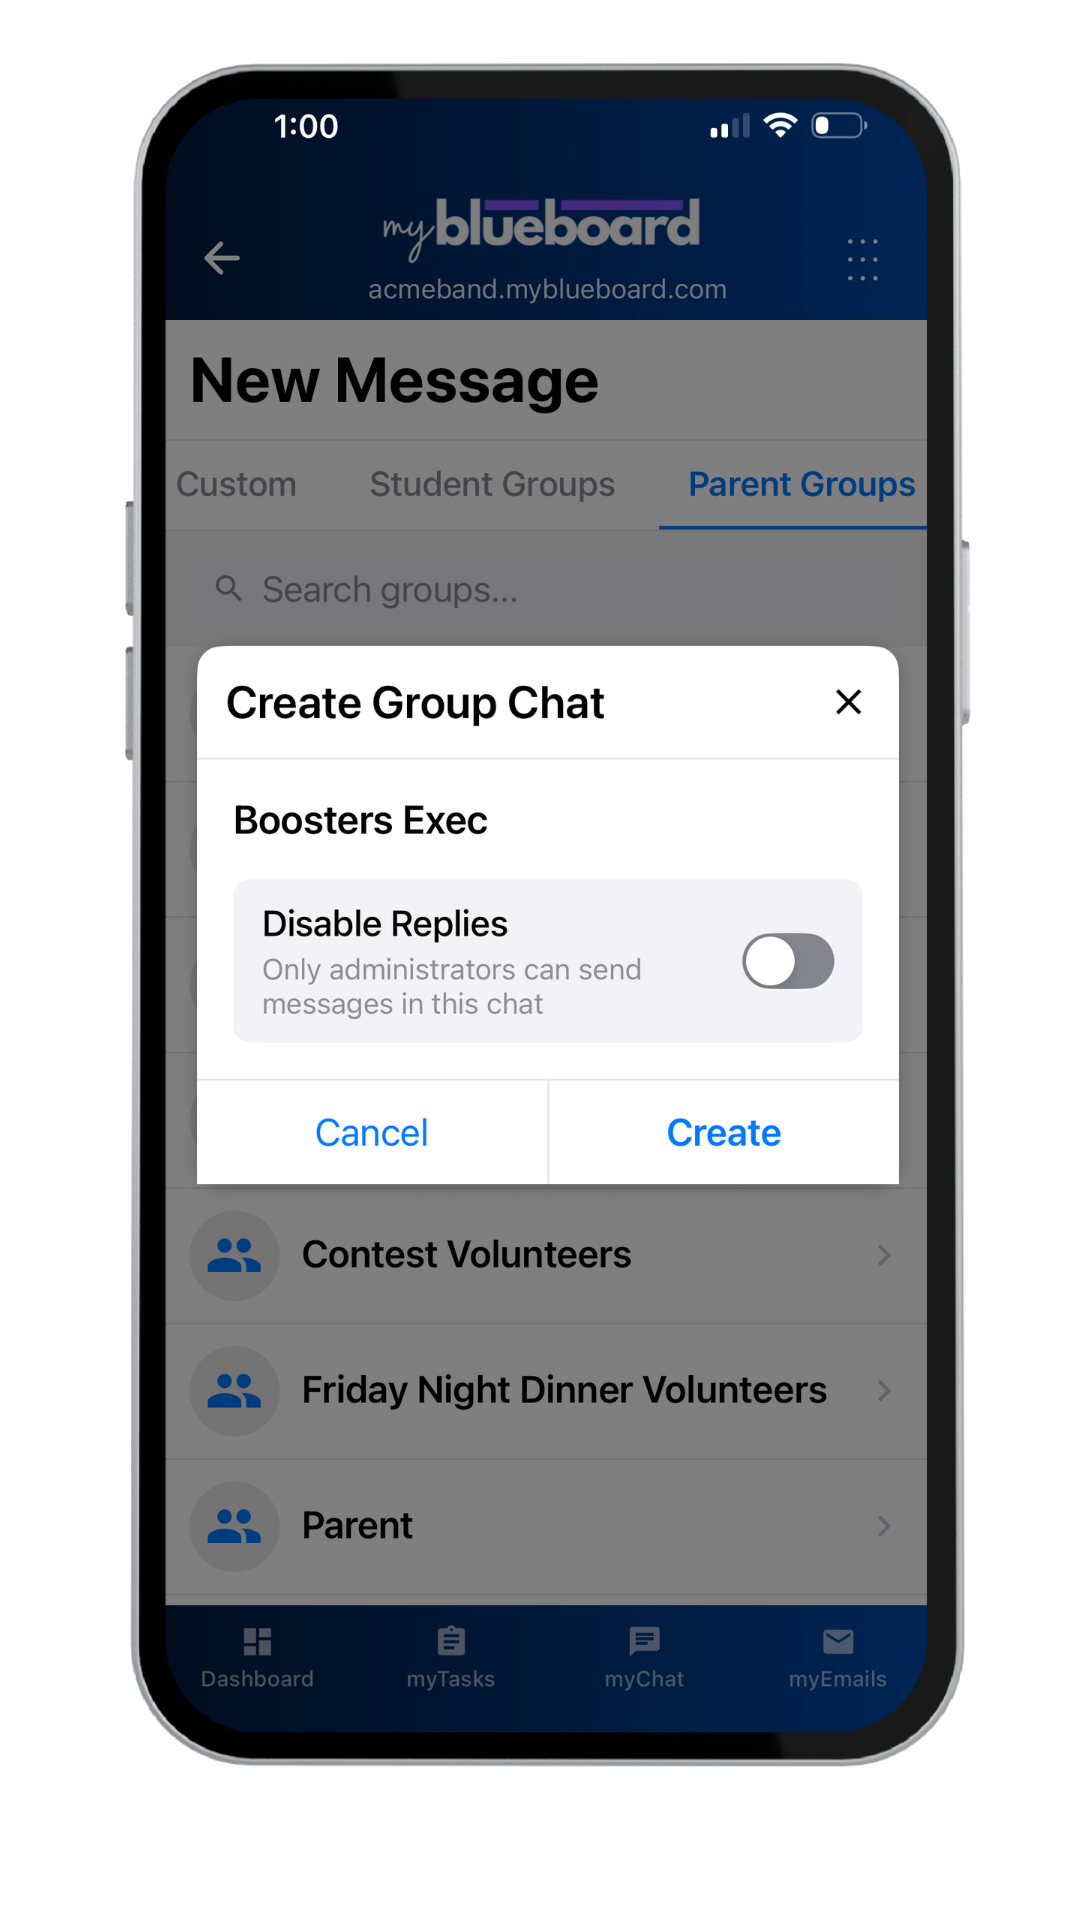
- Select whether you would like to disable replies by selecting the Disable Replies toggle or leave it untoggled to allow responses (creating a one-way message) and select Create (Image 14).
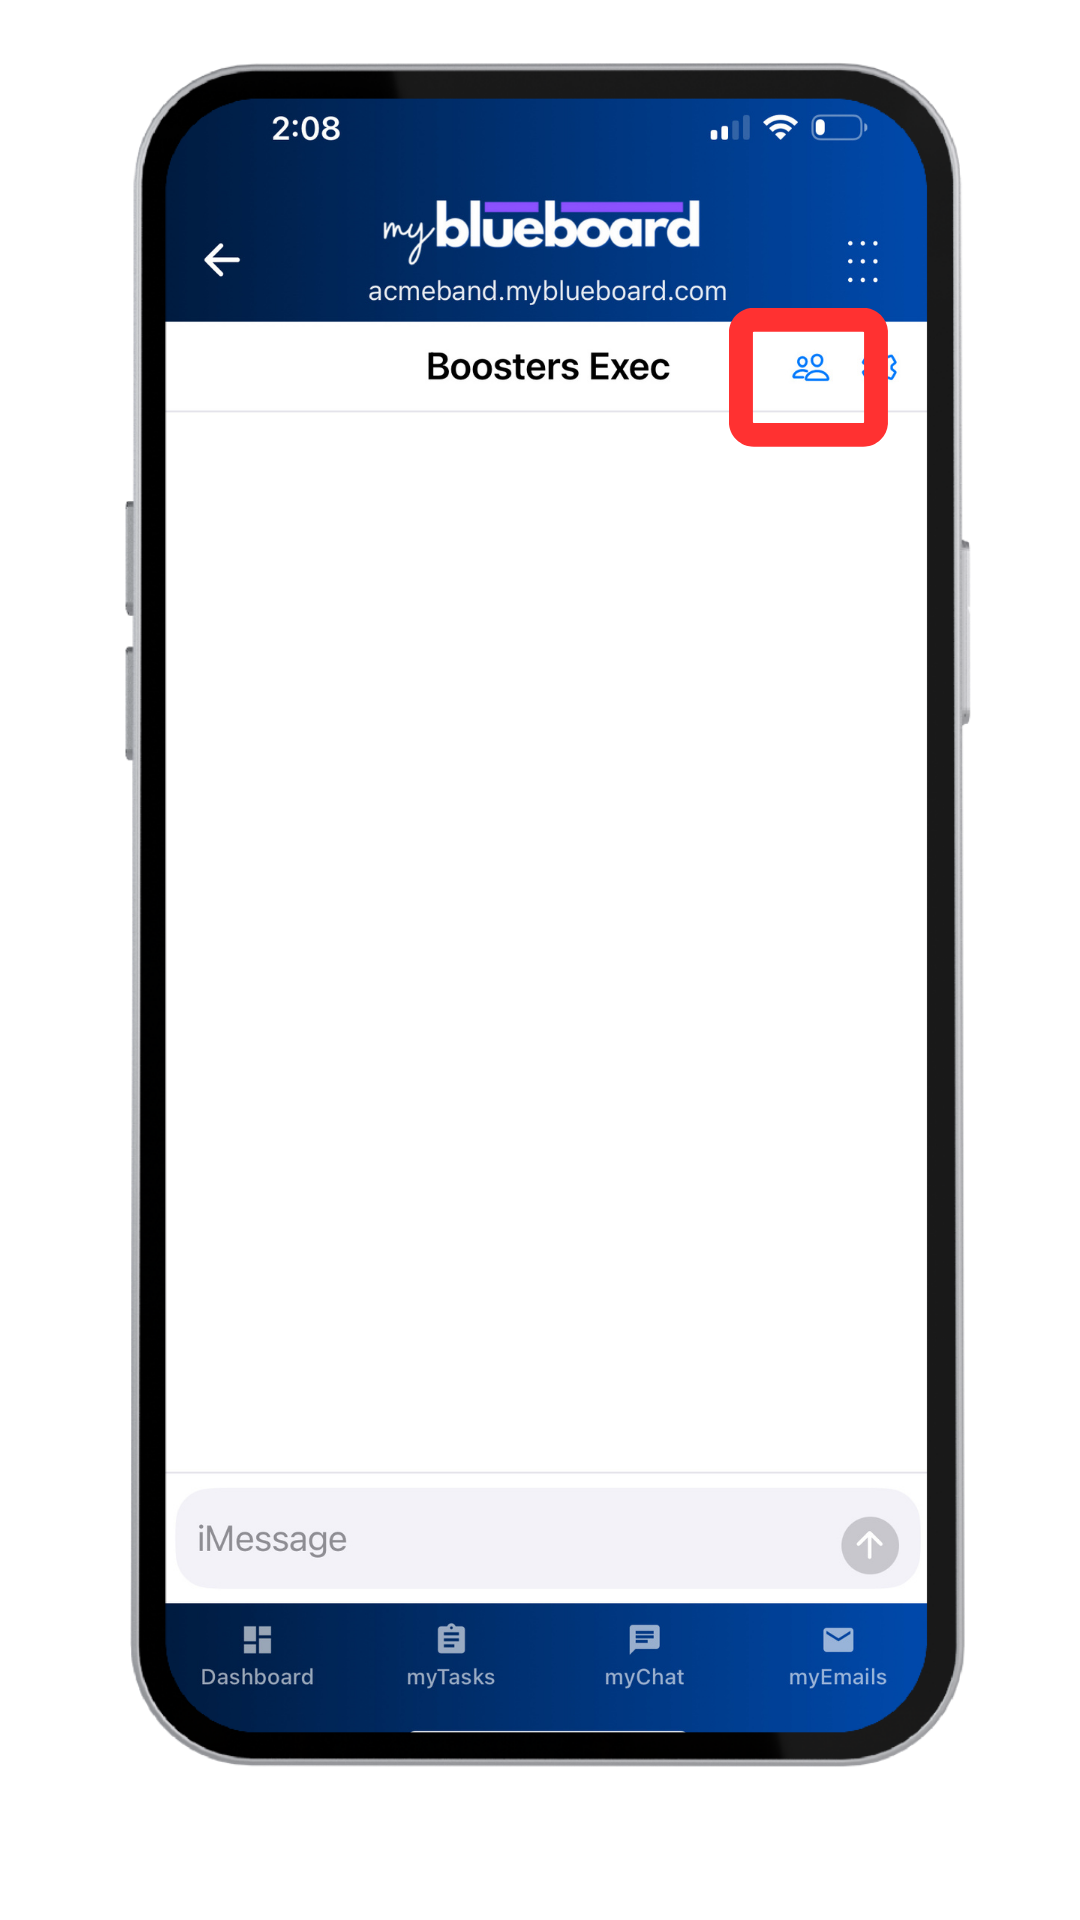
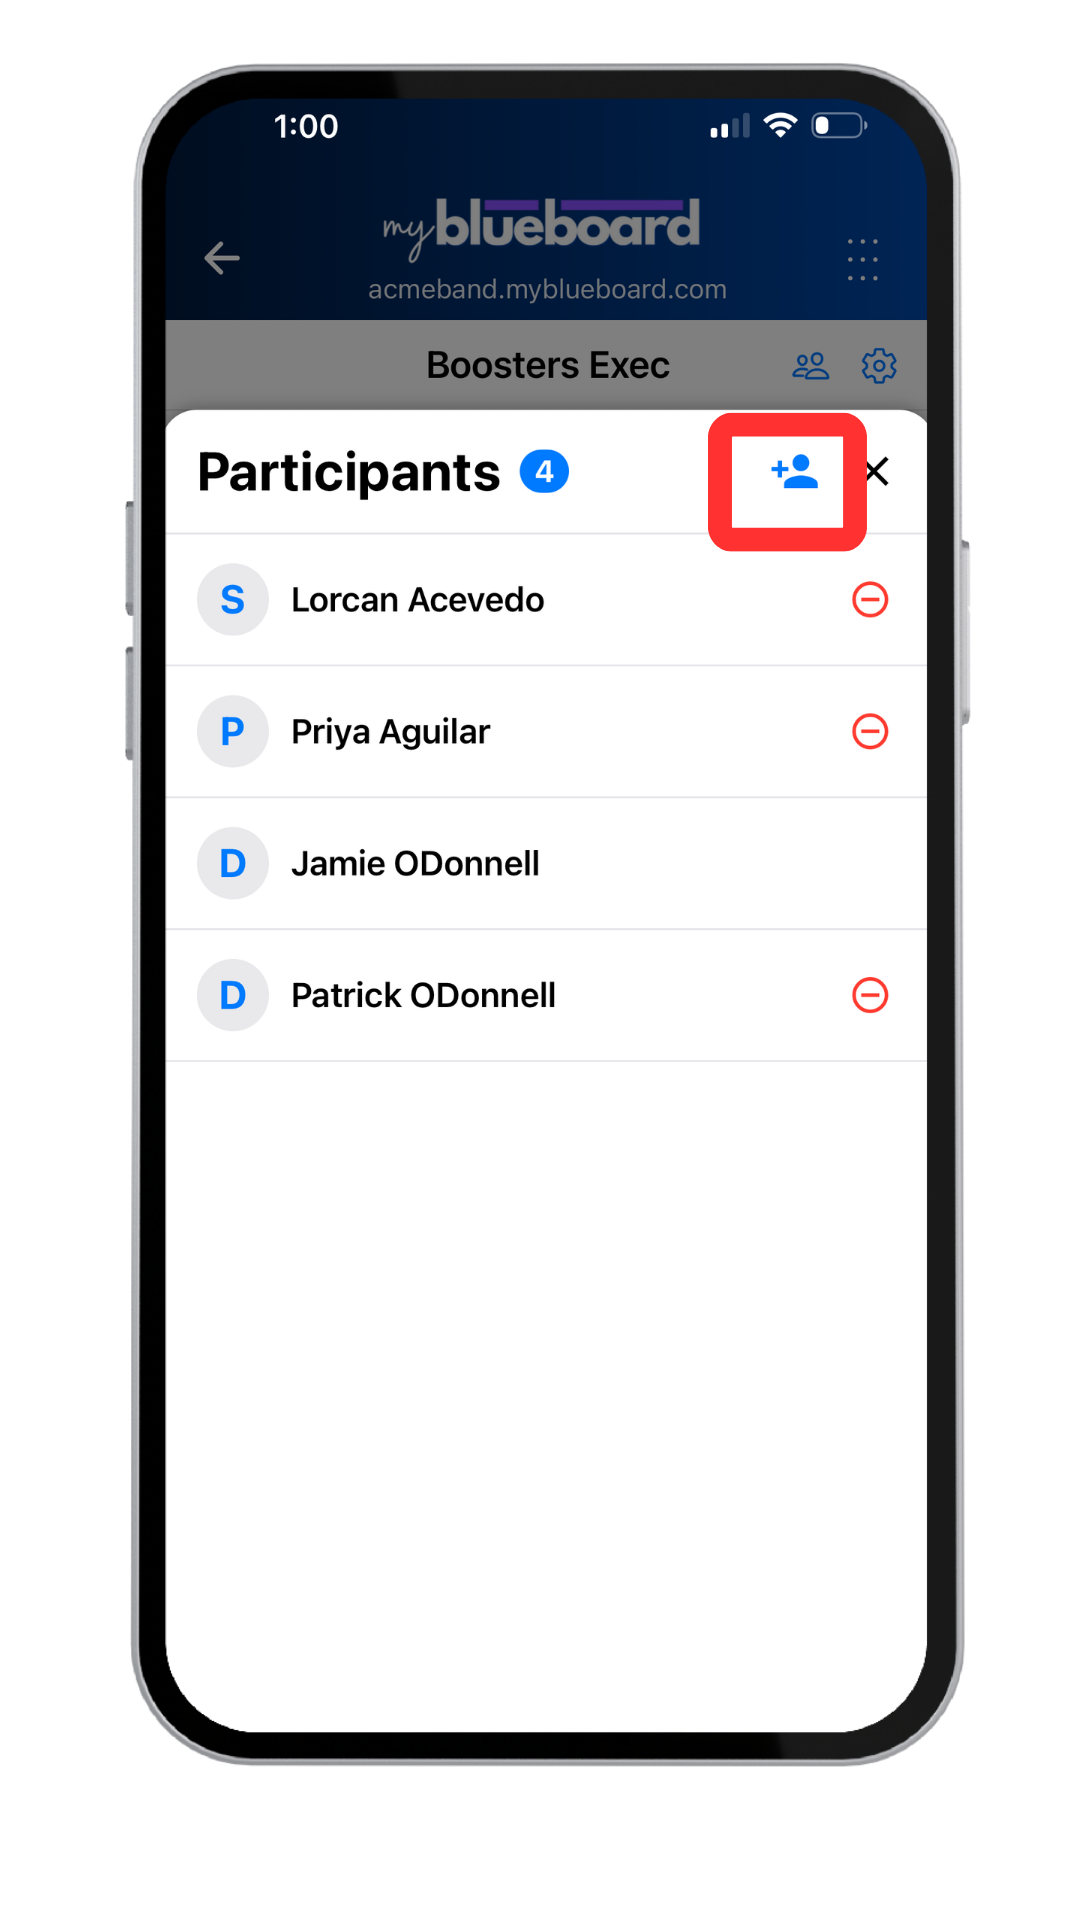
- You can use the Participants icon to view all people included in the group (Image 15). You can add additional people by selecting the Add People icon (Image 16) and you can remove people using the Minus icon next to their name (Image 17).

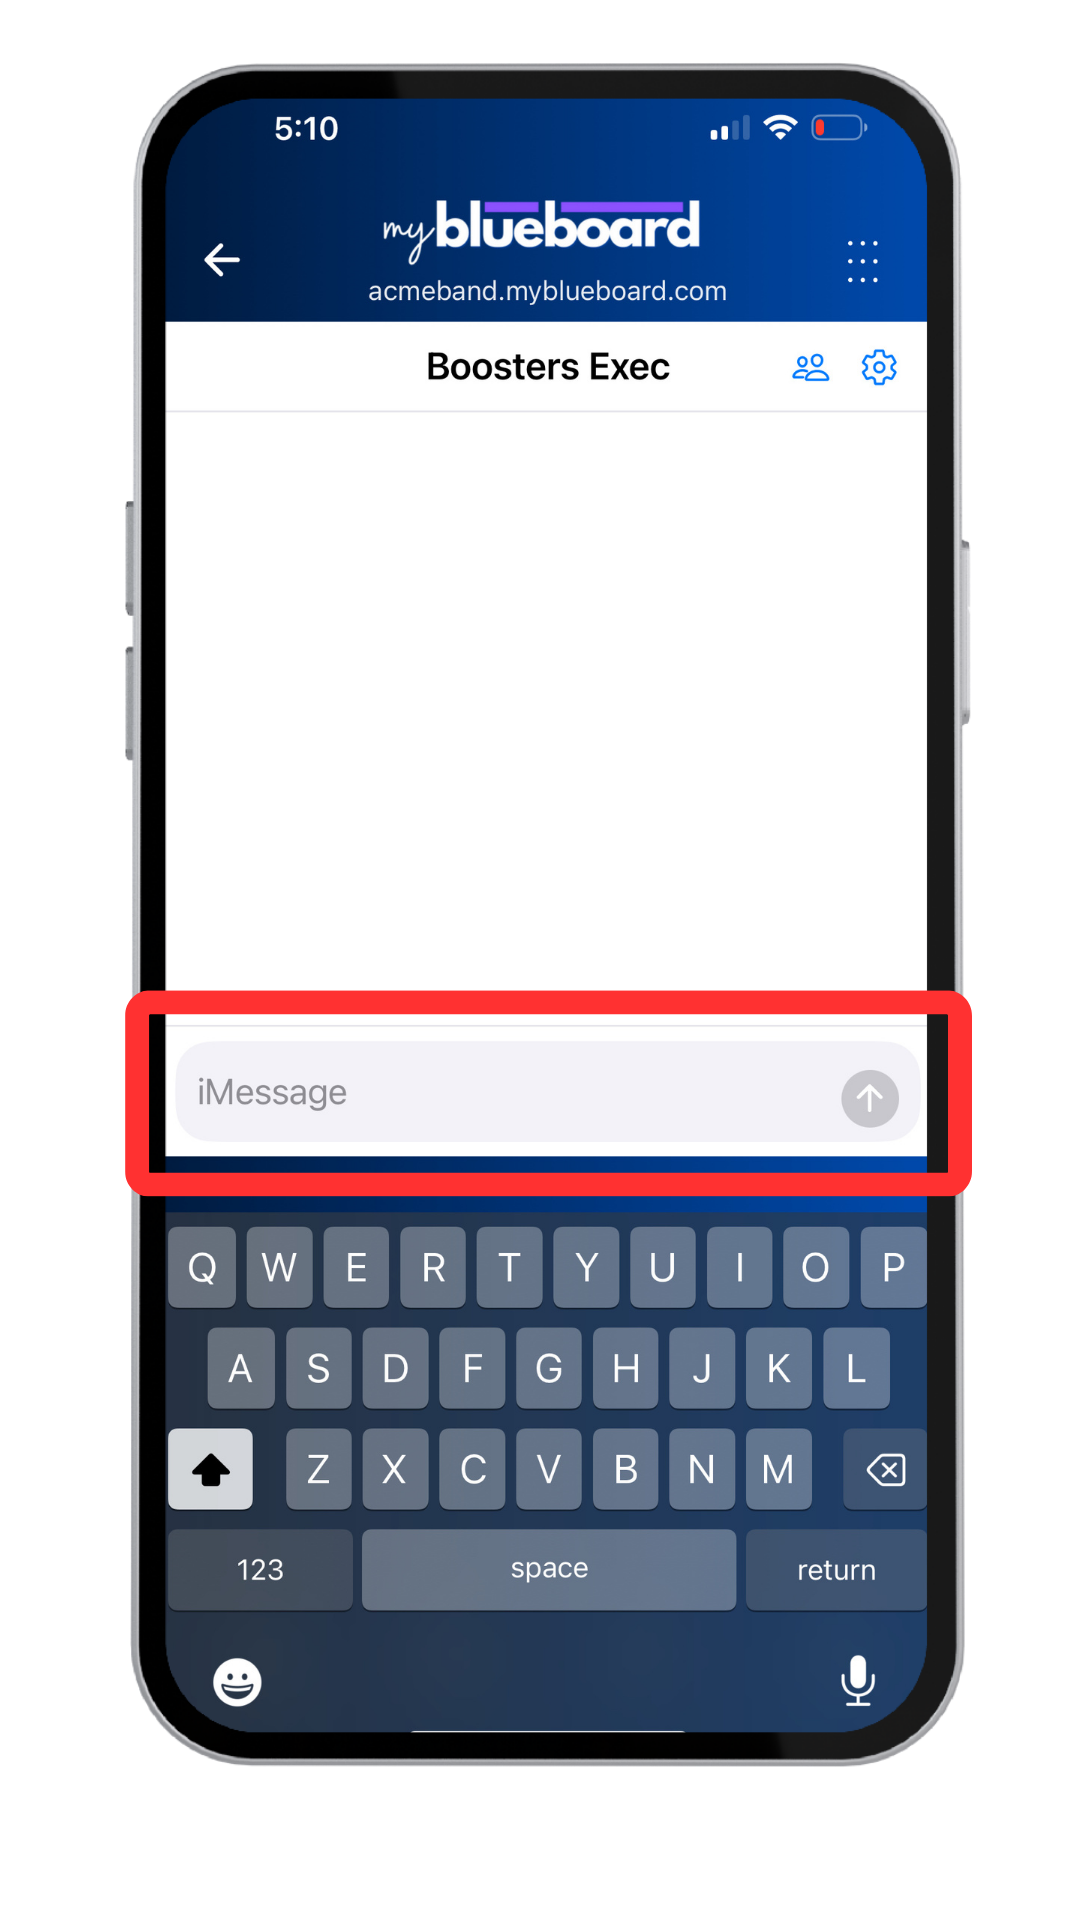
- Type your message in the iMessage box and use the arrow icon to send it (Image 18).
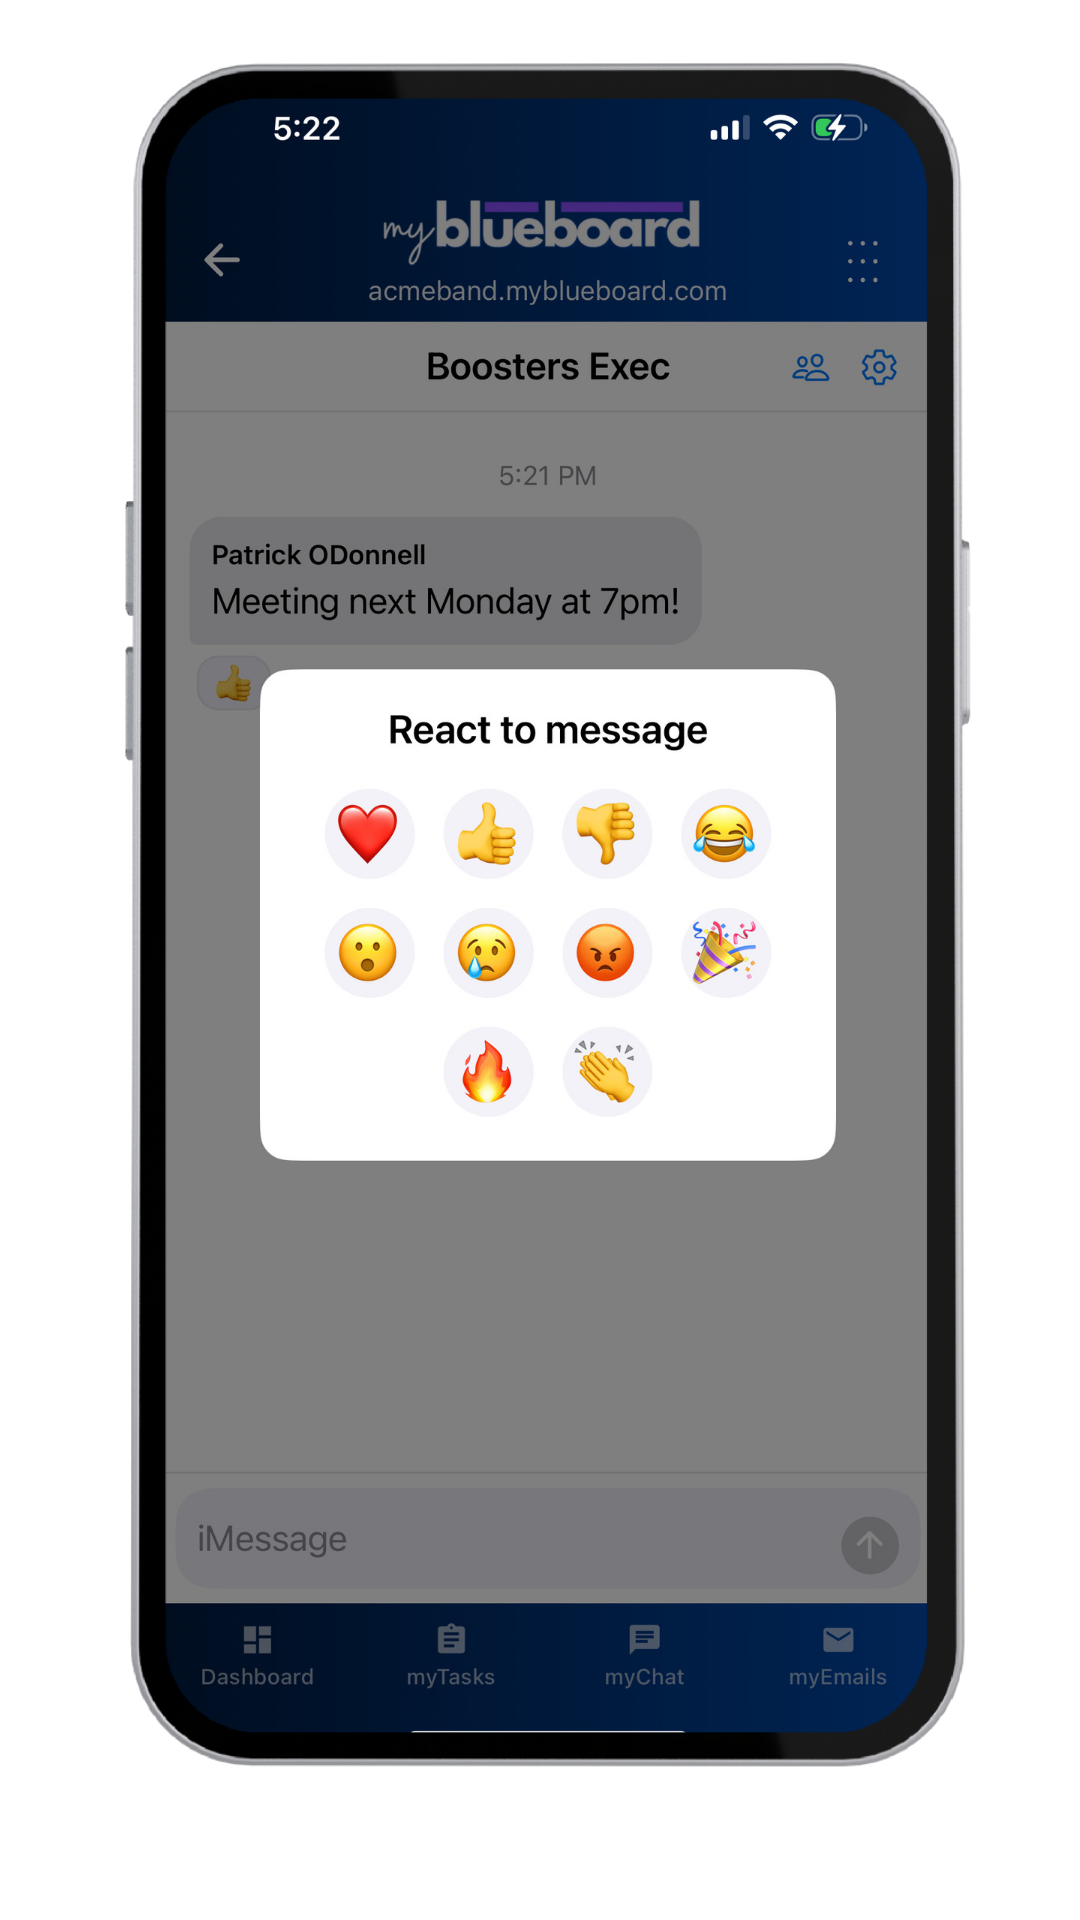
- Participants can react to your message by holding a finger on the message for one second, which will populate a list of reaction icons (Image 19).
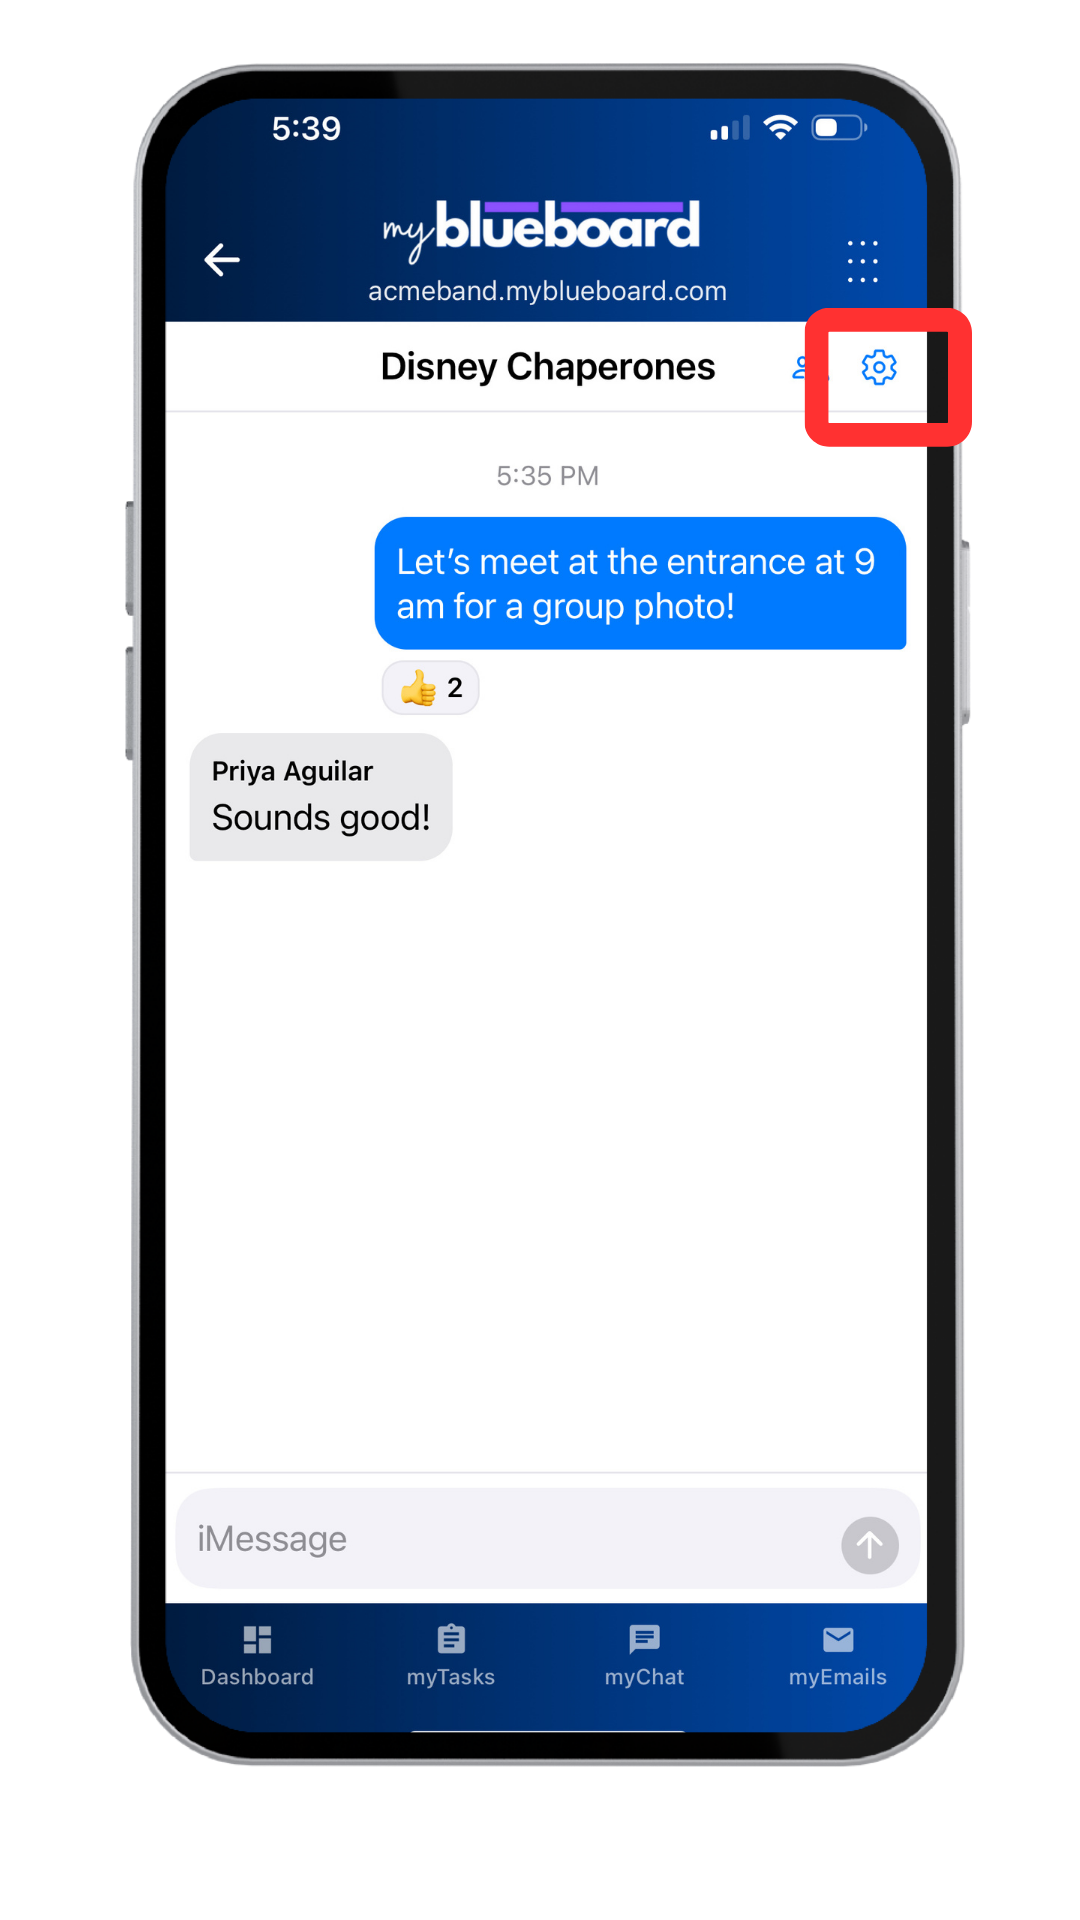
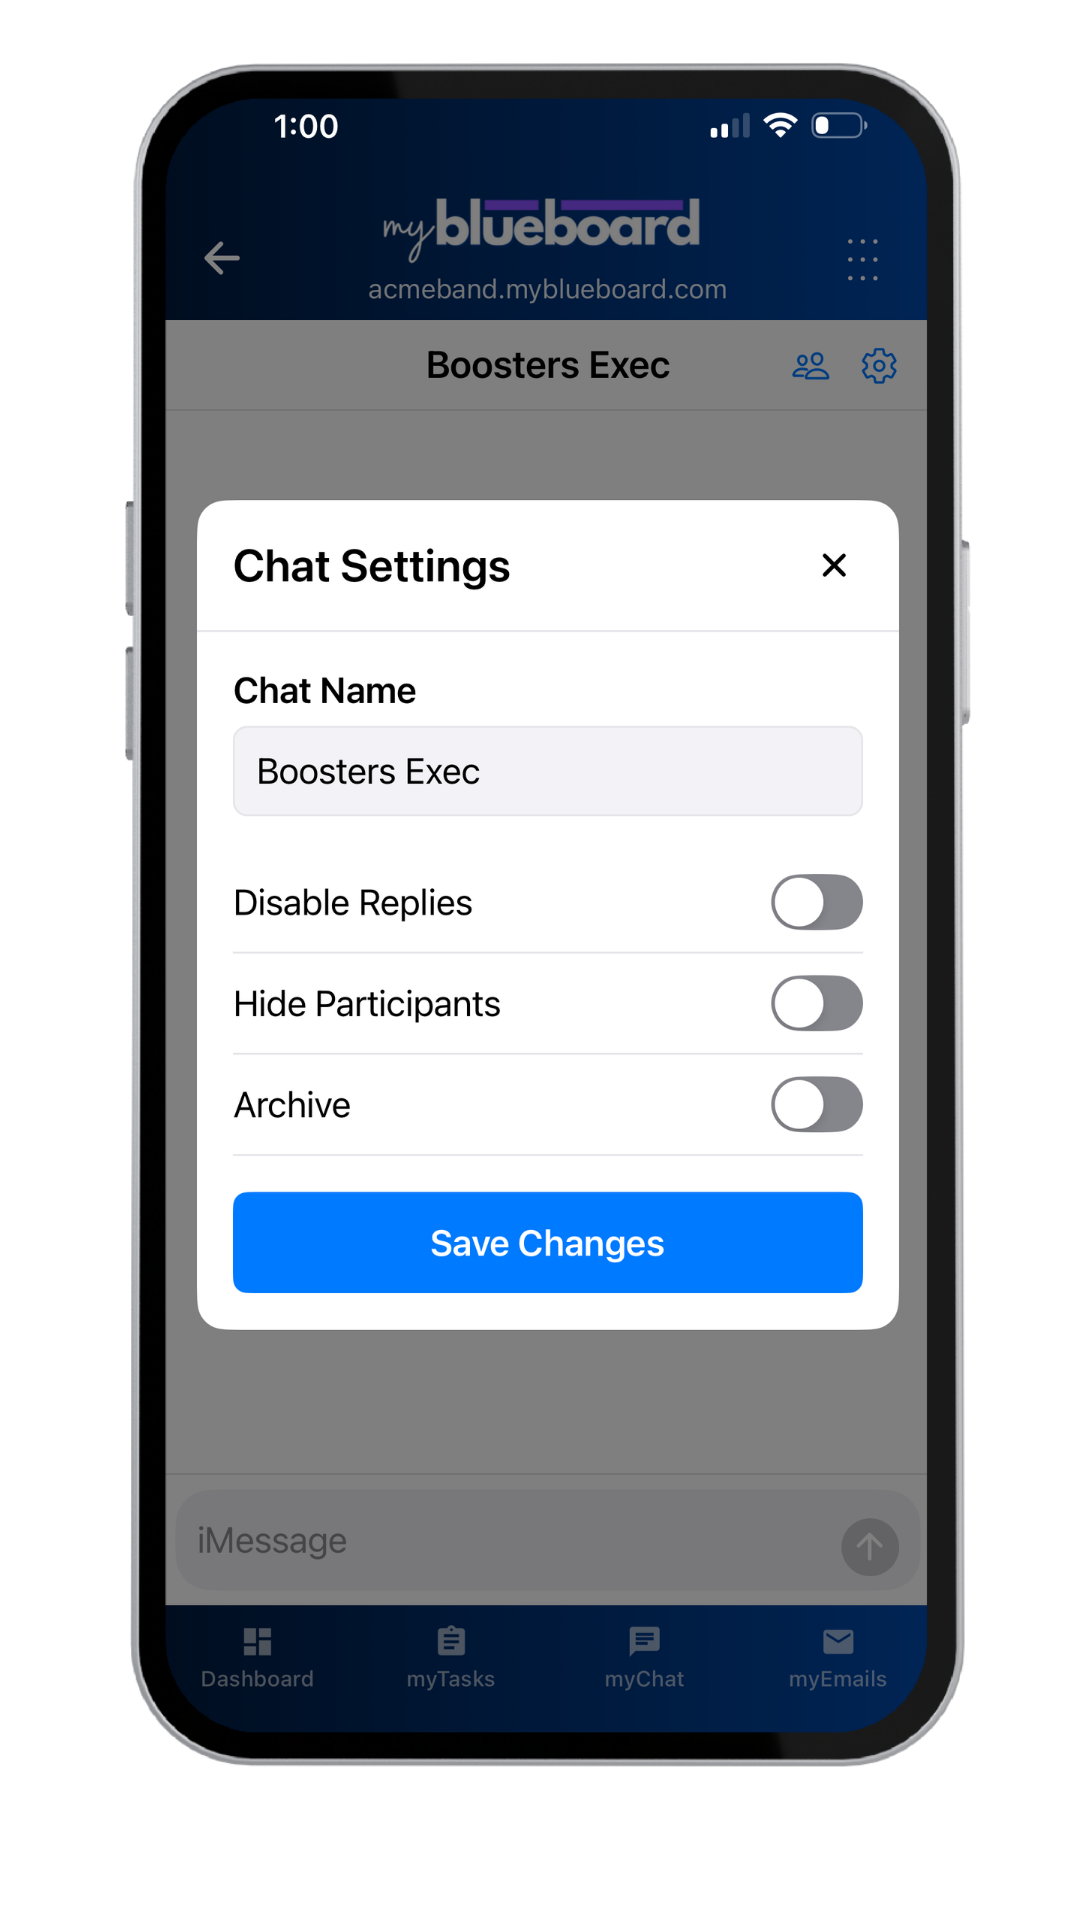
- You can use the Chat settings icon (Image 20) at any time to change the chat name, disable replies, hide participants, or archive the chat (Image 21).
How to create a new chat using a custom group
- Select the myChat icon from the bottom row navigation (Image 10).
- Select the Edit icon to create a new chat (Image 11).
- From the top row, select Custom Group (Image 22).
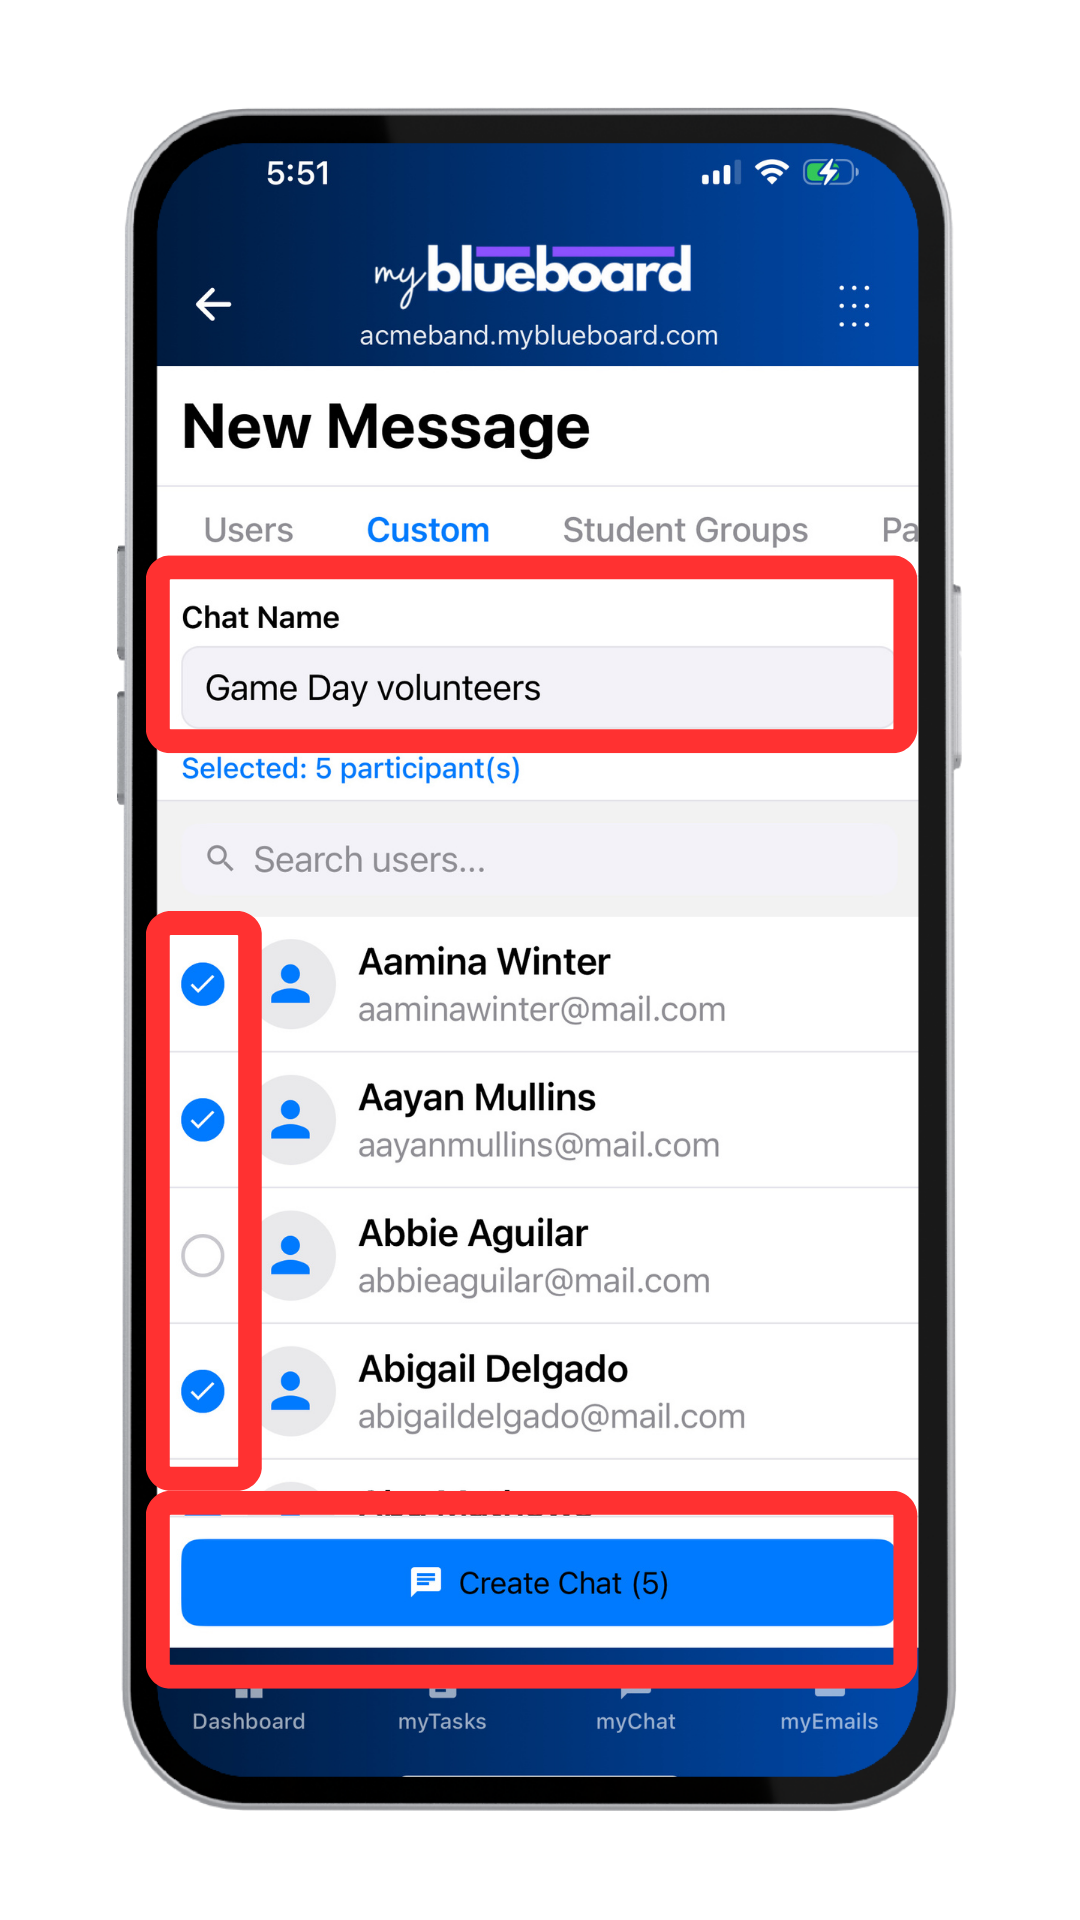
- Enter a Chat Name. Choose your participants for the chat by scrolling or searching and selecting the checkbox by their name. Select the Create Chat button when you are done (Image 23).
- Type your message in the iMessage box and use the arrow icon to send it (Image 18).
- Participants can react to your message by holding a finger on the message for one second, which will populate a list of reaction icons (Image 19).
- You can use the Chat settings icon (Image 20) at any time to change the chat name, disable replies, hide participants, or archive the chat (Image 21).
- You can use the Participants icon to view all people included in the group (Image 15). You can add additional people by selecting the Add People icon (Image 16) and you can remove people using the Minus icon next to their name (Image 17).
Checking Email
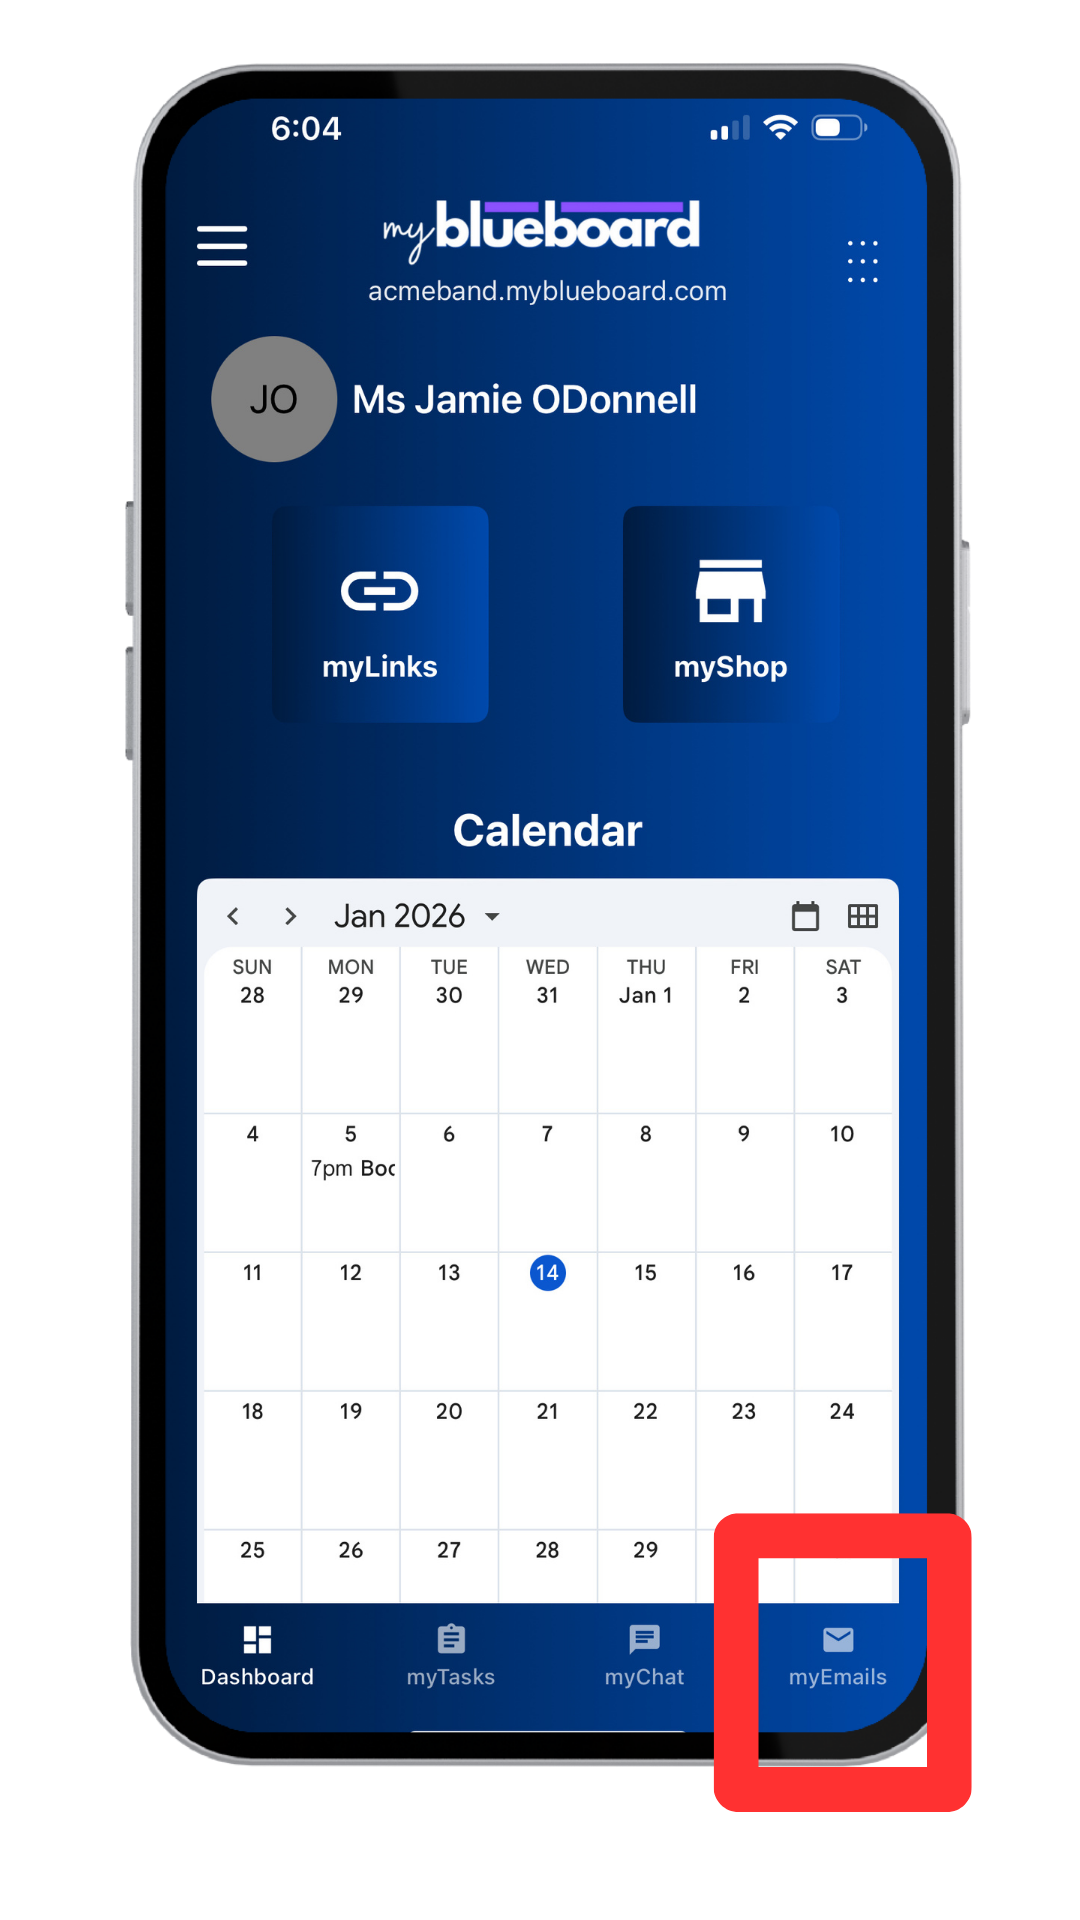
Select the myEmails icon from the bottom row navigation (Image 24).
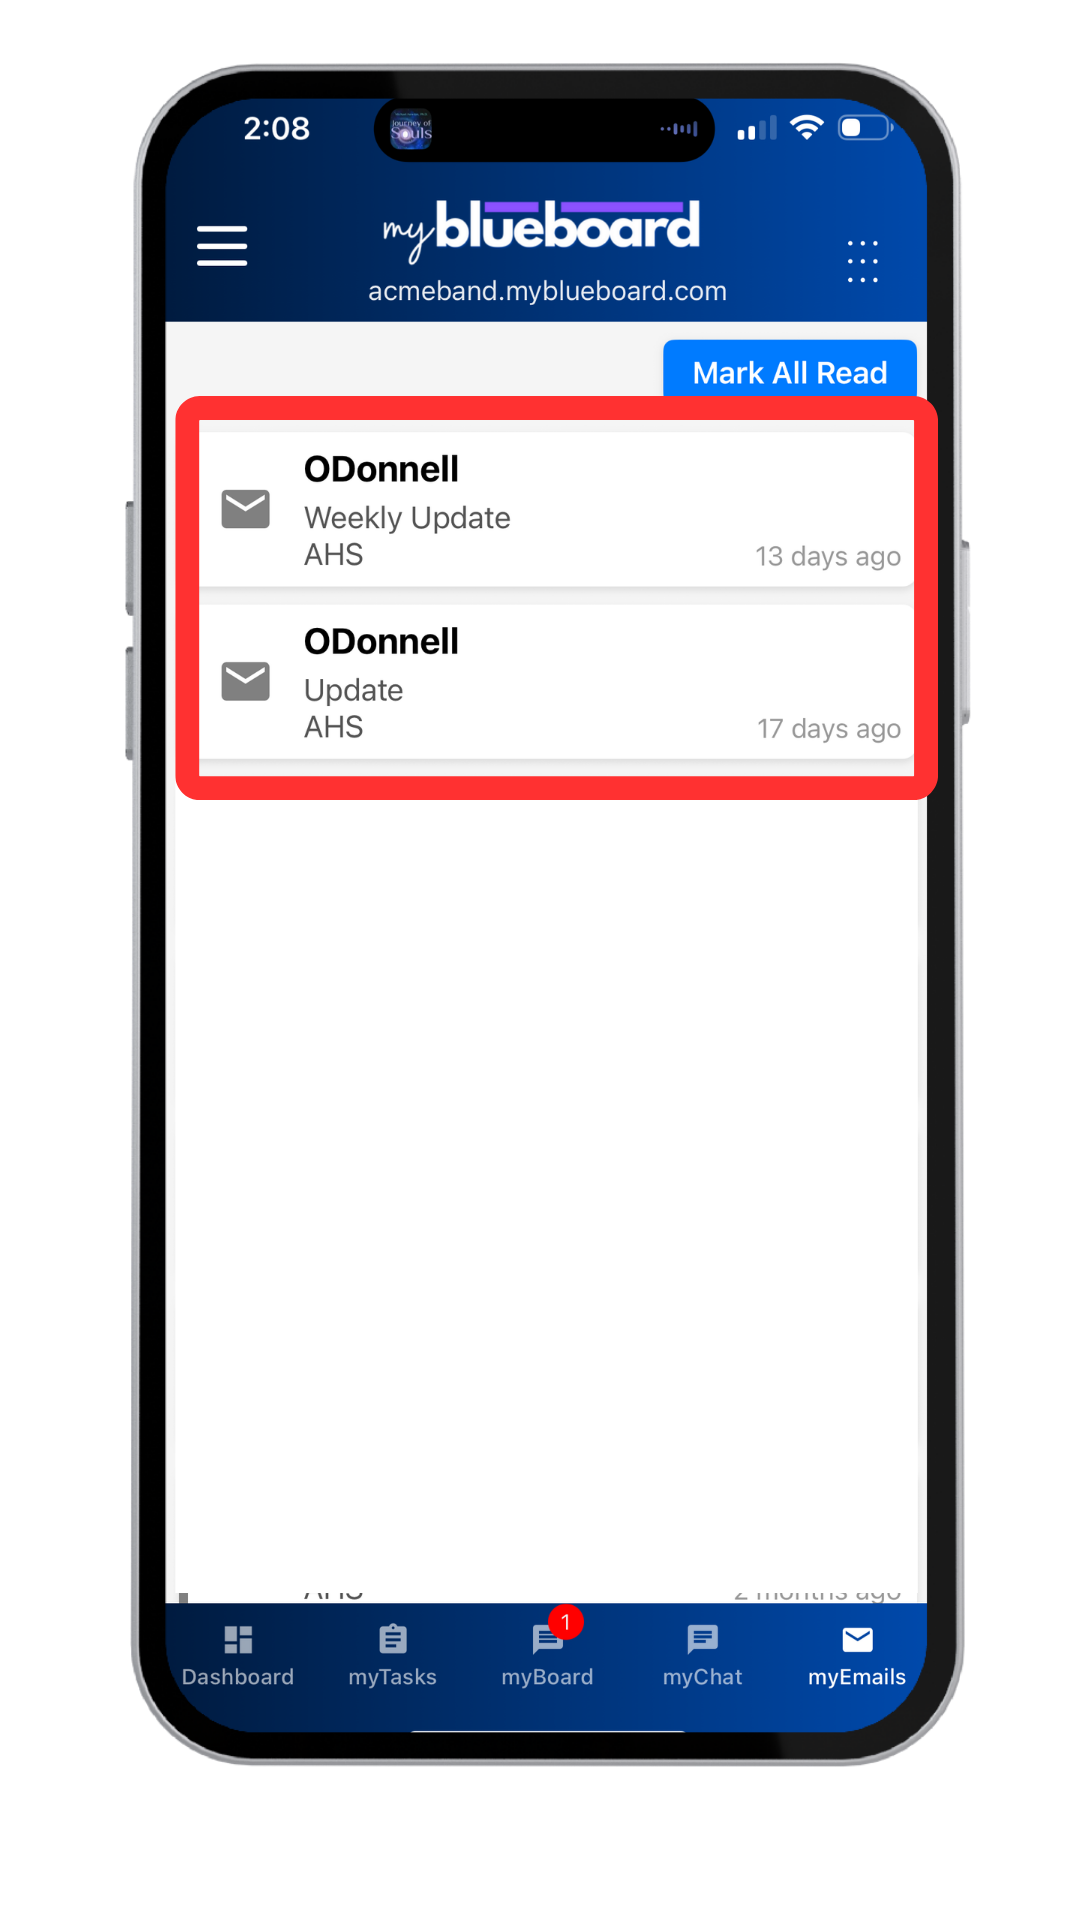
You can read emails by selecting them from the inbox (Image 25).
Sending Emails
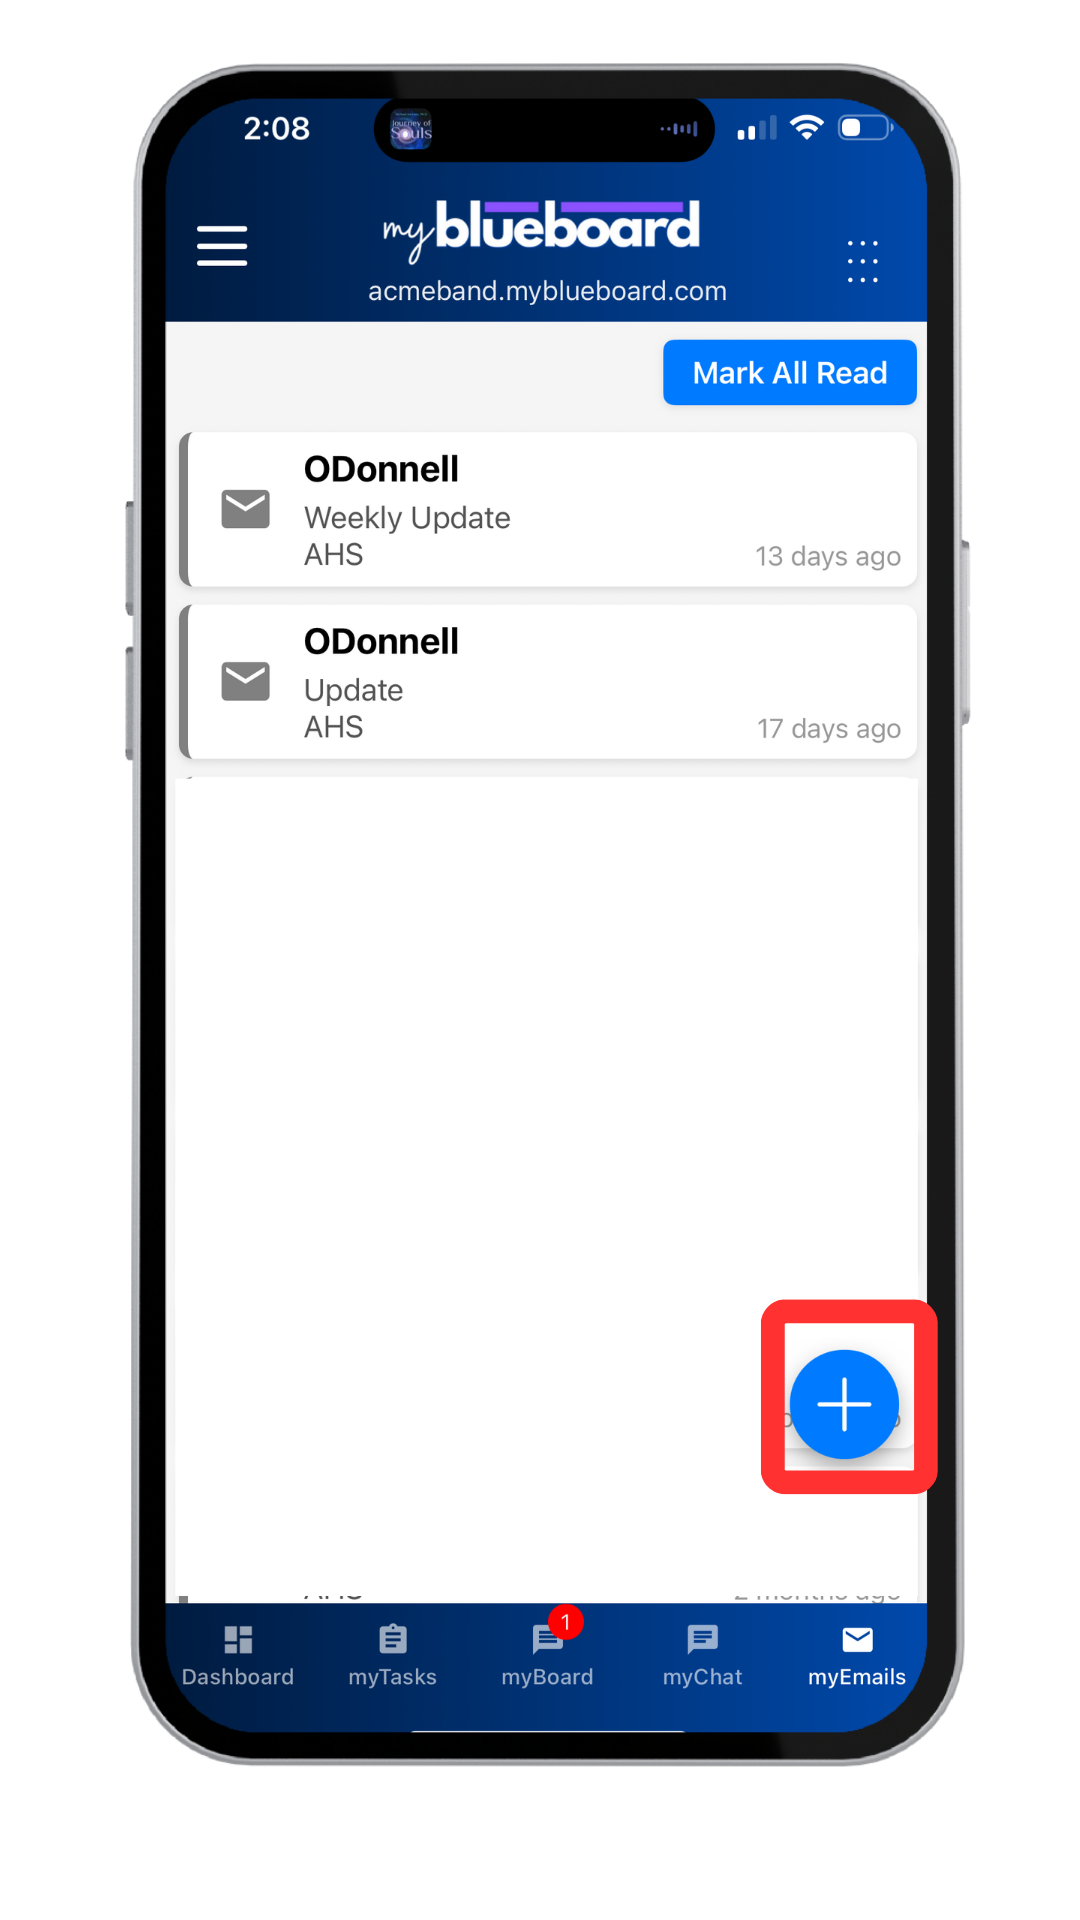
- Select the blue + button to compose an email from the mobile app (Image 26)
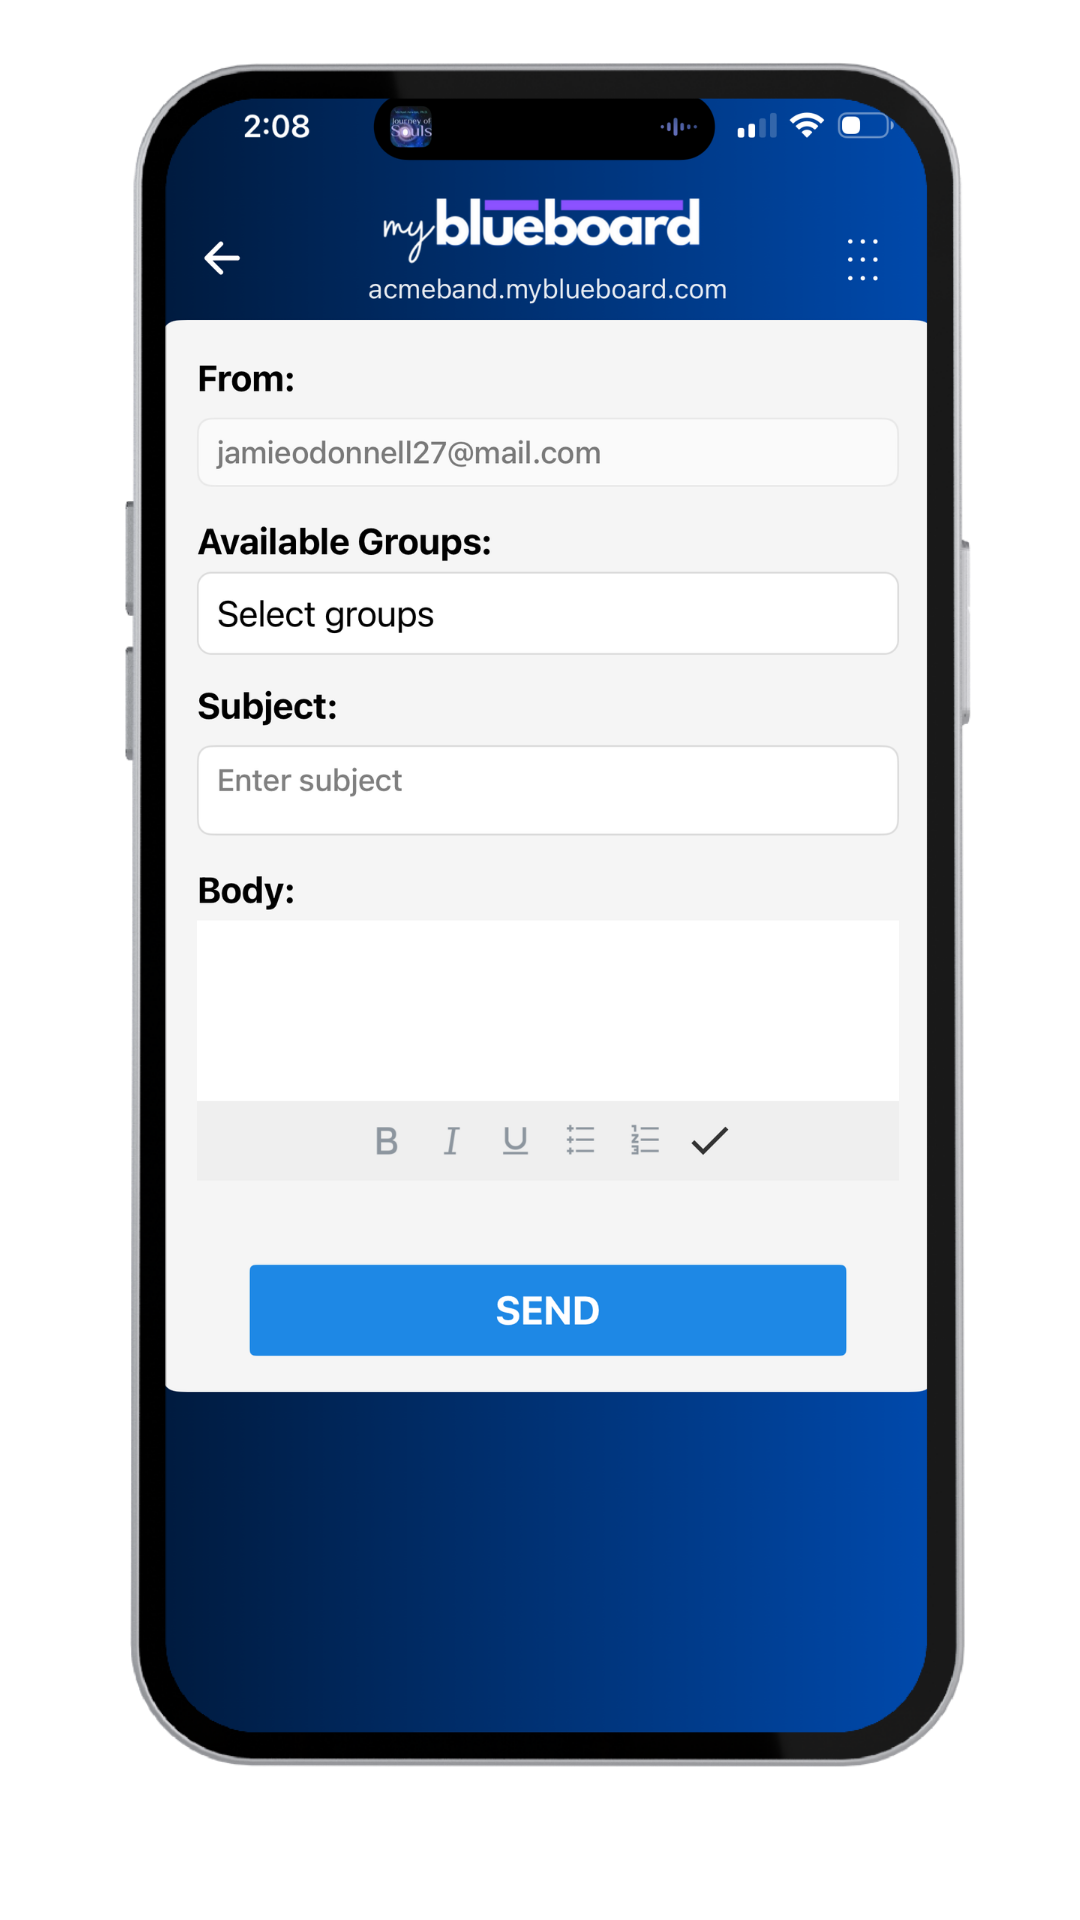
- Select the Group to populate a dropdown with all available groups to choose from and enter the Subject, and Message (Body). Click Send (Image 27).
myTasks
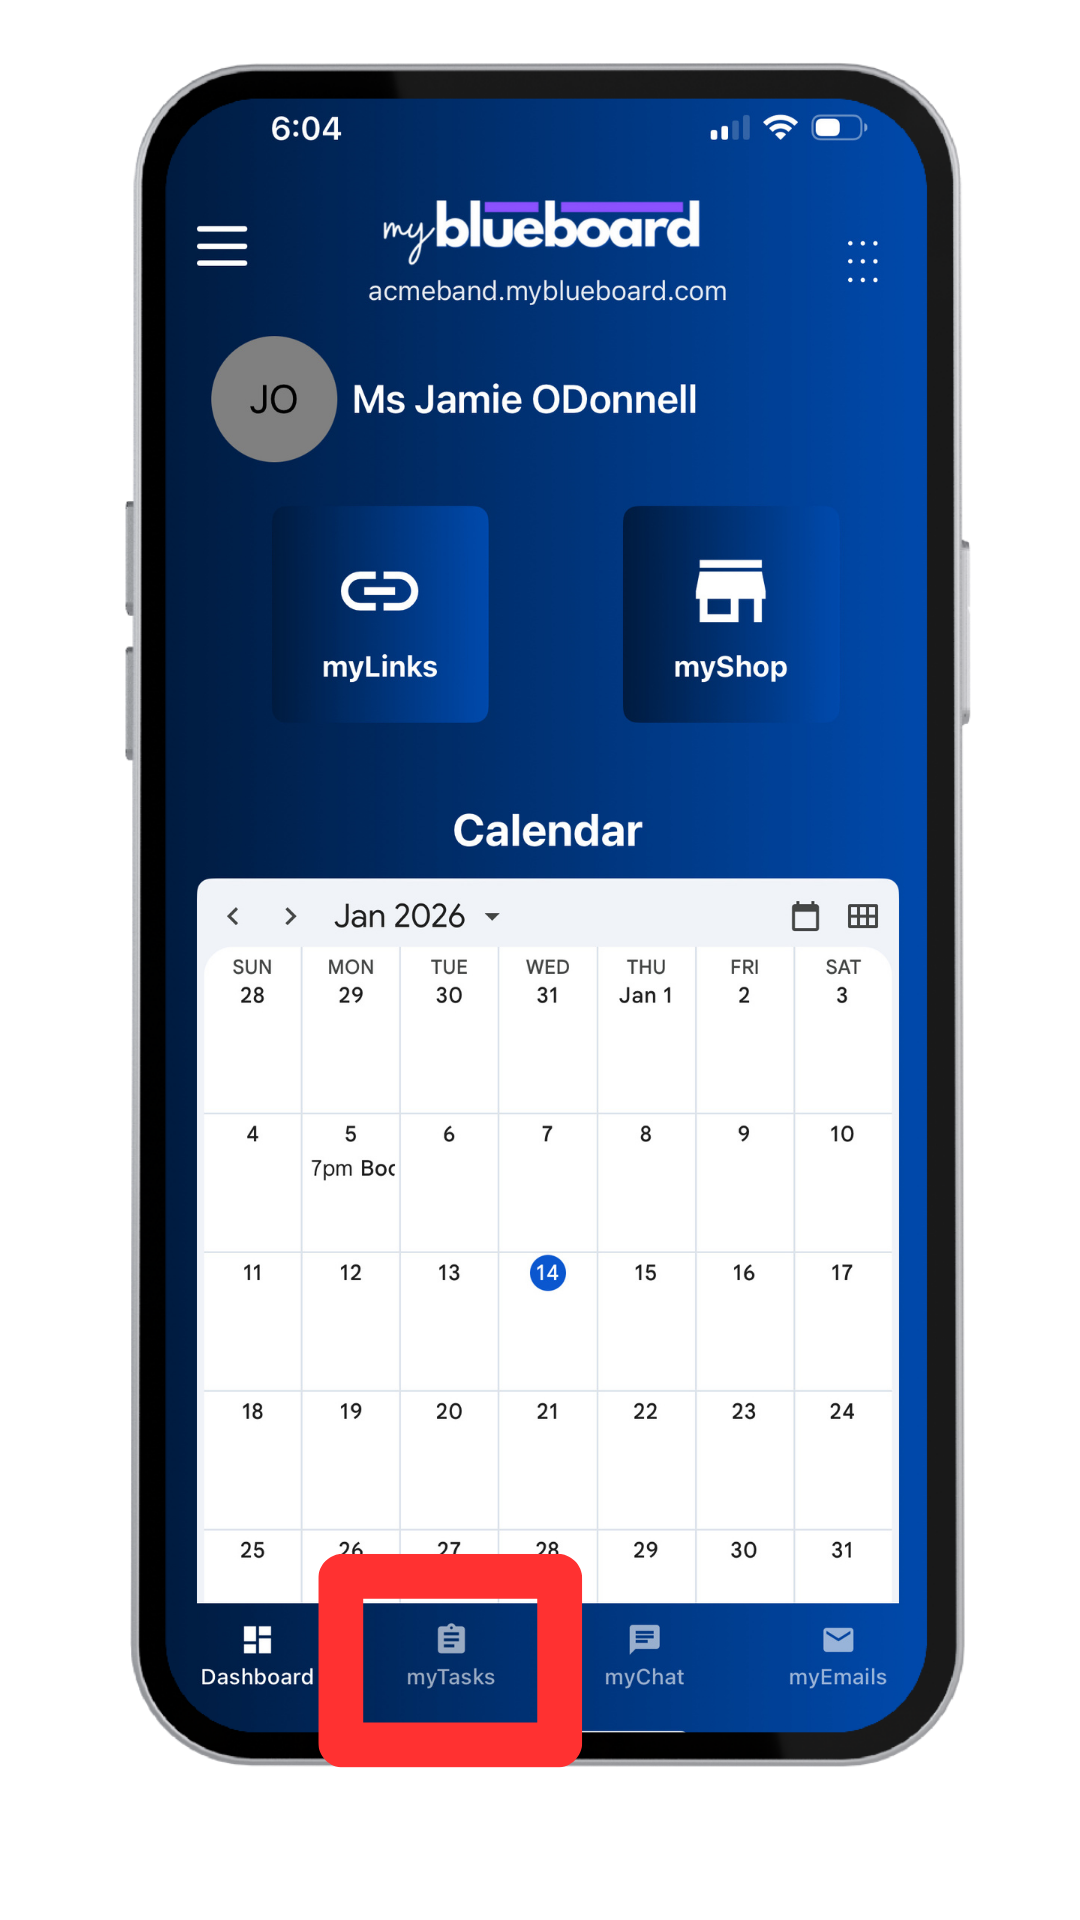
Select the myTasks icon from the bottom navigation (Image 28).
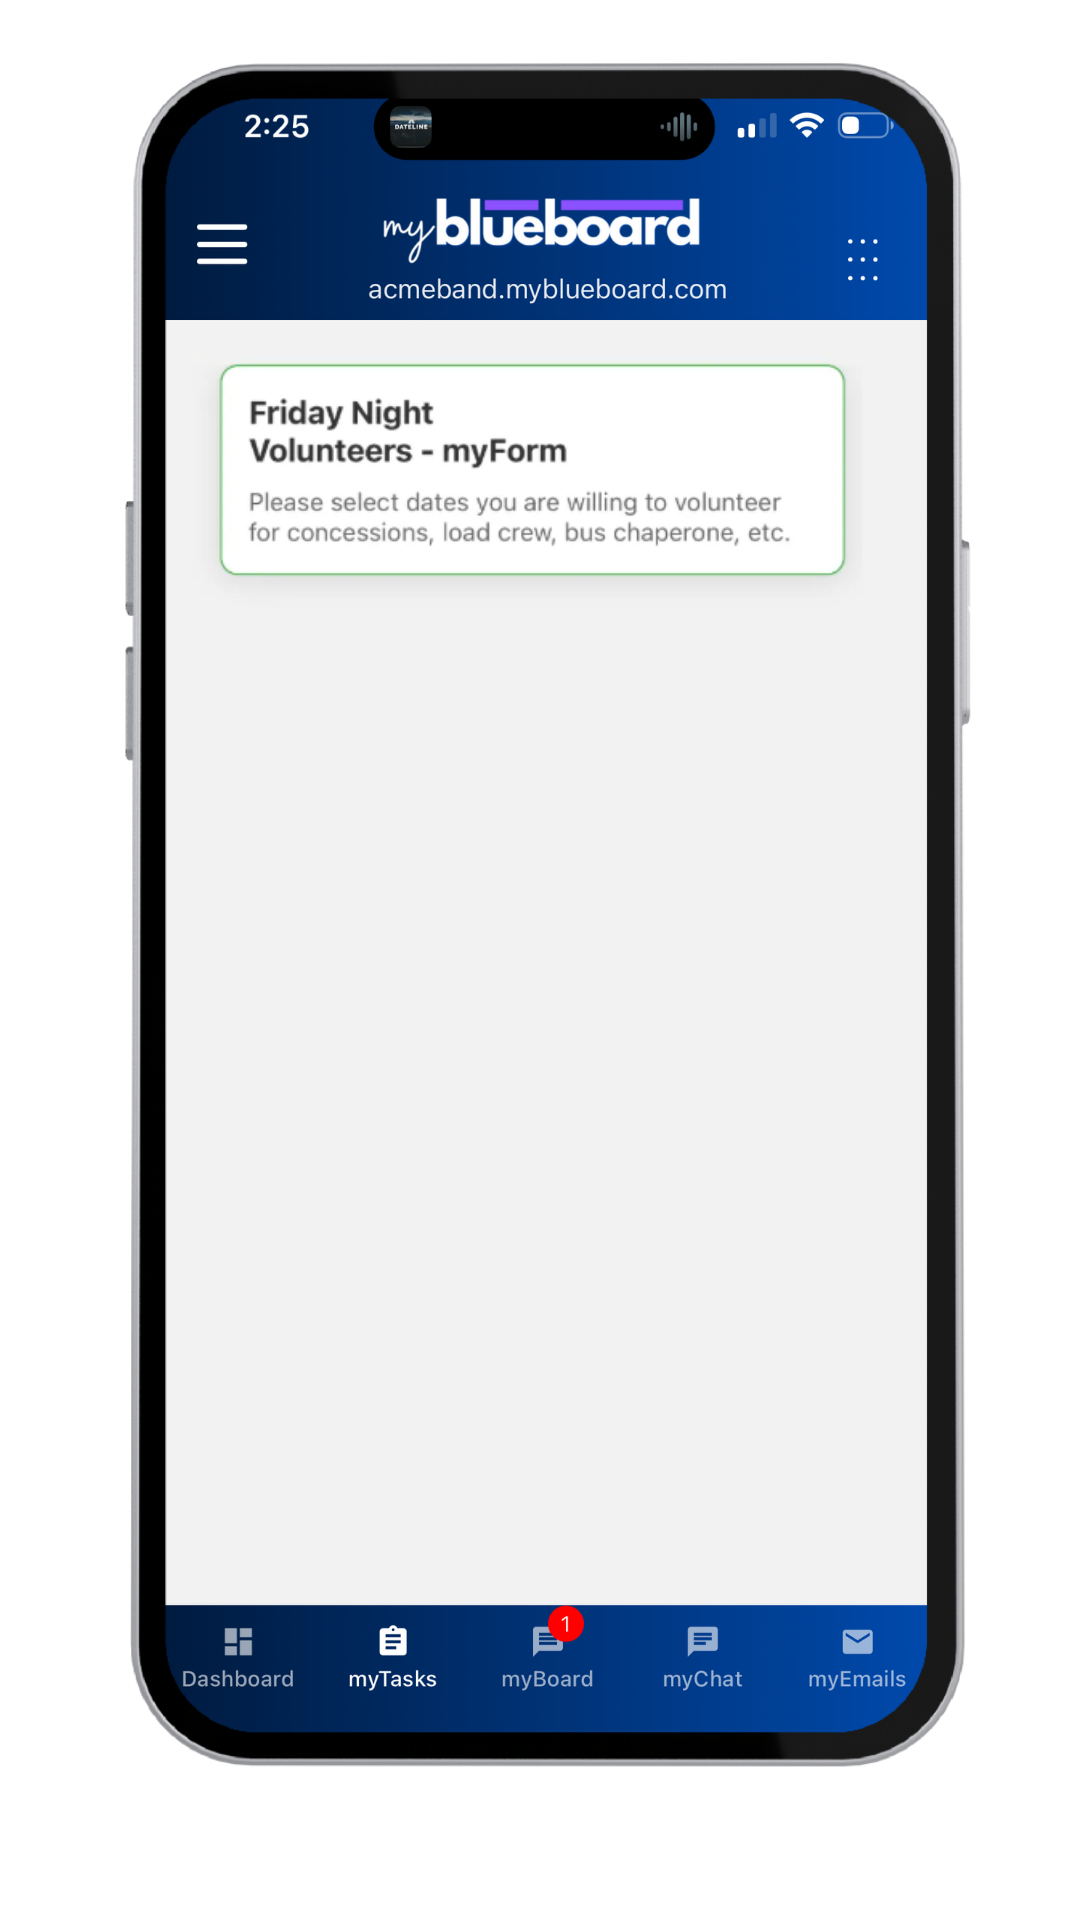
All pending tasks will be listed here (Image 29).
Complete any pending task by selecting it.
myInfo
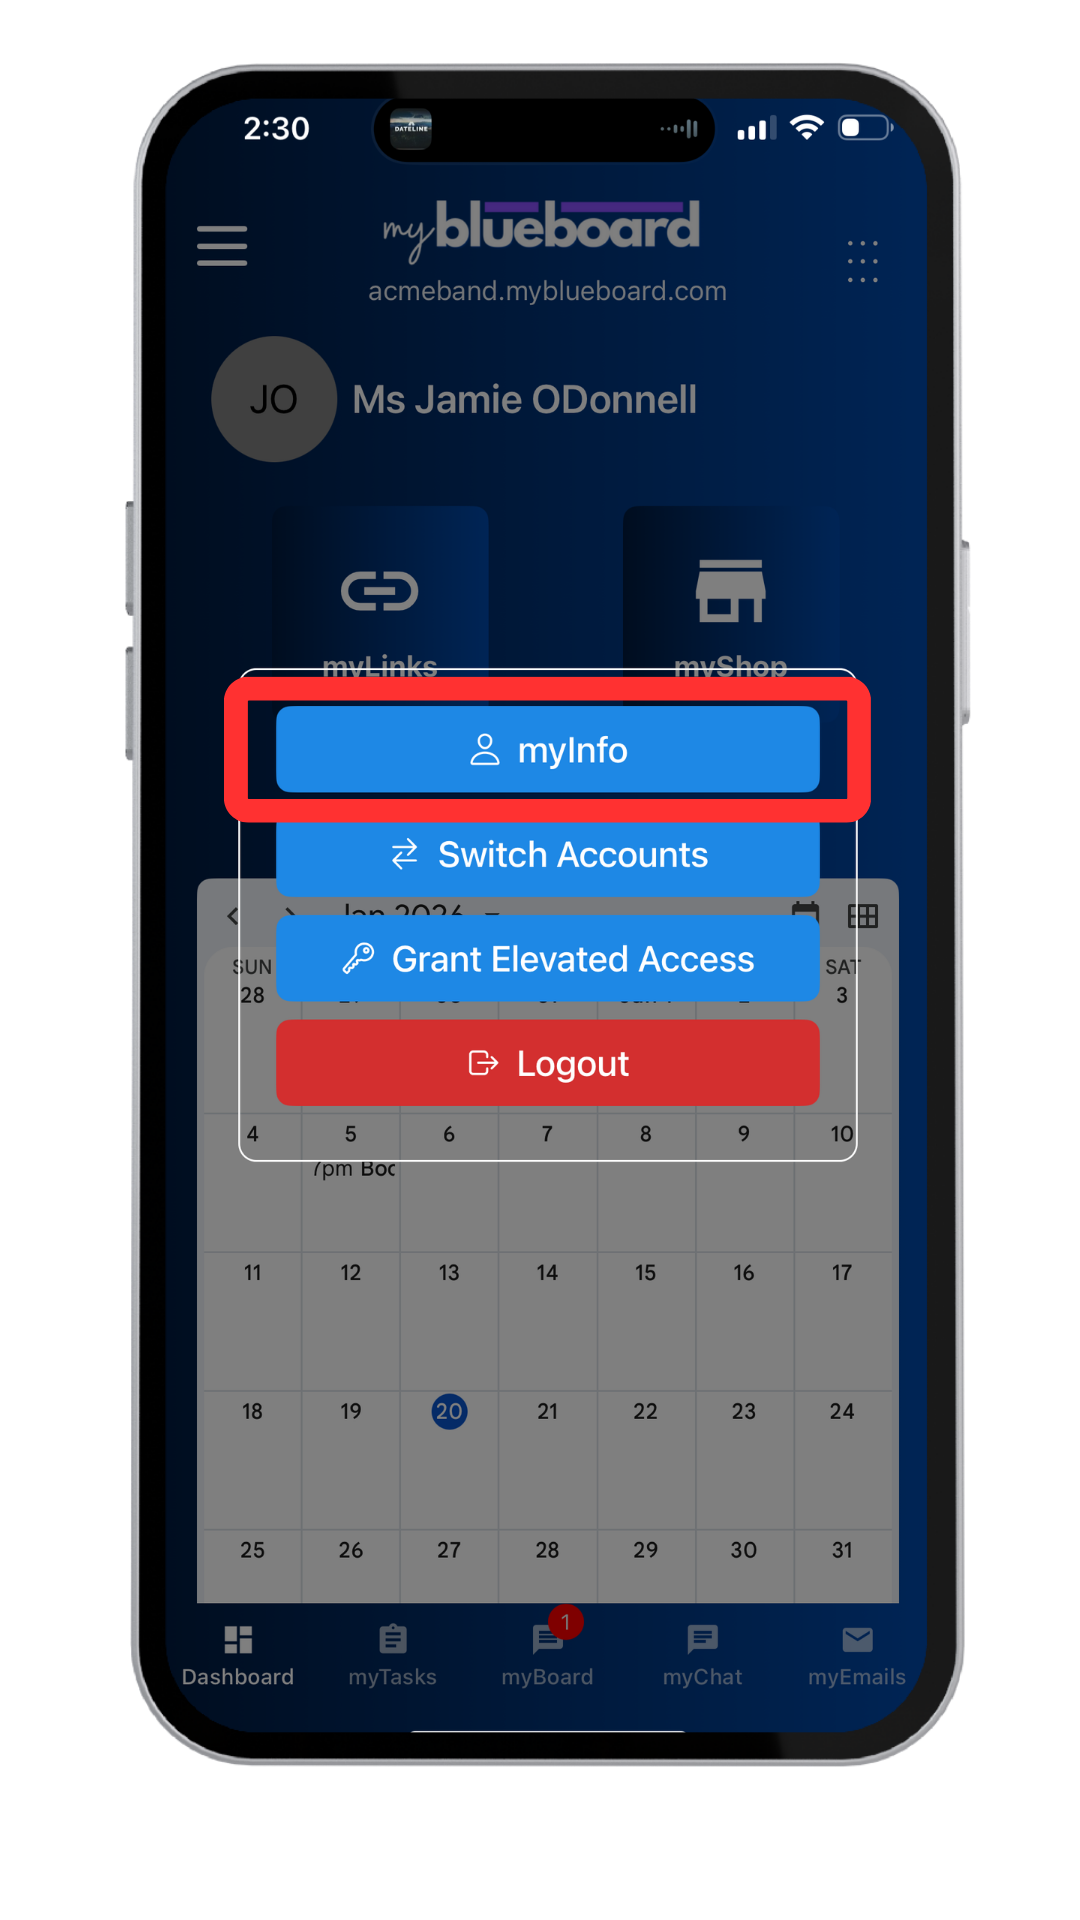
- Select the Grid icon in the top right corner of the dashboard (Image 30)
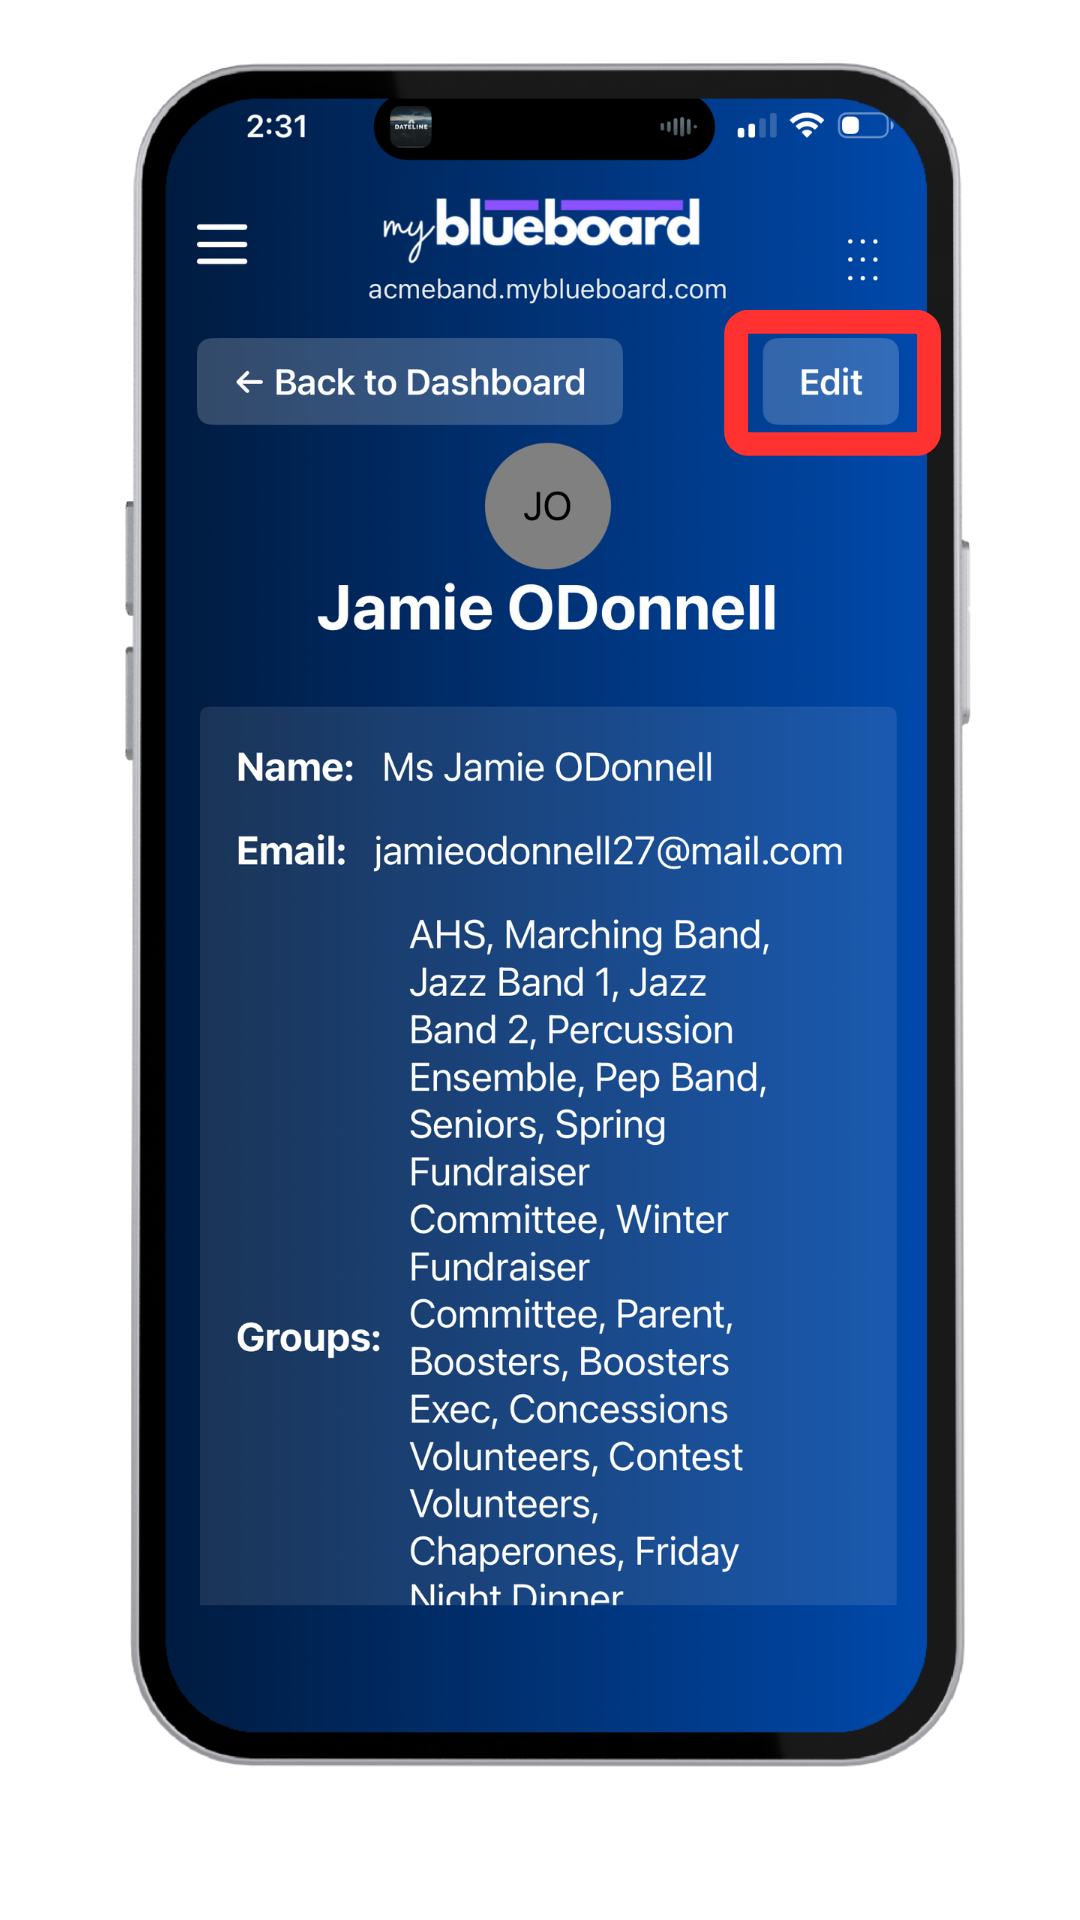
- Select myInfo to edit your profile (Image 31).
- To edit your profile, select the Edit button (Image 32).
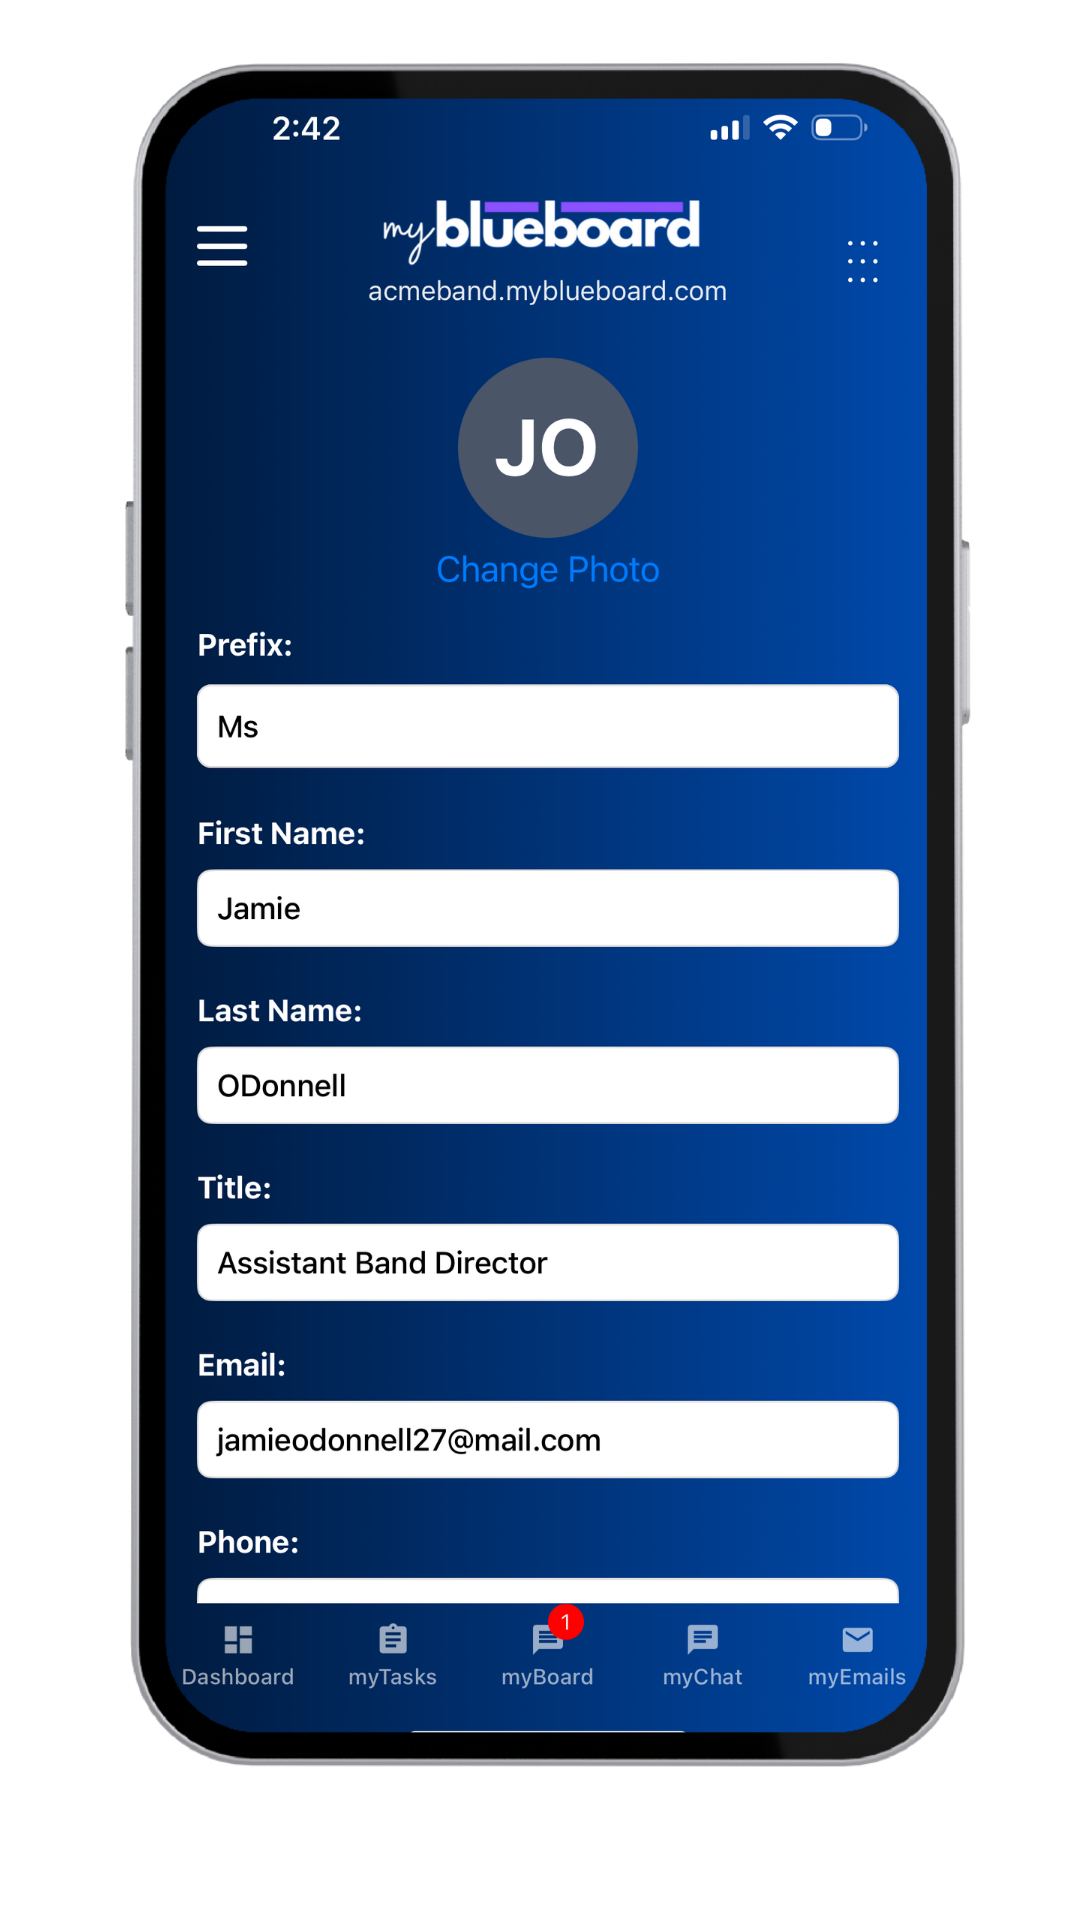
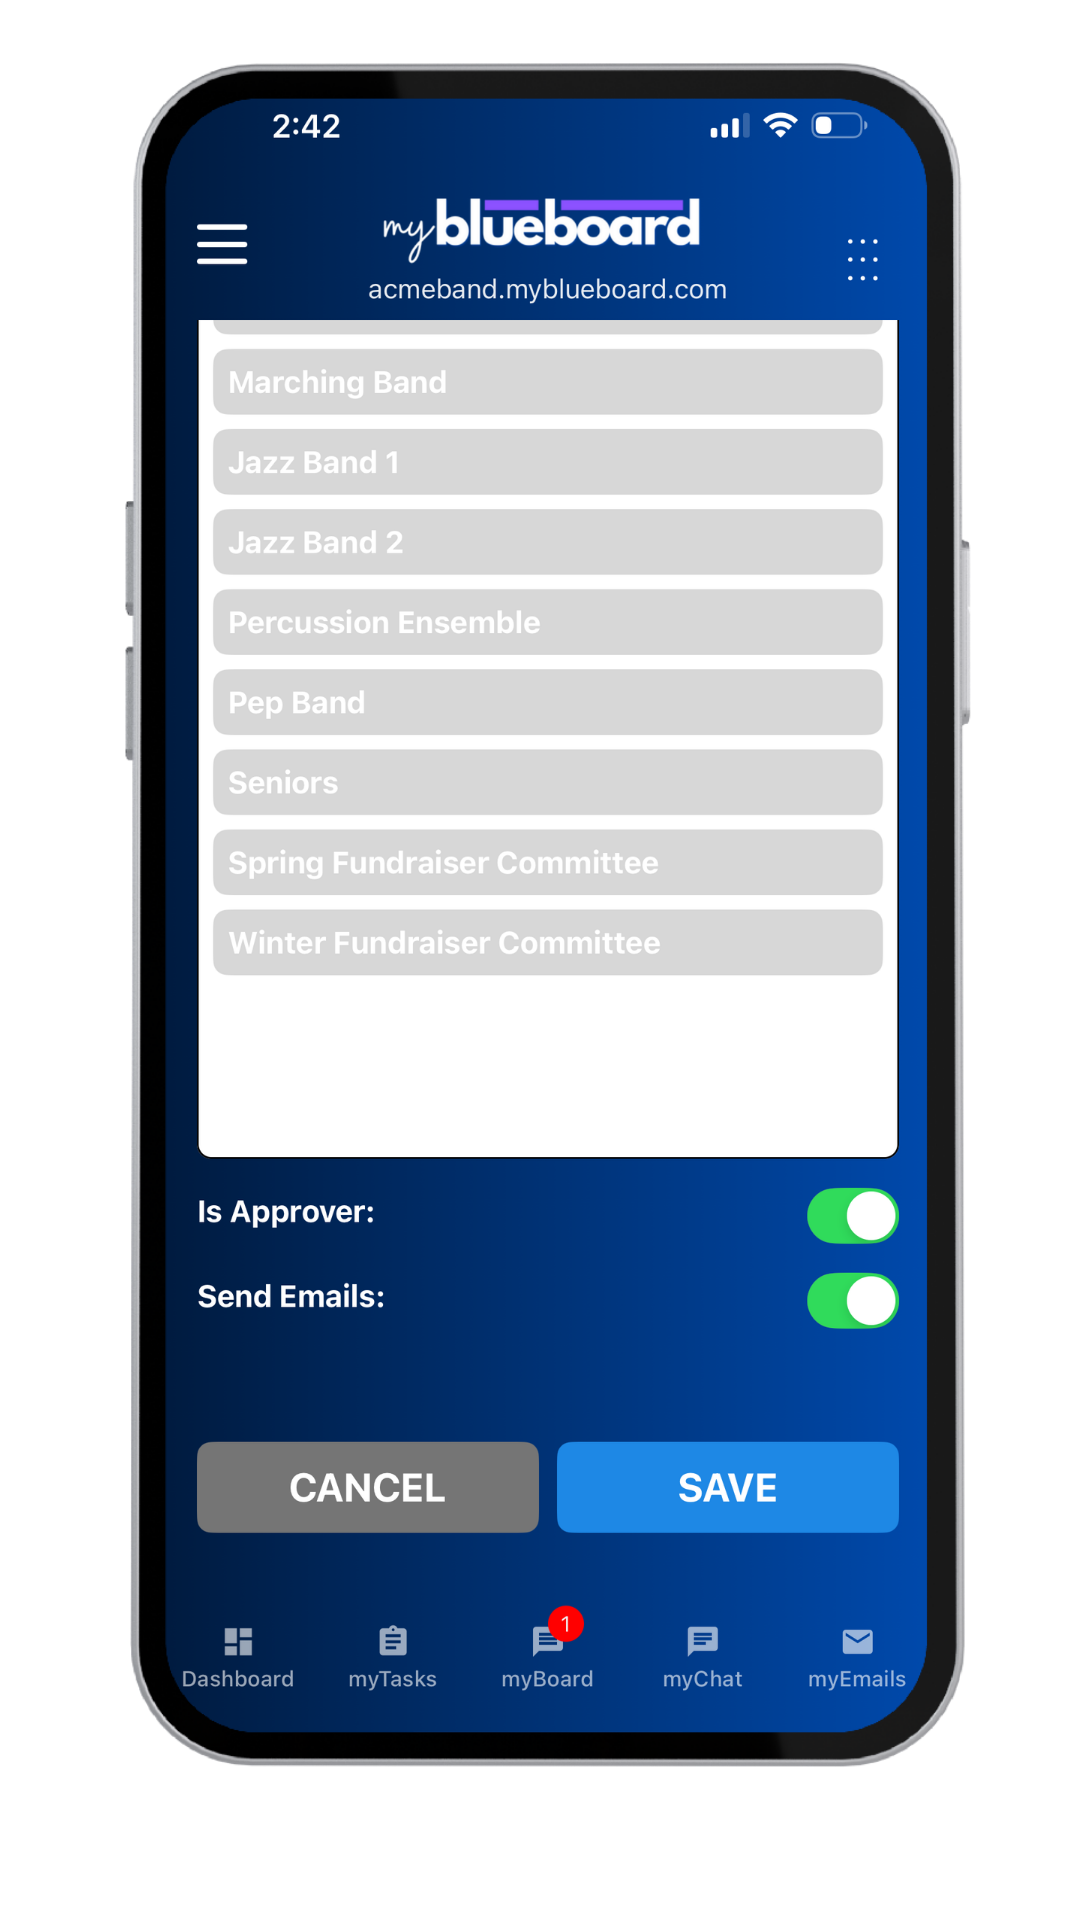
- Edit the profile fields (Image 33) and scroll to the bottom to Save your changes (Image 34).
How to log out
Select the Grid icon in the top right corner of the dashboard (Image 35).
Select the red Logout button (Image 36).
