

Setting up myShop
Admin access to myShop
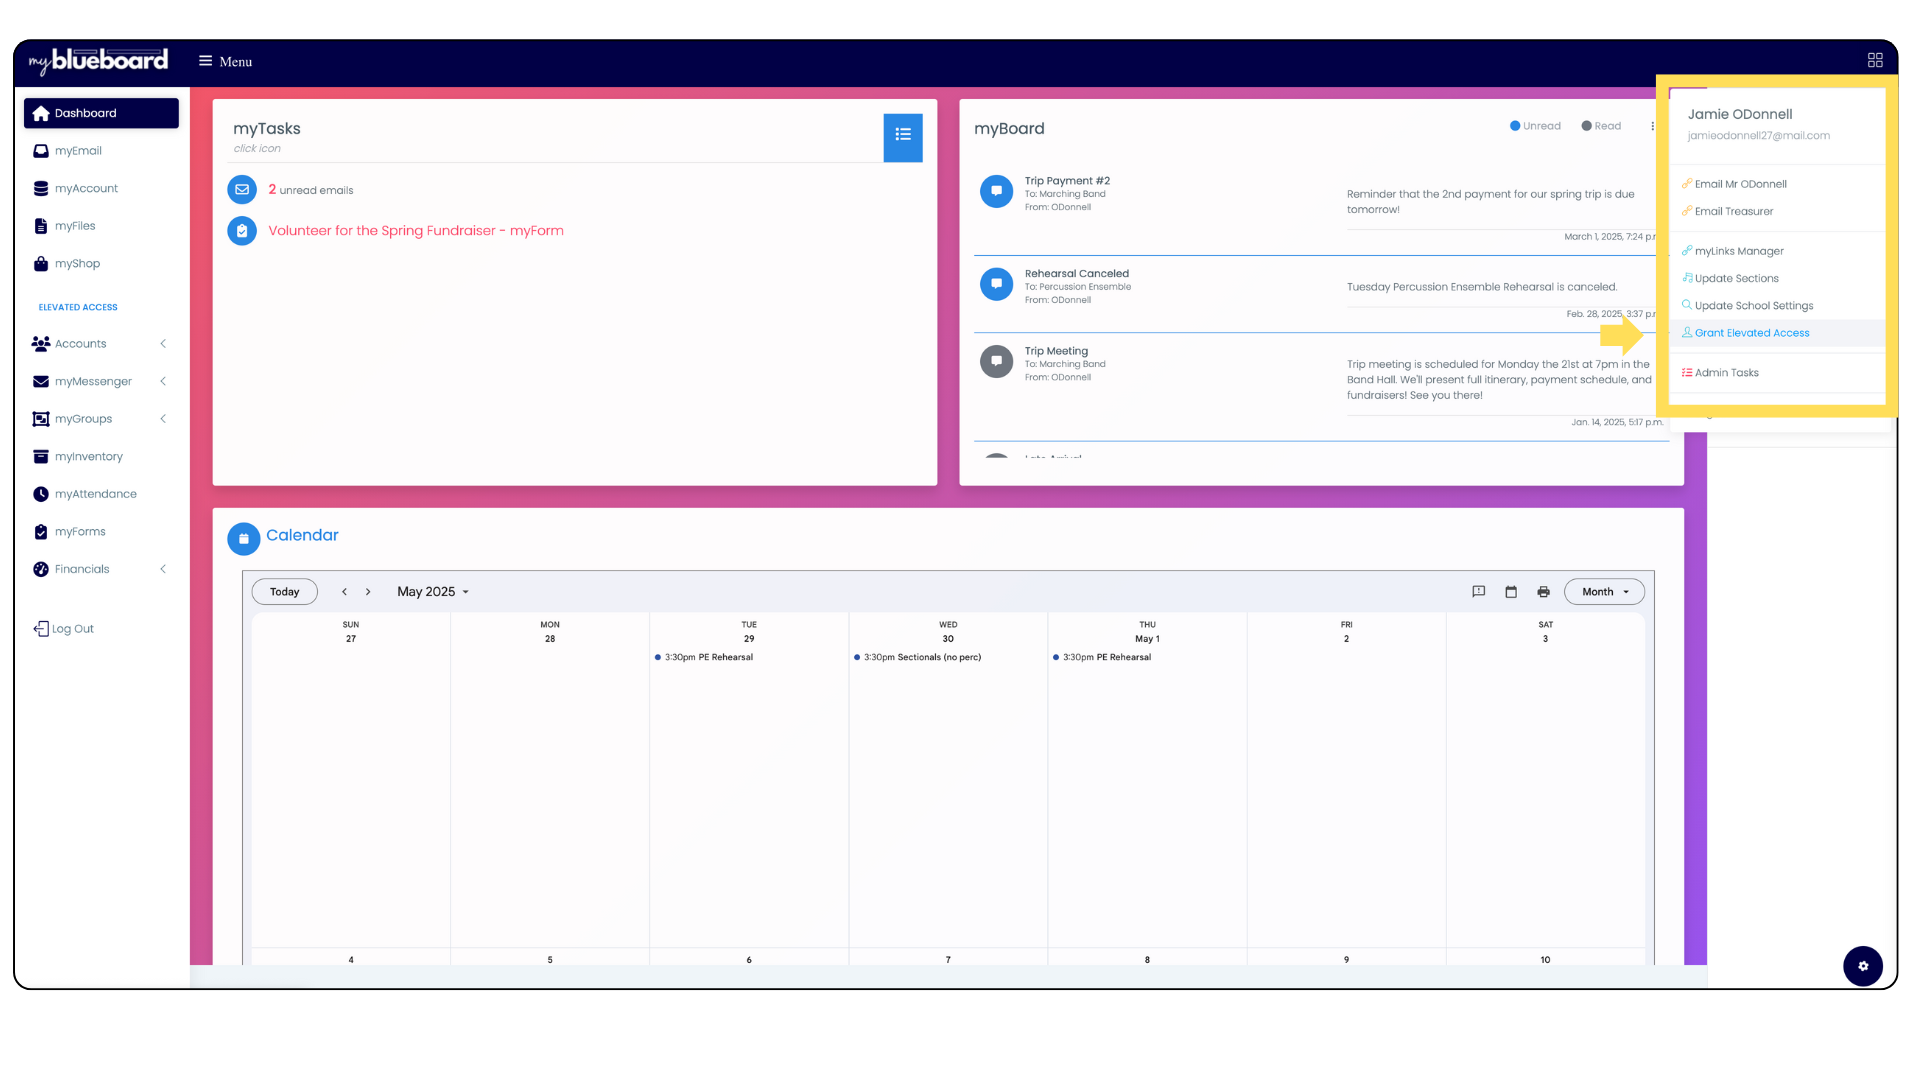
myShop Admin Access allows a member to access every part of your shop.
How to provide a user with myShop admin access:
- Select the Window icon in the upper right corner of your dashboard
- Select Grand Elevated Access (Image 1).
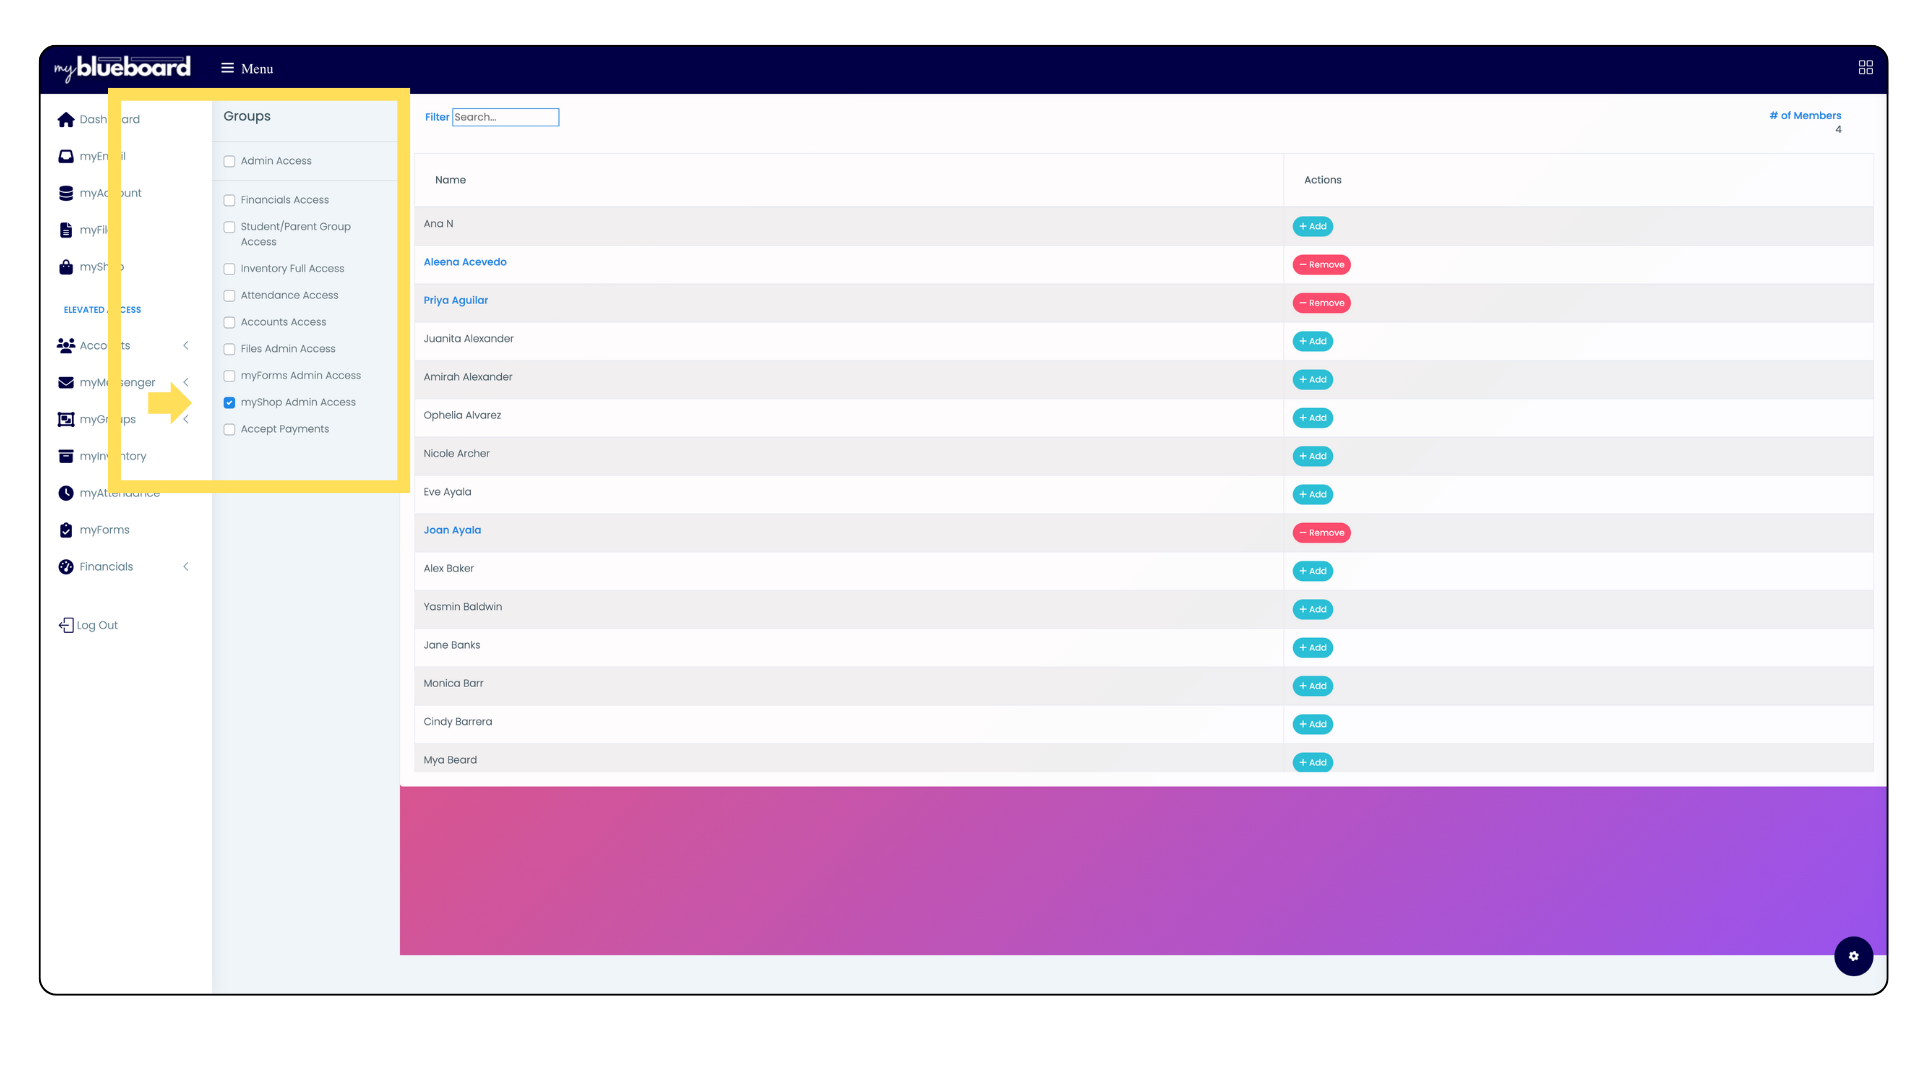
- Select the myShop Admin Access check box (Image 2).
- All member names will populate. Select Add next to the users name to grant them elevated access.
Adding Categories
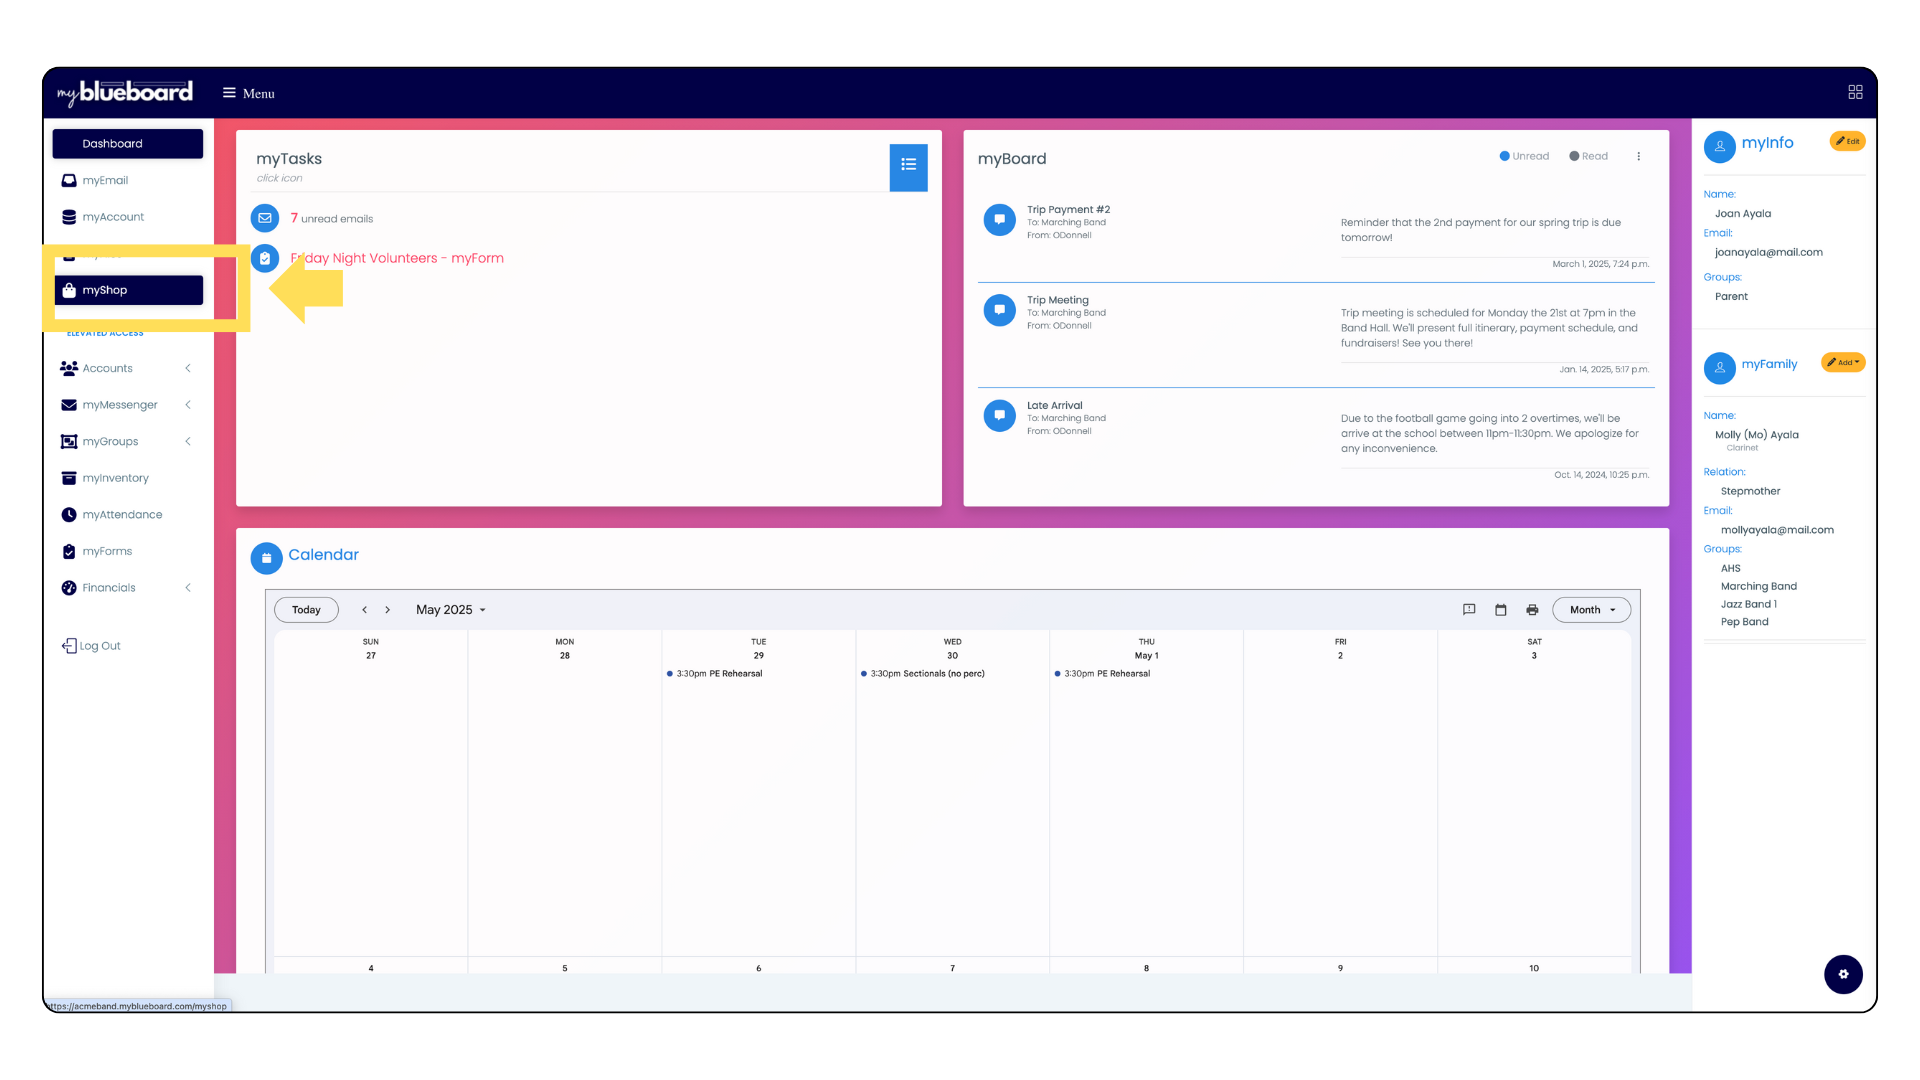
To add products, you must create at least one Category. To organize your shop, we recommend creating categories for every type of product you add.
- Select myShop from the left sidebar menu. (Image 3)
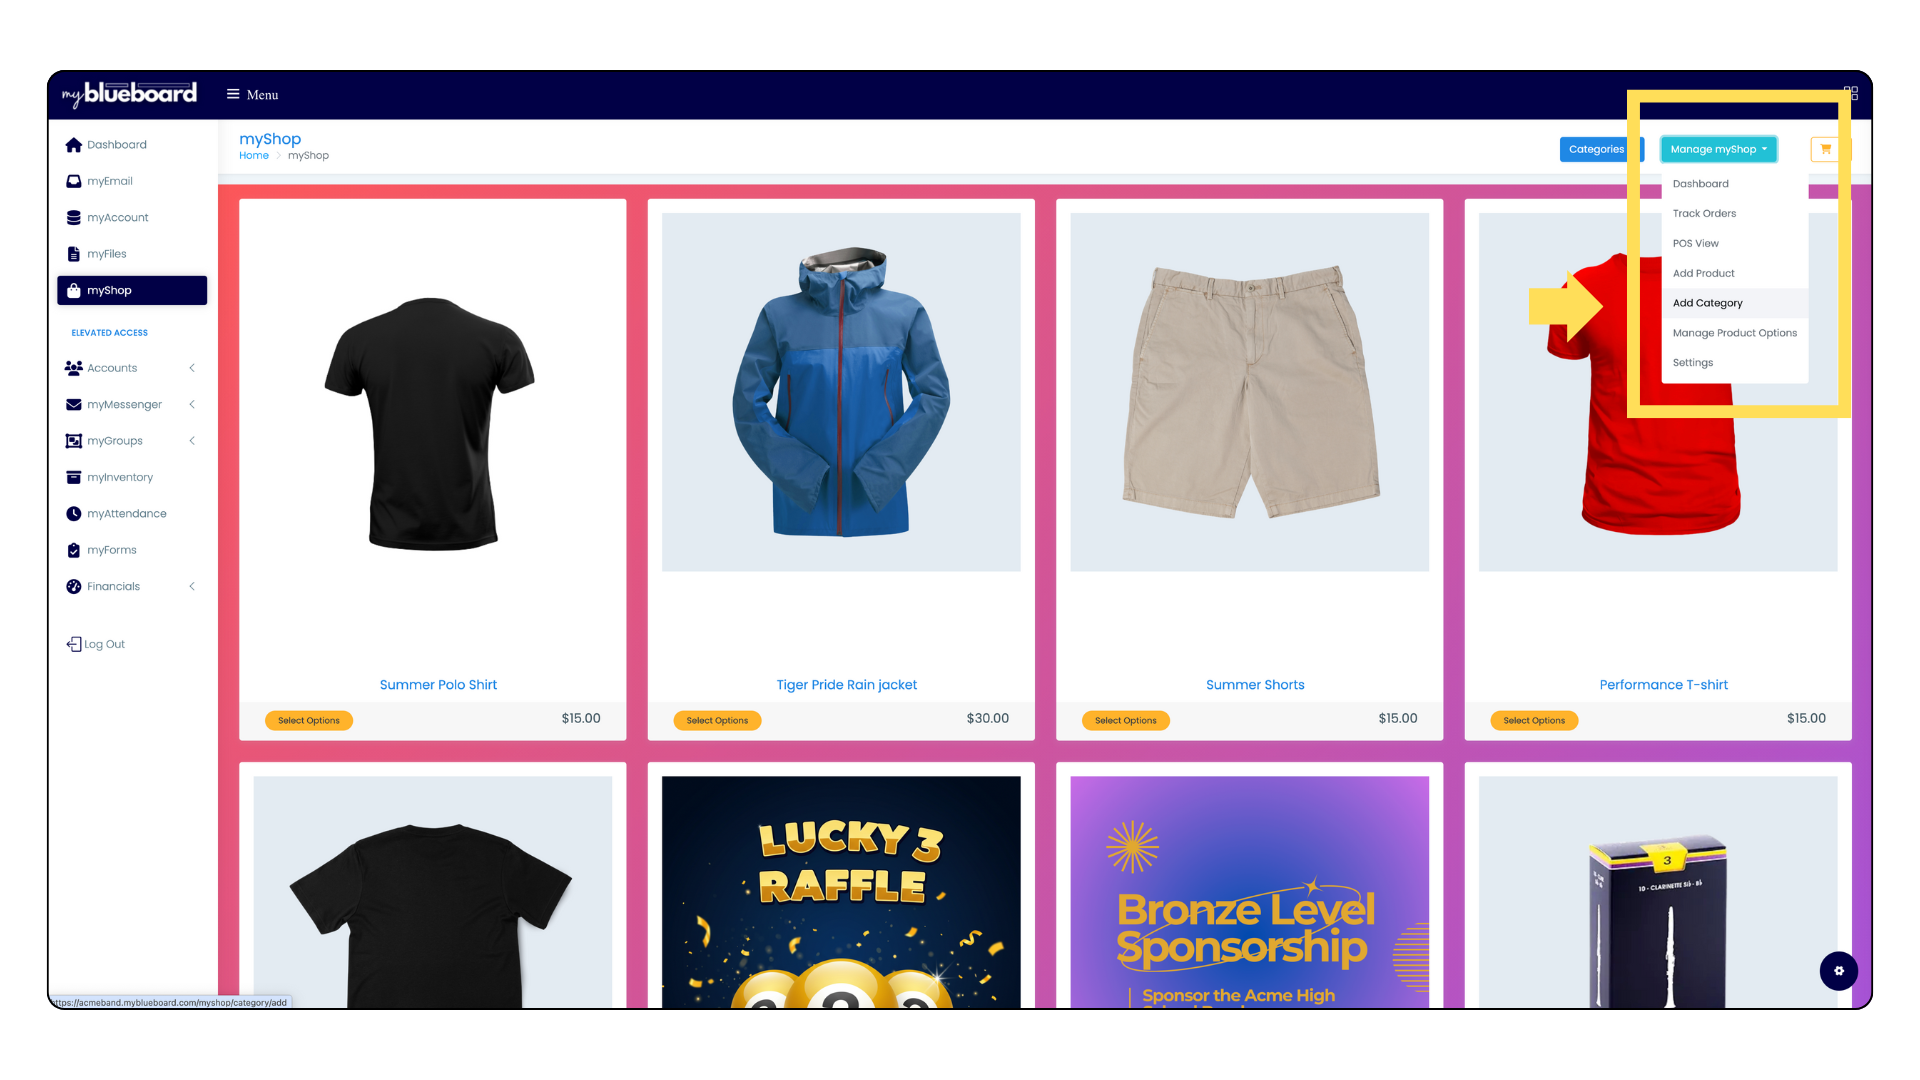
- In the myShop dashboard, select the Manage myShop button, then select Add Category from the dropdown (Image 4).
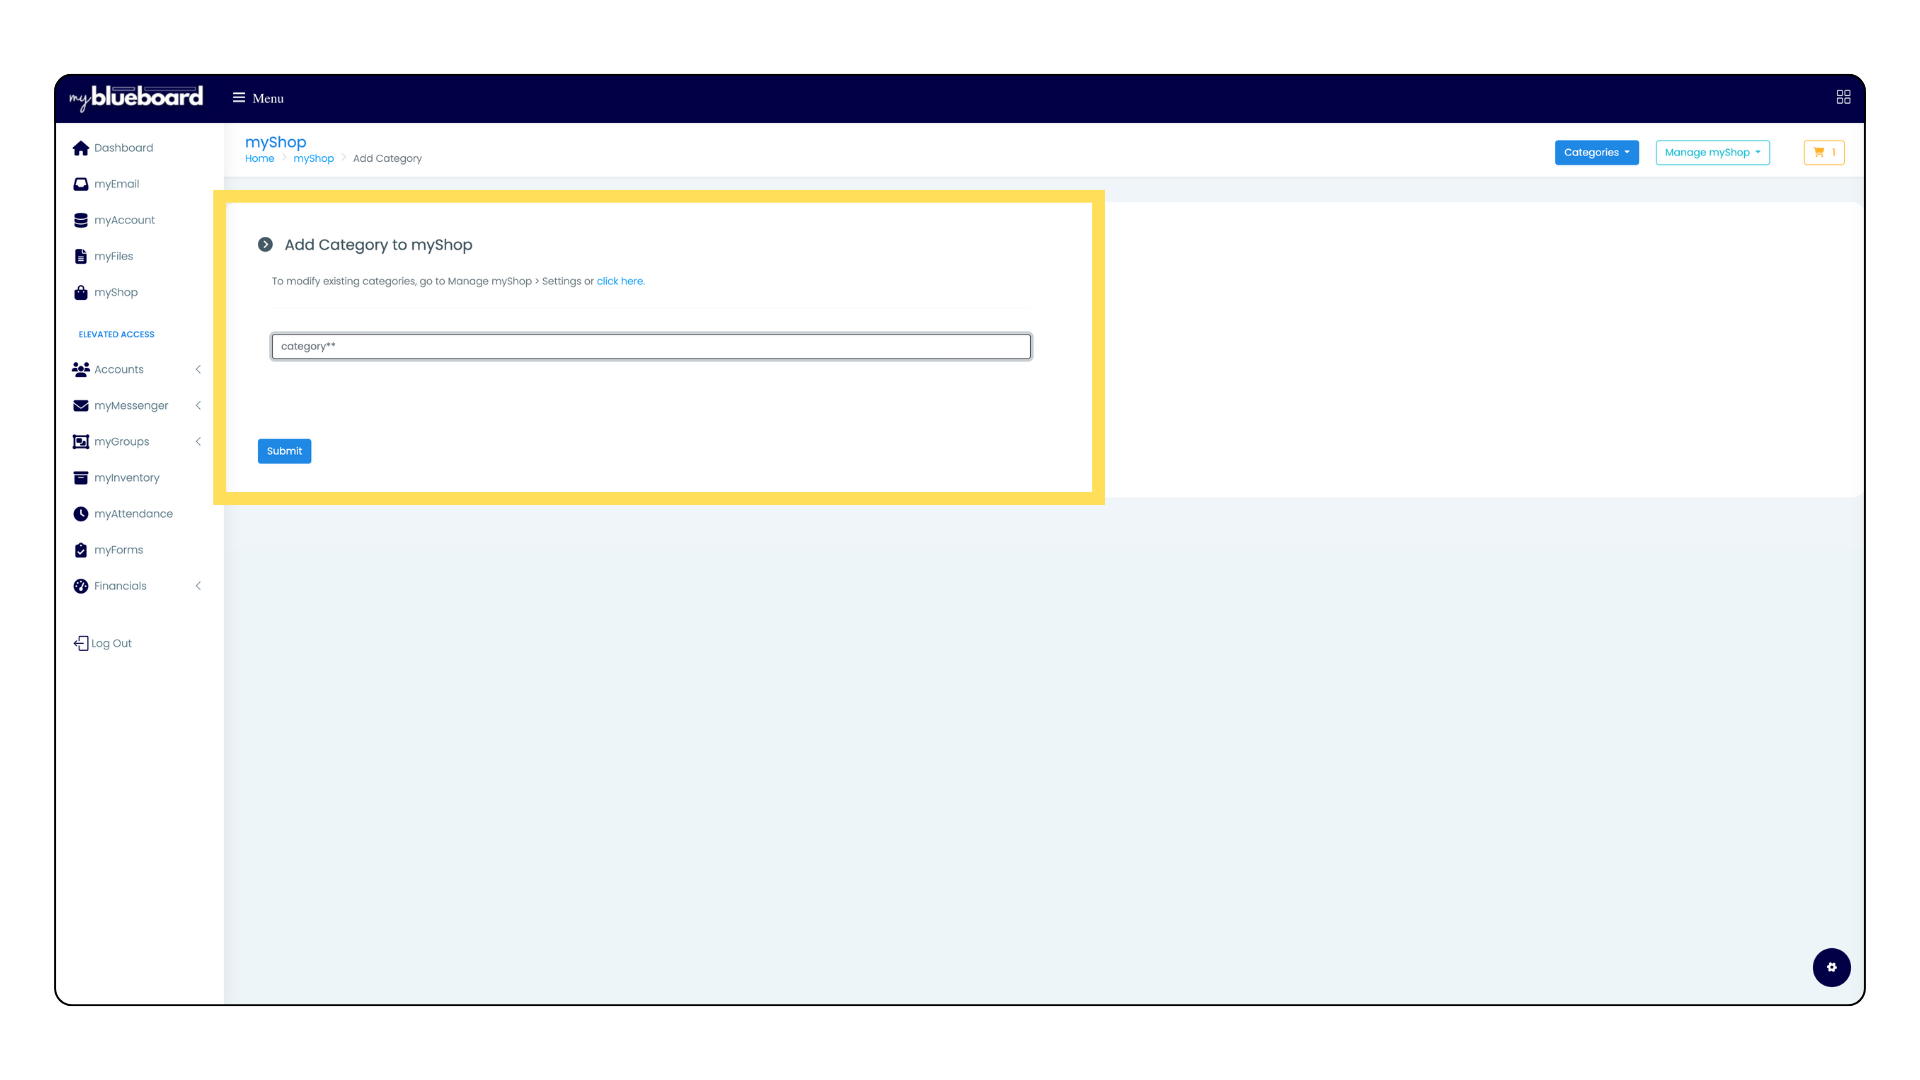
- Enter the title for the new category and select Save (Image 5).
Adding Products
You must create a category before adding a product.
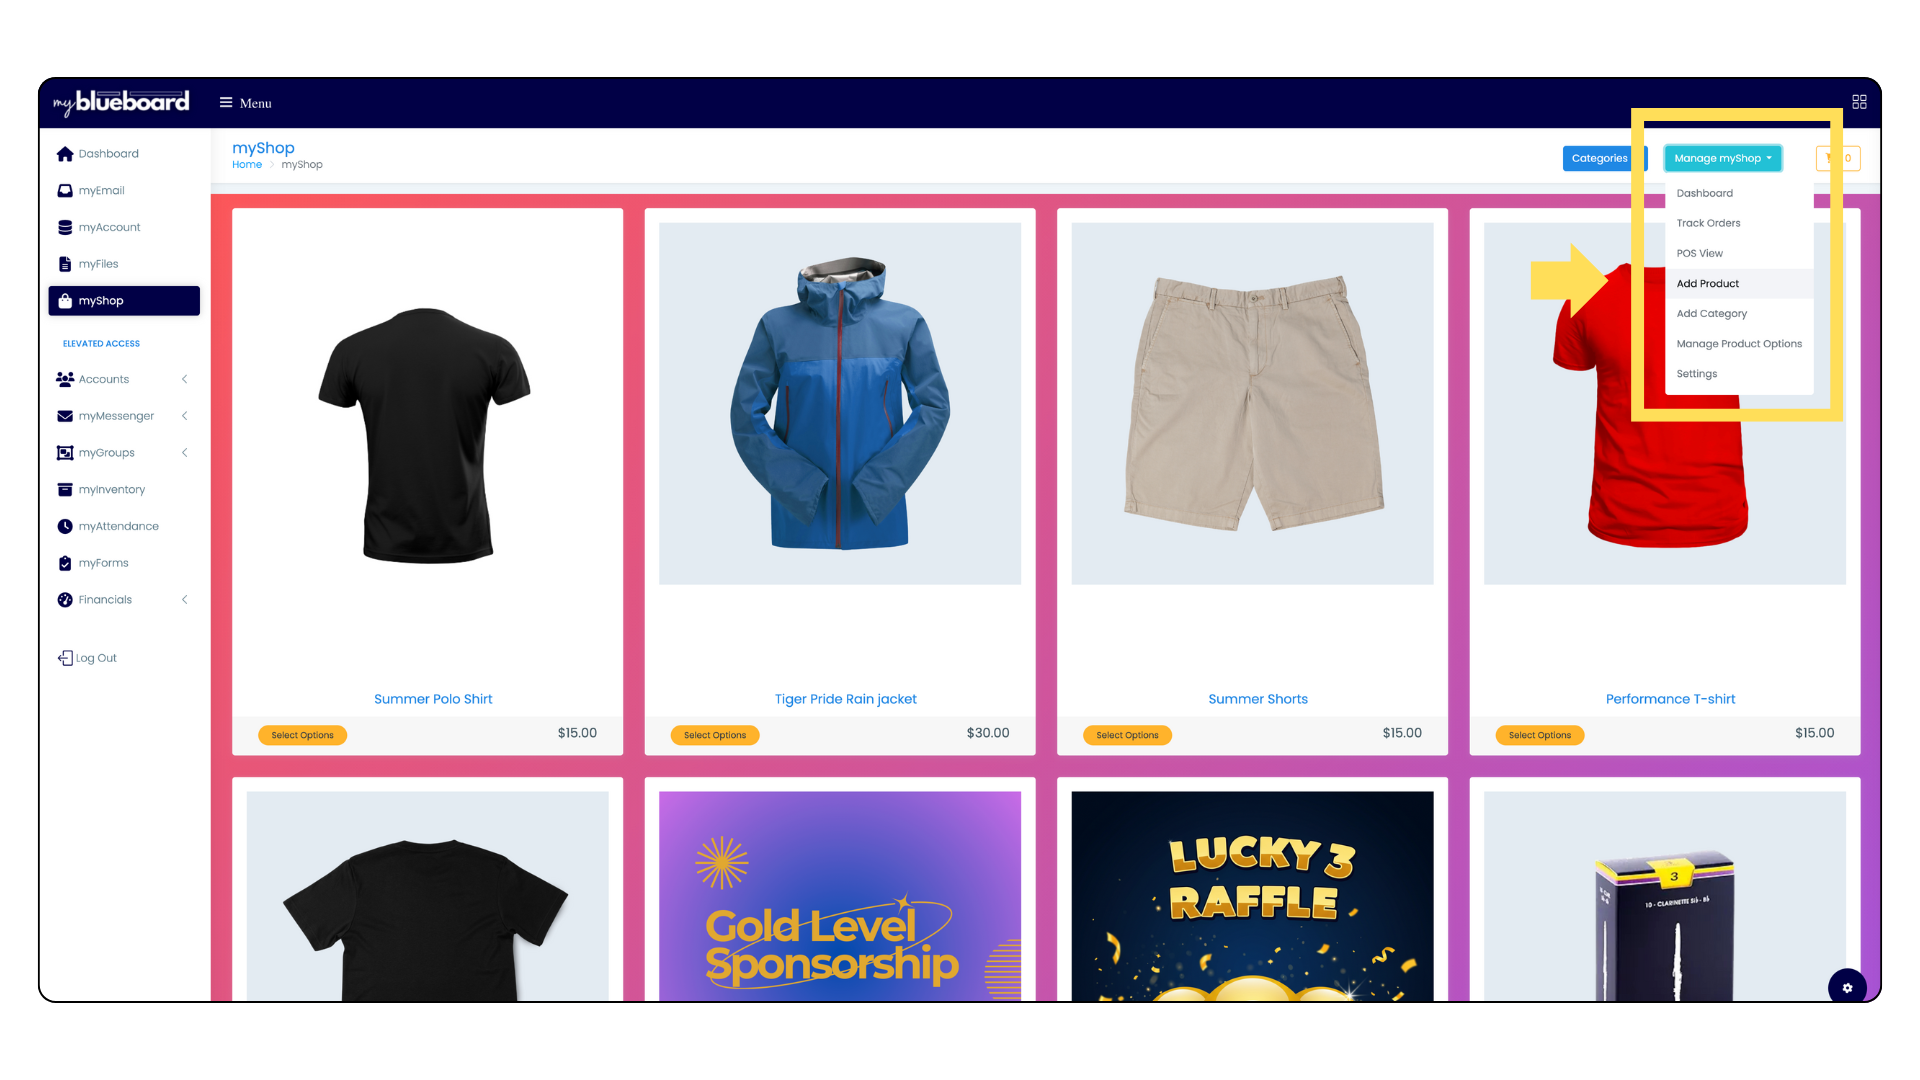
- In myShop, select Manage myShop, then select Add Product (Image 6).
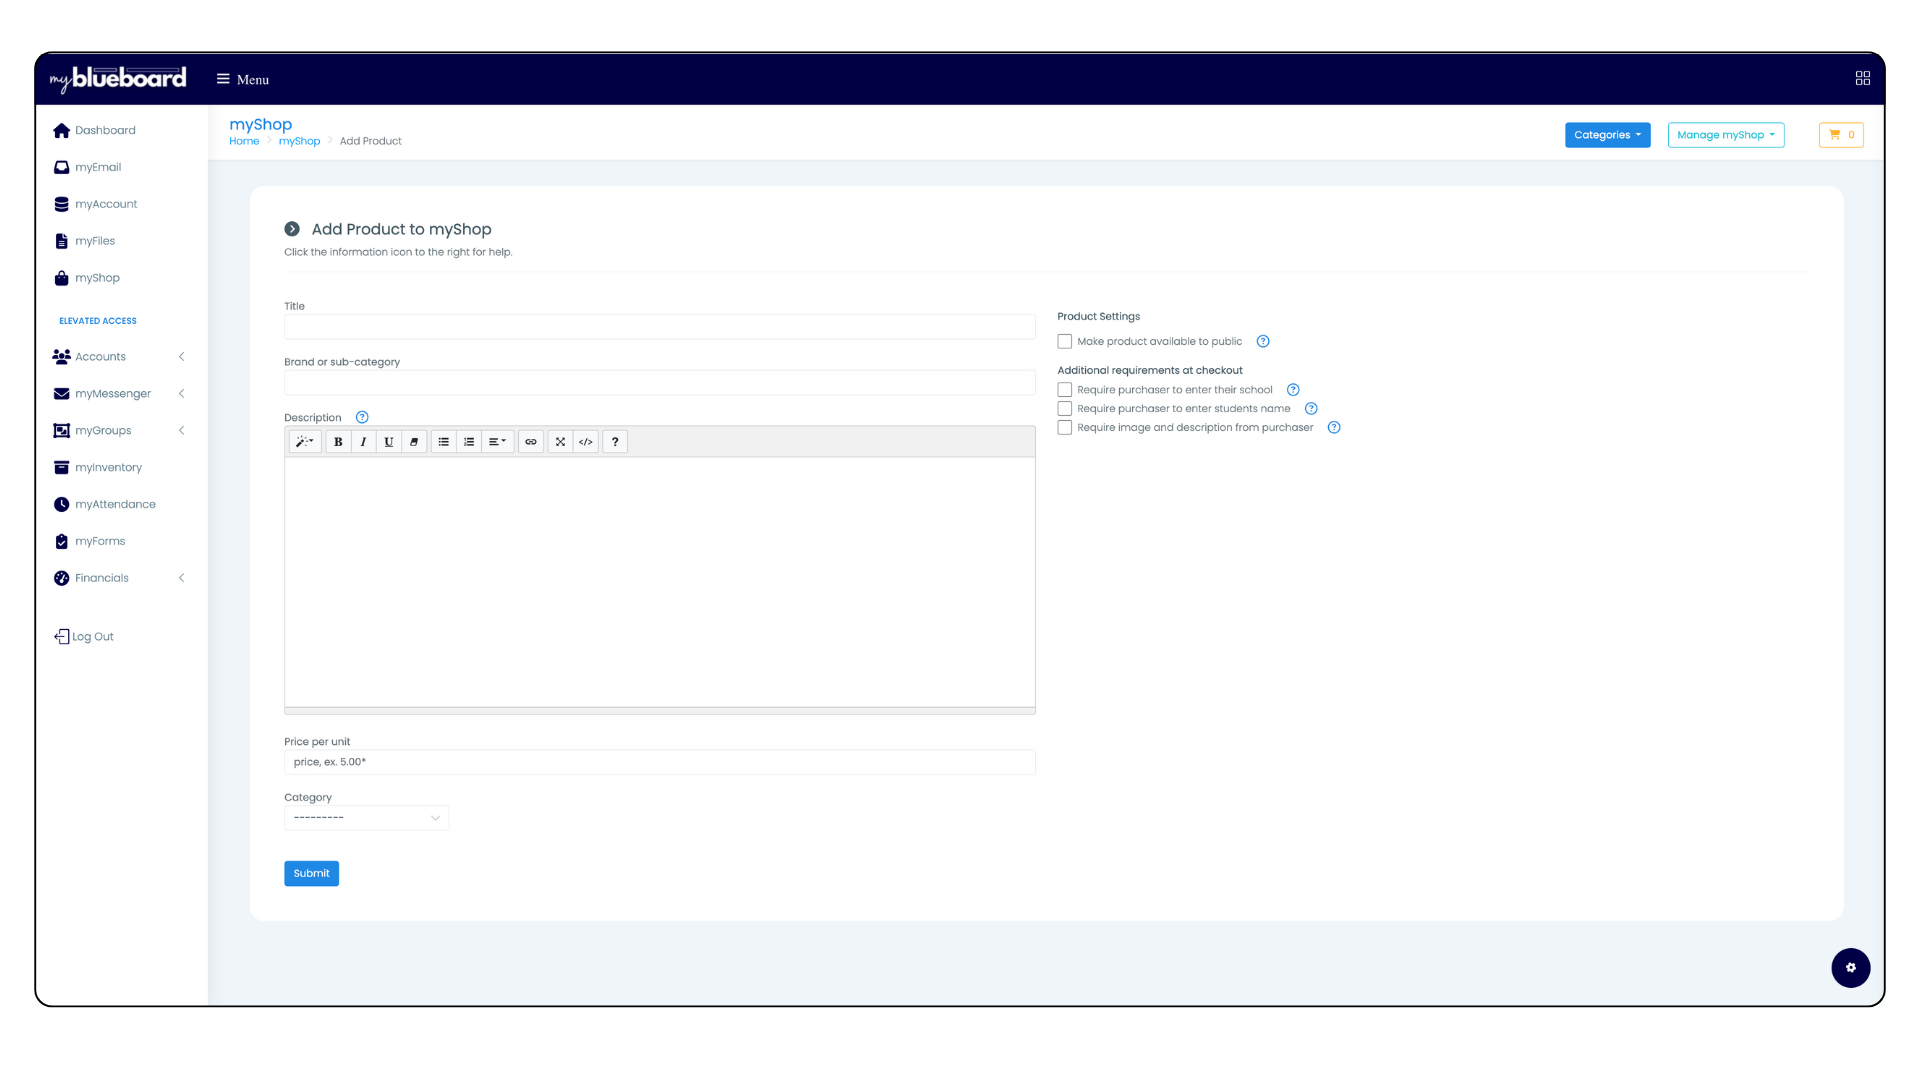
- Add the product Title, Brand / Sub-category, Price, and Category. (Image 7).
- Under Product Settings, select the checkbox to make the item available to the public (Image 8). If you do not select this checkbox, the item will only be available to your mybb account members.
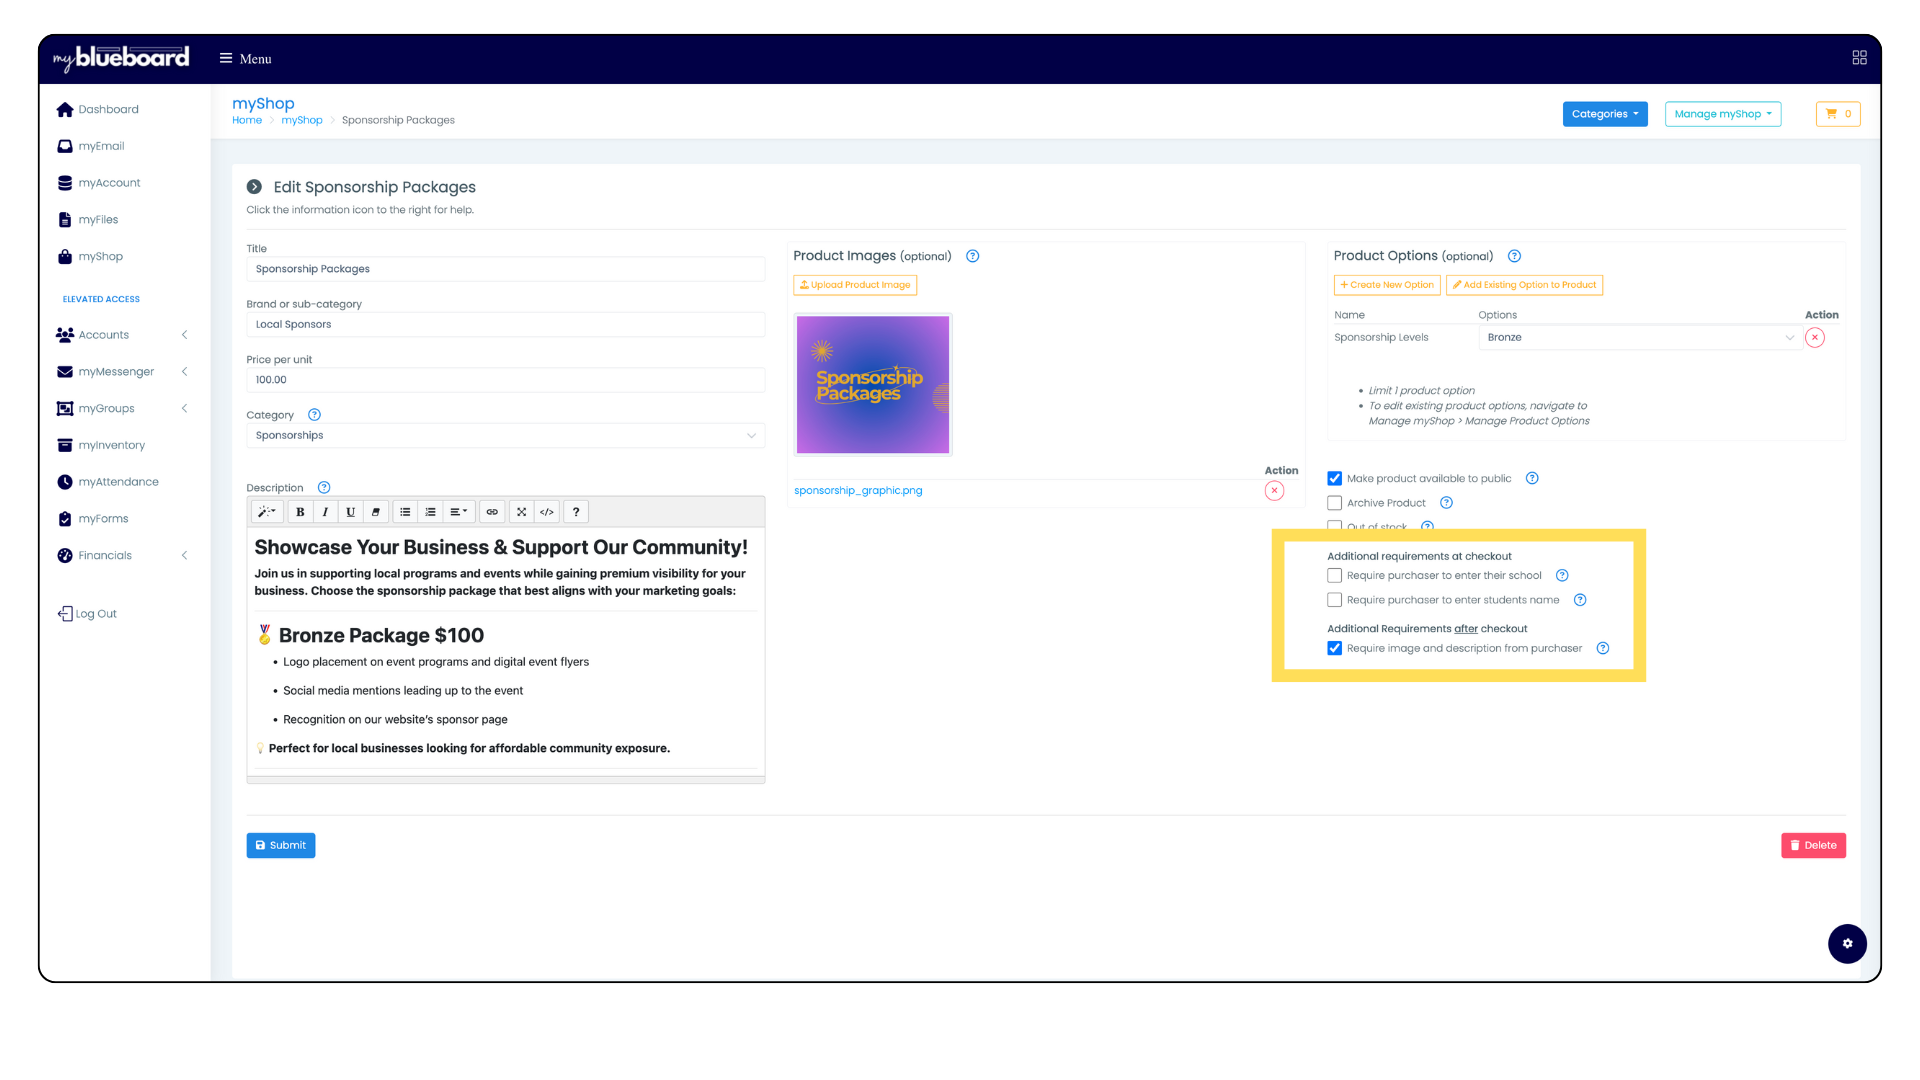
- Under Additional requirements at checkout, you can select checkboxes to require the purchaser to enter their school, require the purchaser to enter the student's name, and require image and description from purchaser (Image 9).
Adding Images
- Before you can add images to products, you must first create the product (with title, description, price, etc.) and click Submit.
- This will add the product to your shop.
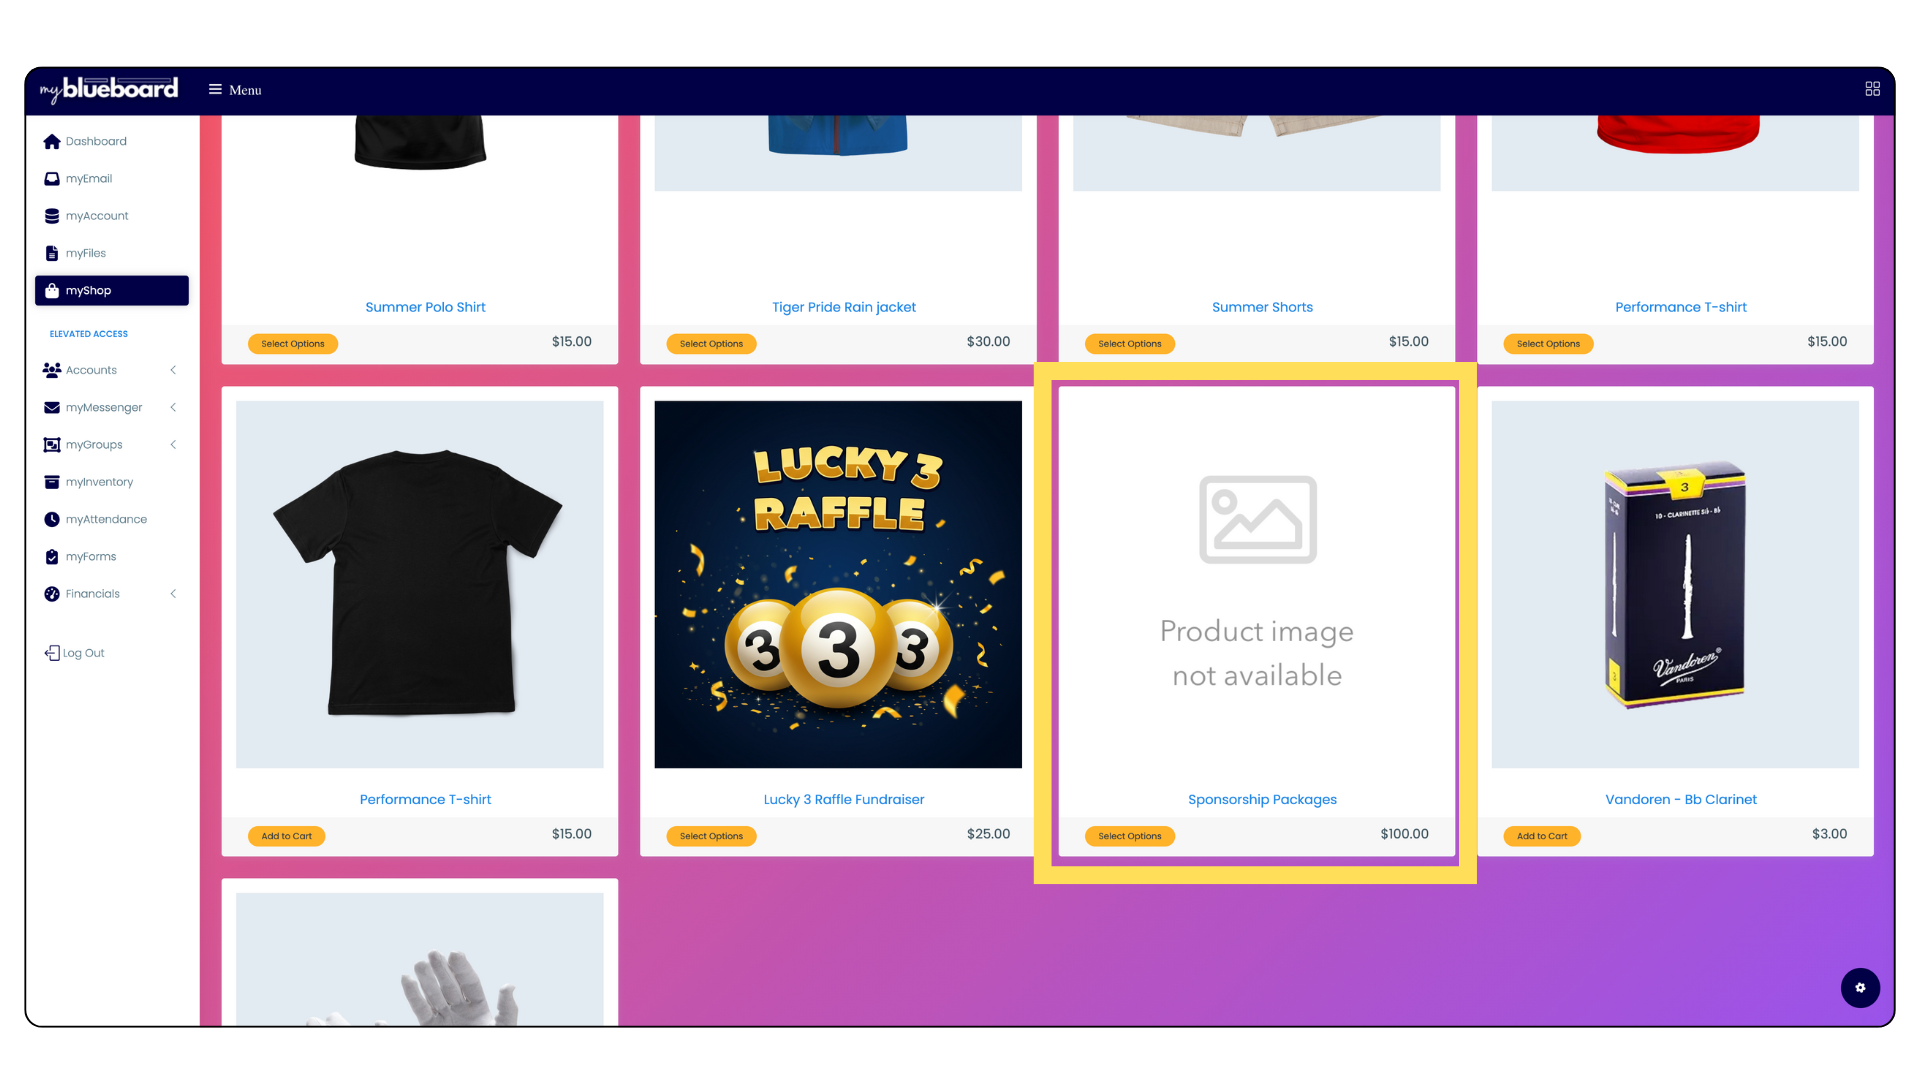
- From your myShop homepage, click on the title of the newly created product (Image 10).
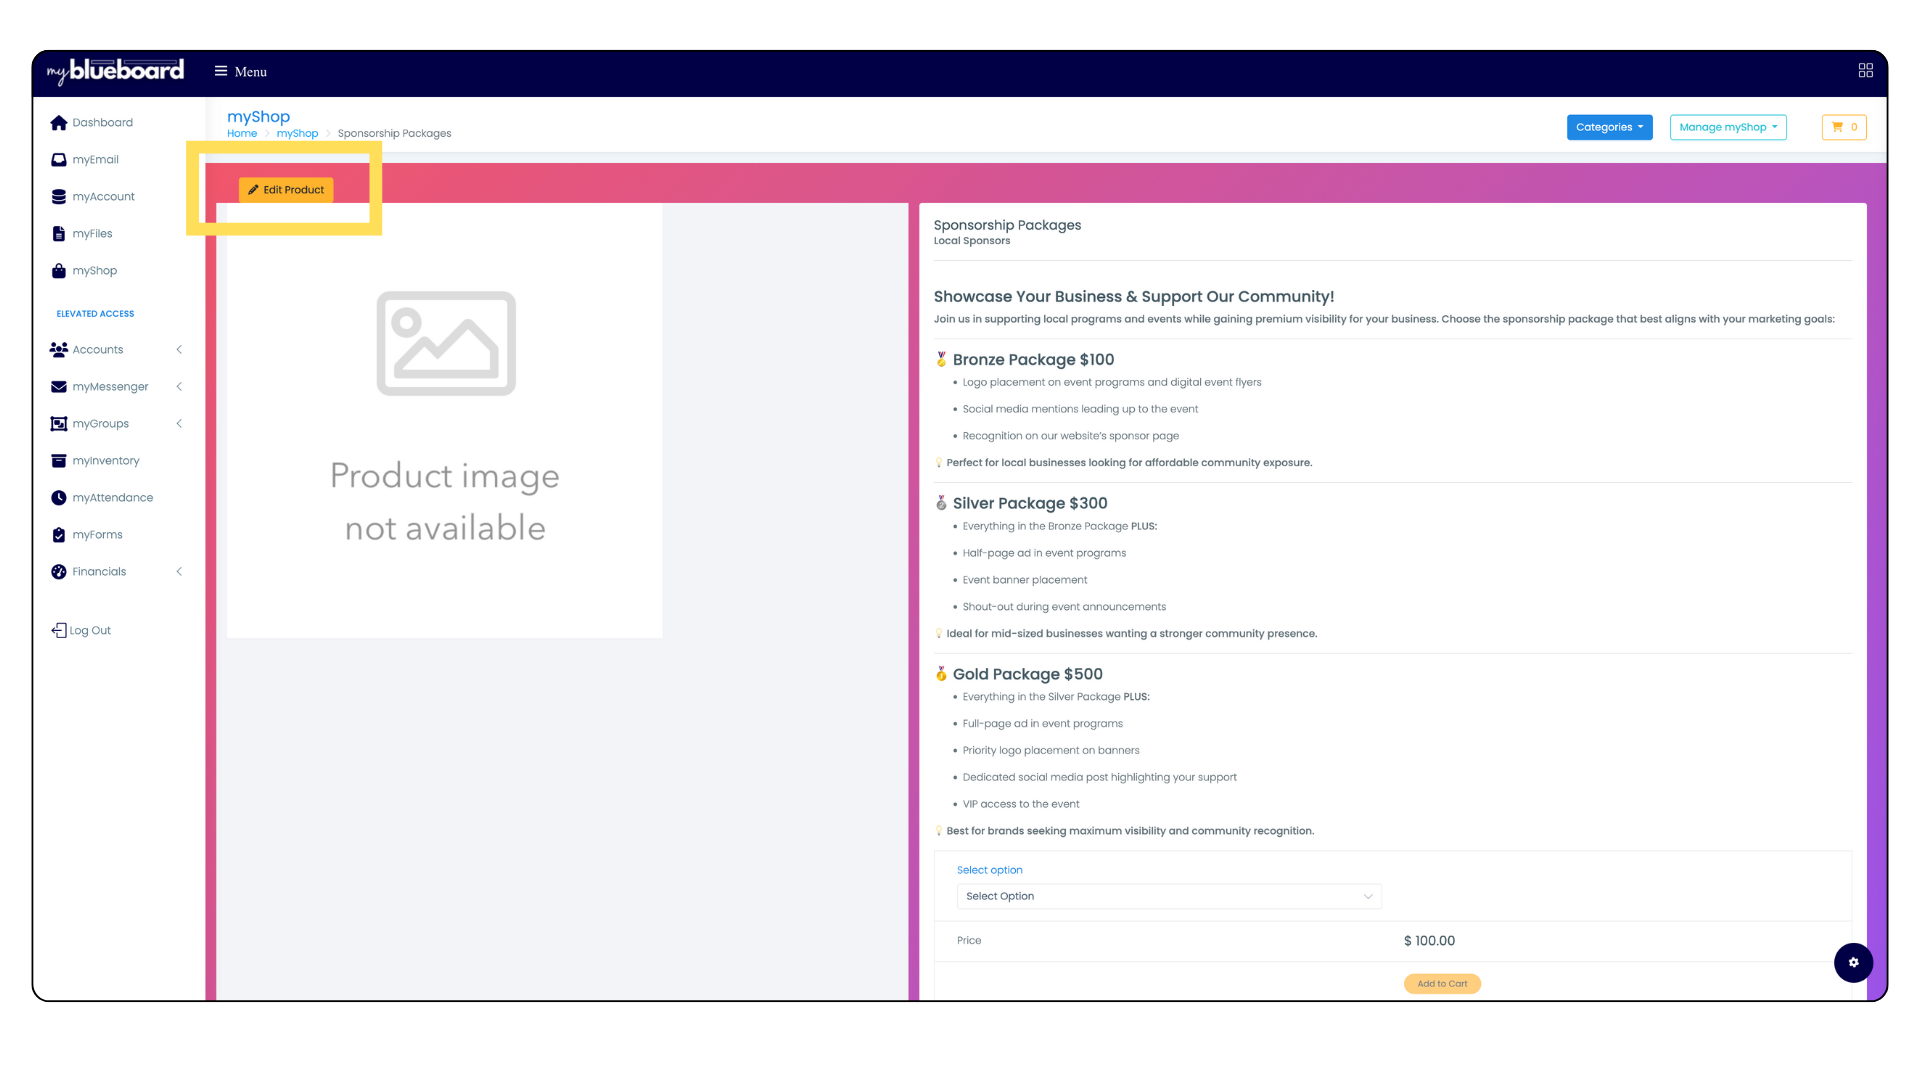
- Click the yellow Edit product button in the top left corner of the listing (Image 11).
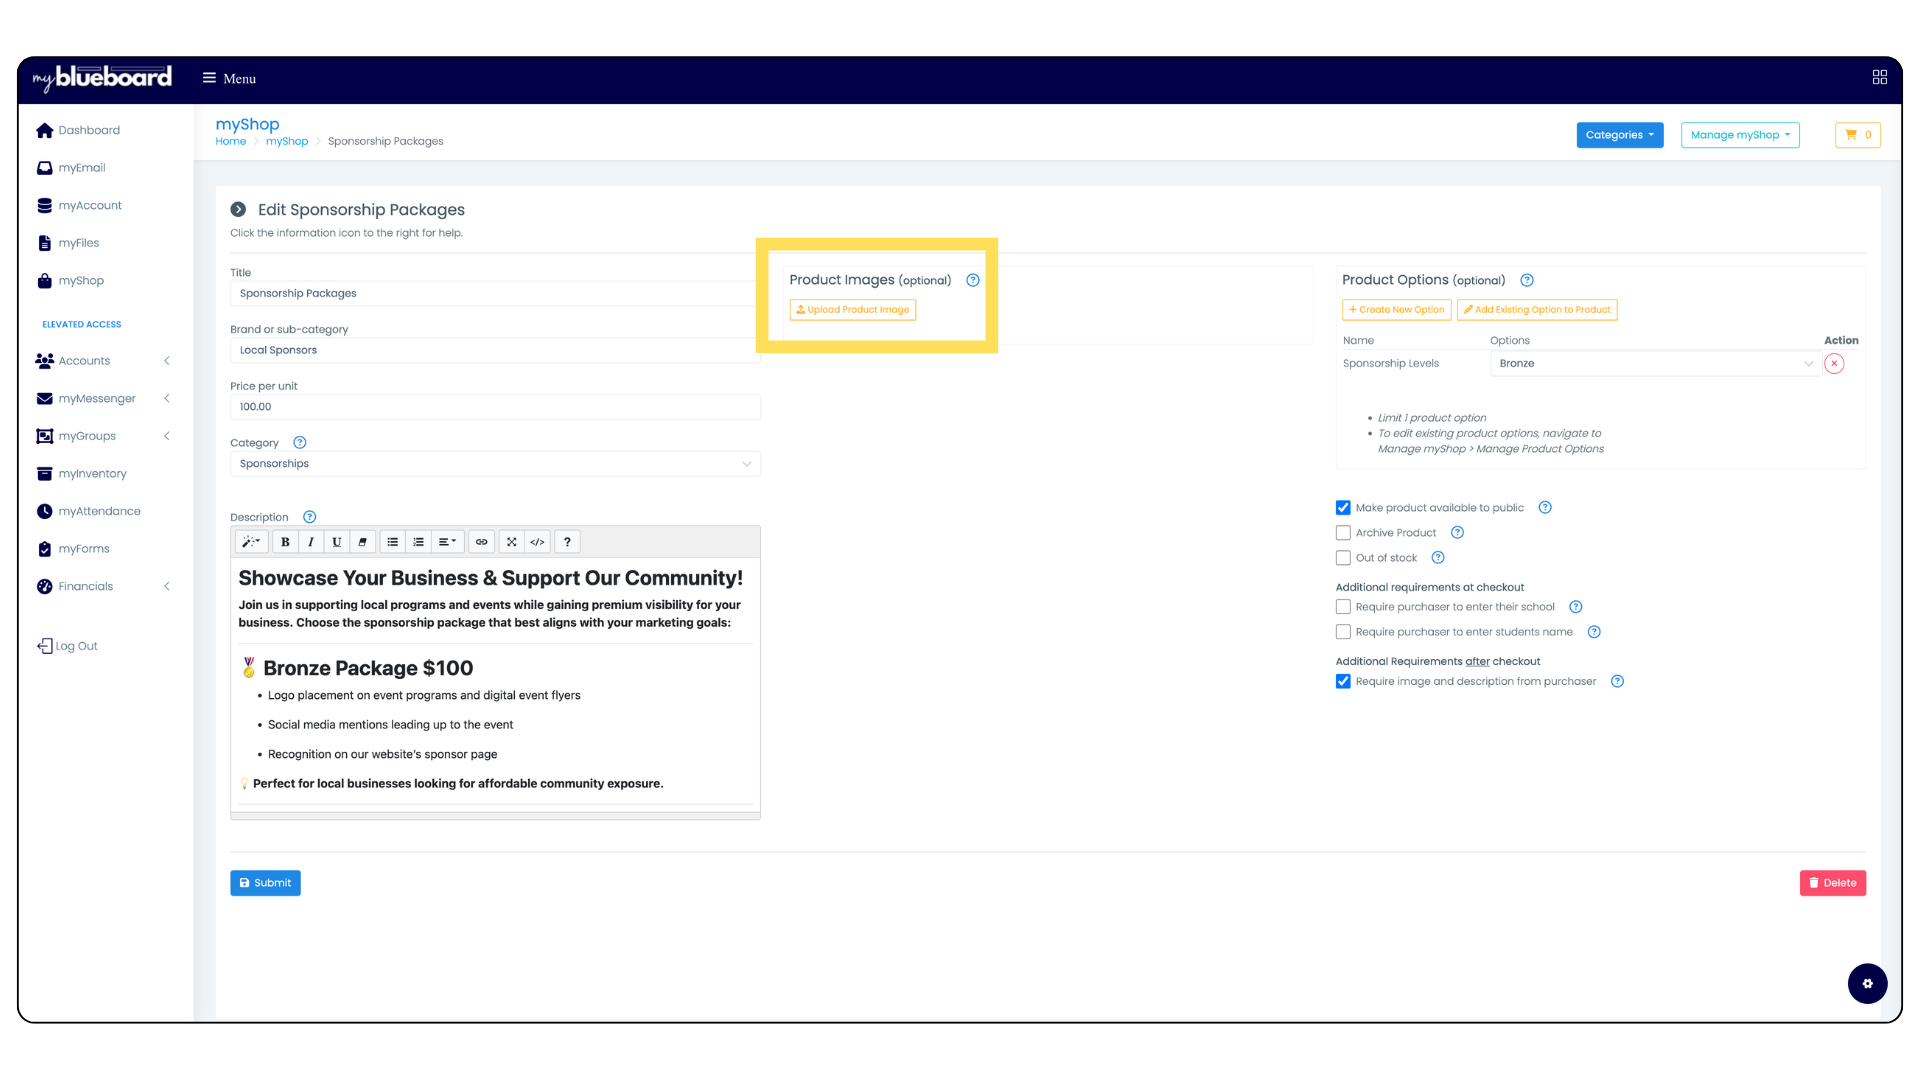
- In this view, you can add images by clicking the Upload Product Images button (Image 12).
- Crop images to approx. 4:5 or 5:7 ratio.
- Try to stay under 1000px for width or height. Doing this will improve how quickly the page loads.
- Use multiple images with multiple angles.
- Upload images in the order you want them to be viewed.
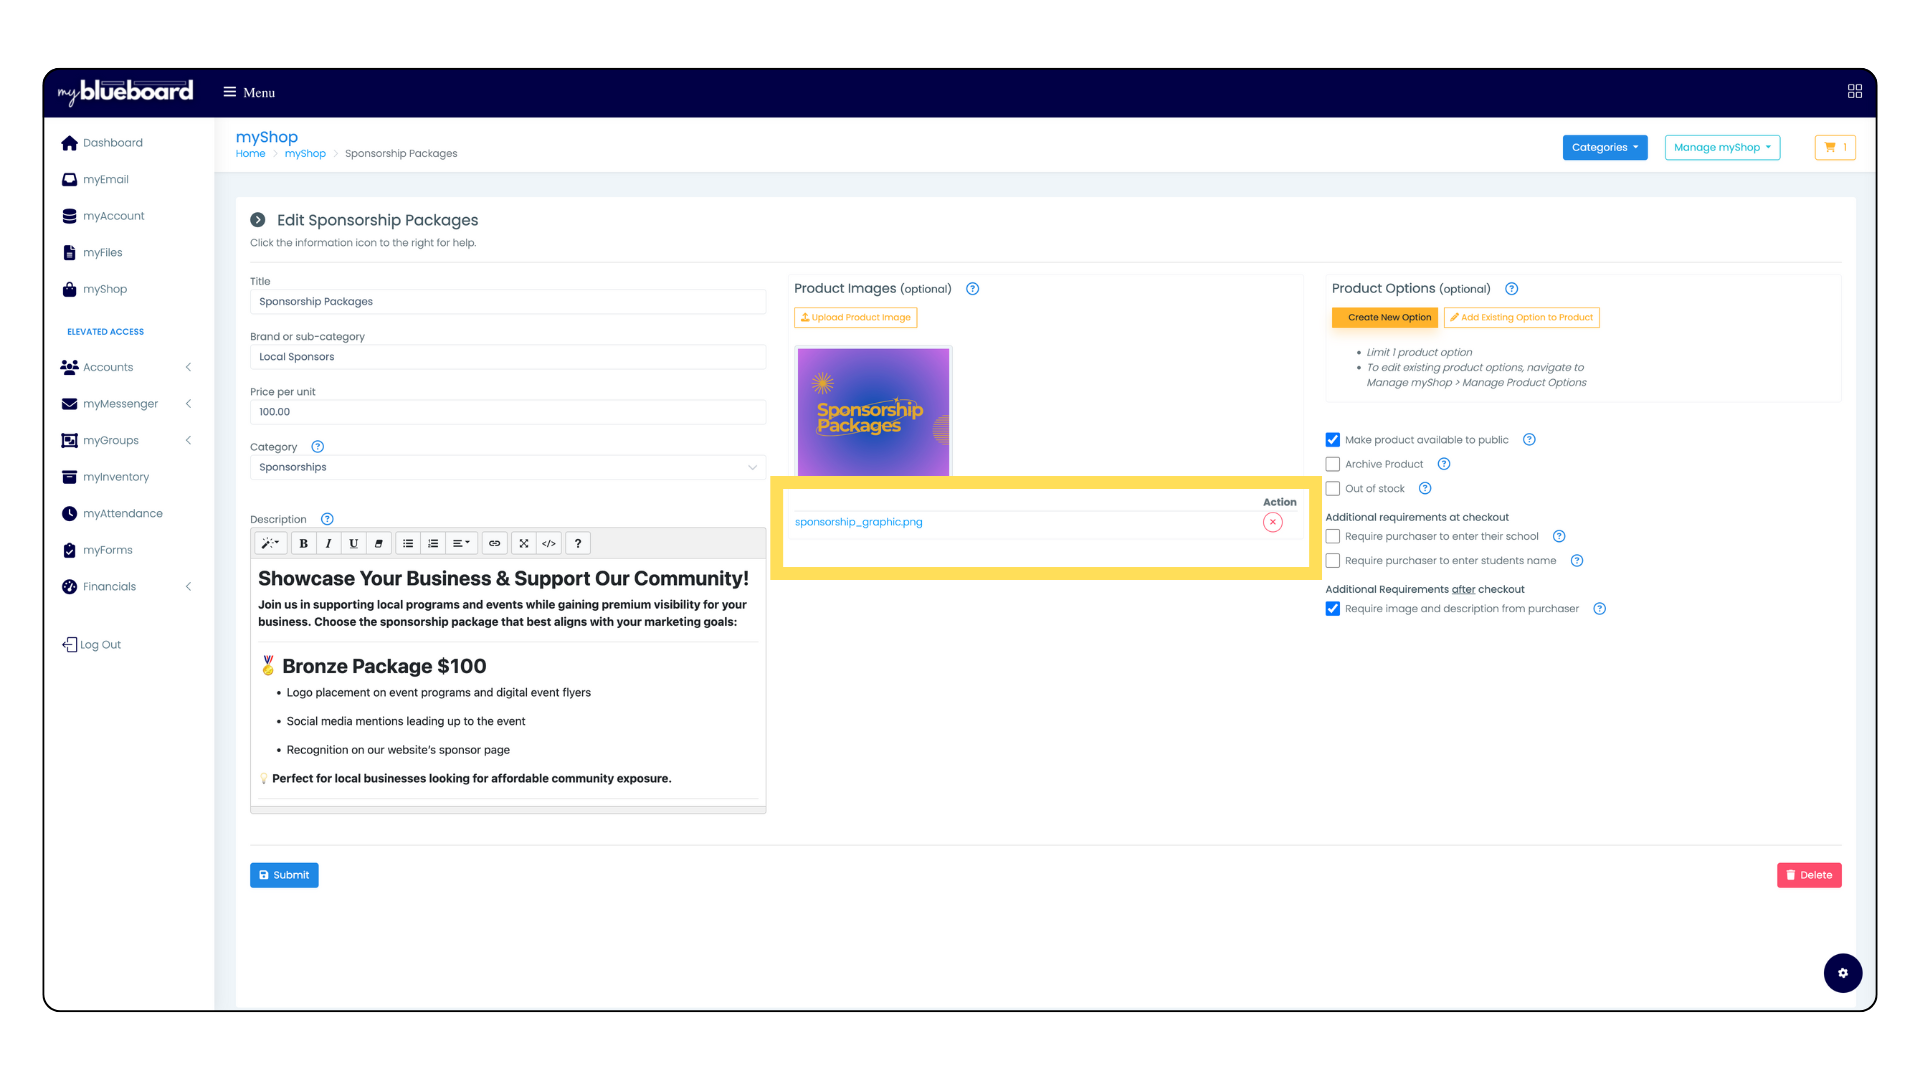
- Remove an image by clicking the red X next to the image name (Image 13).
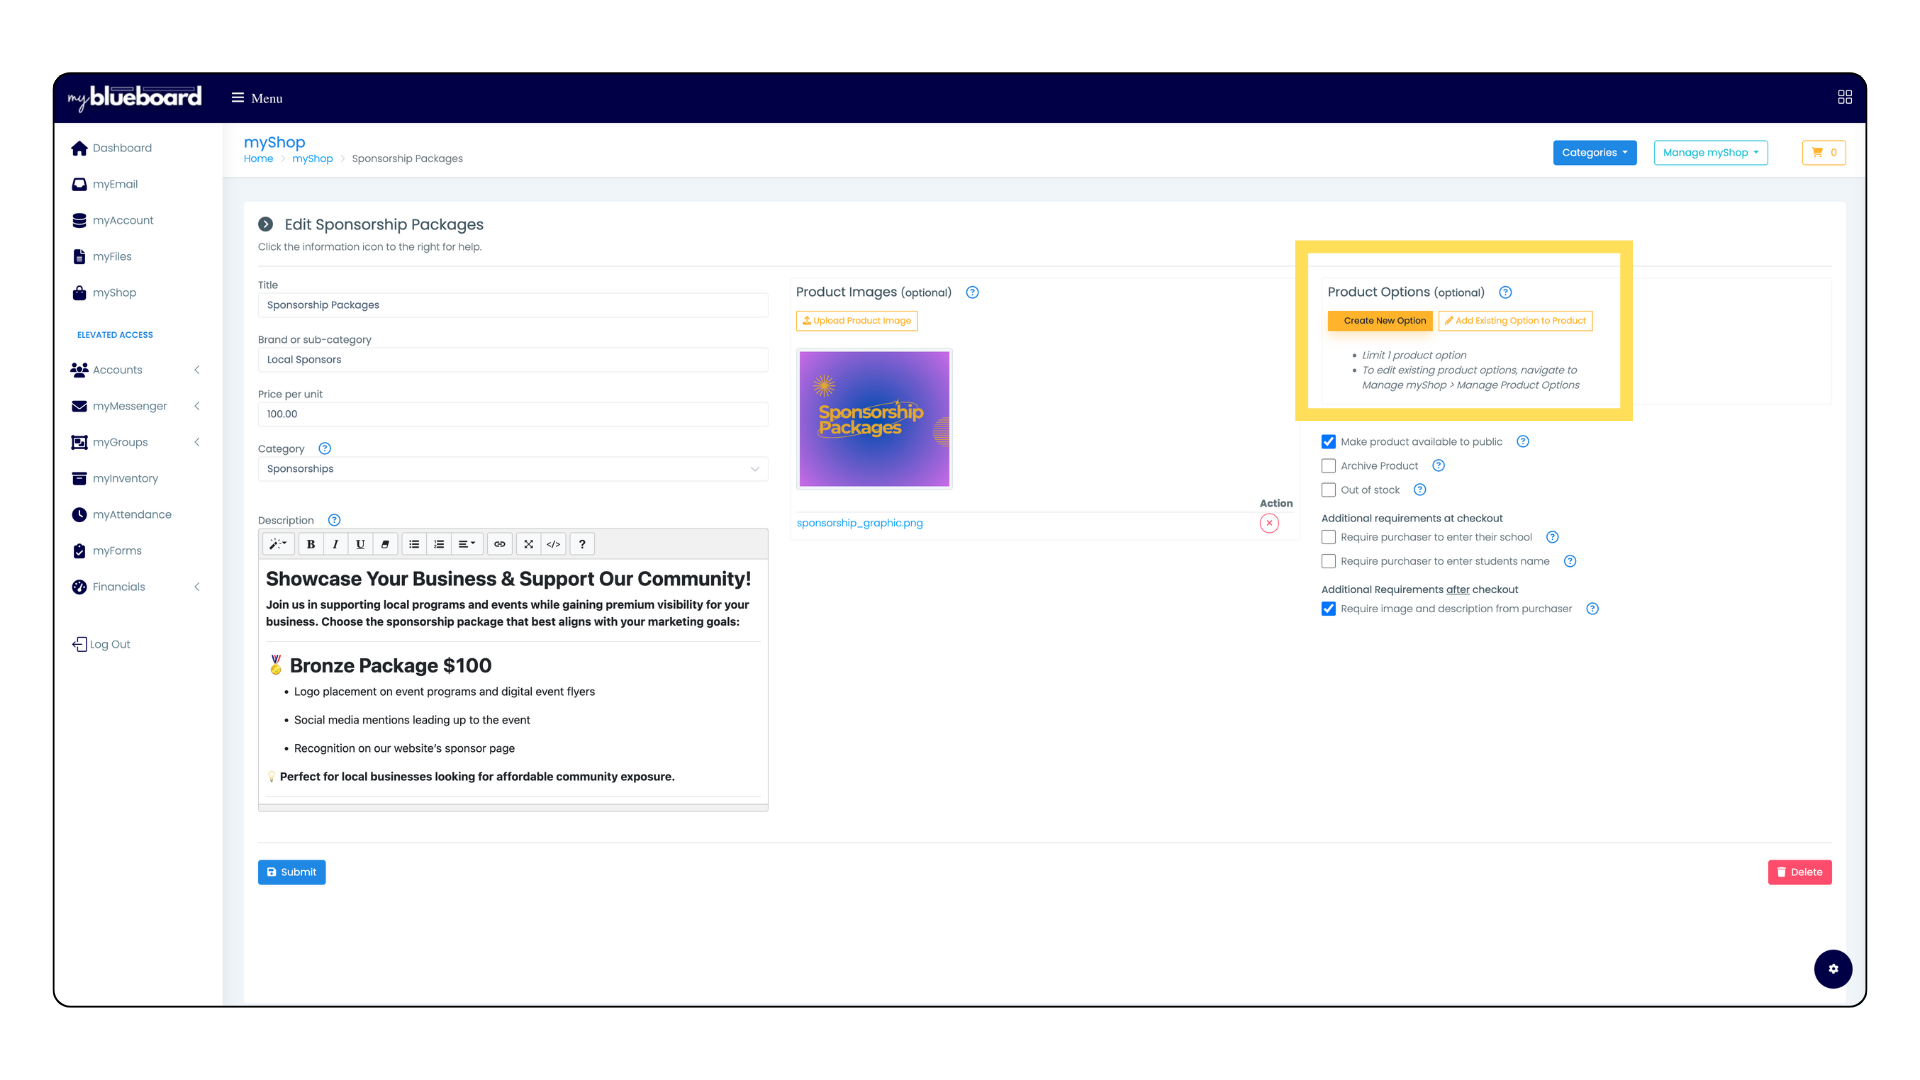
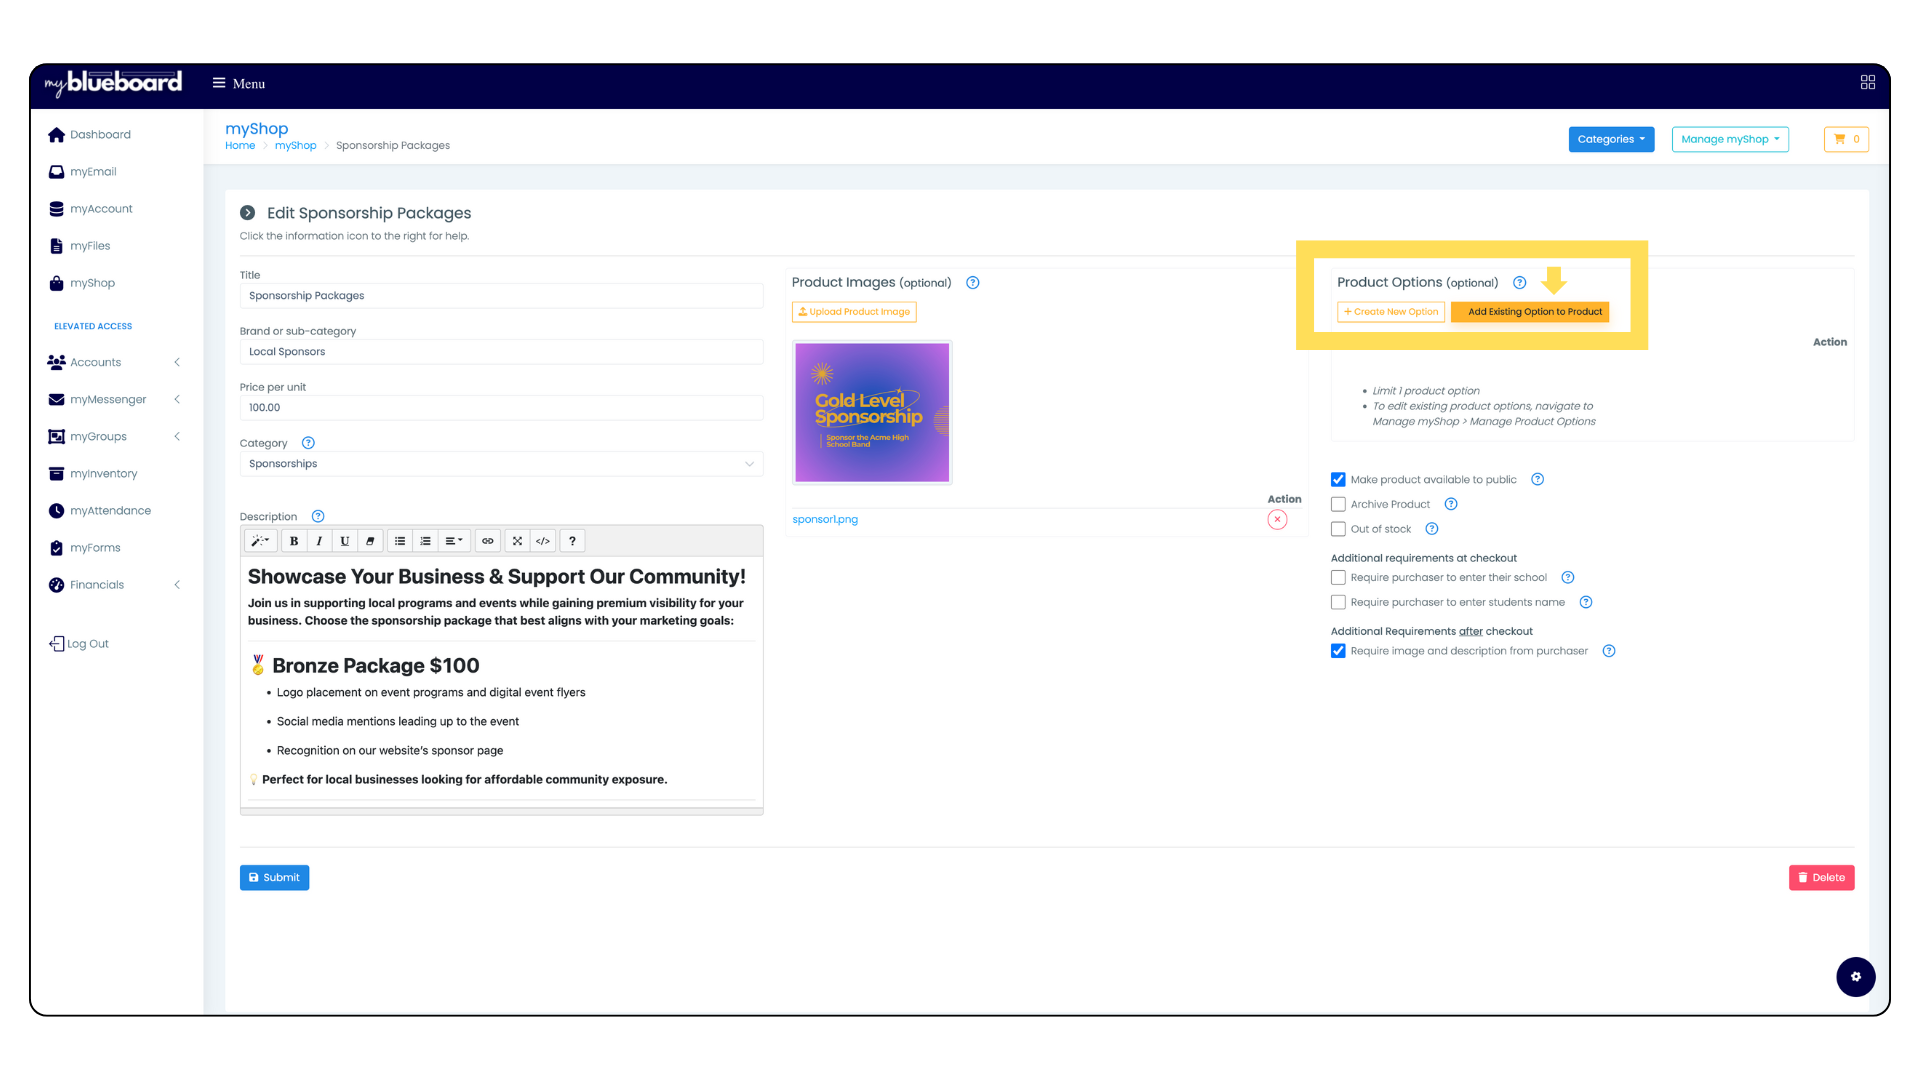
Product options are used for adding colors, sizes, levels, or any other choice selection to your product listings.
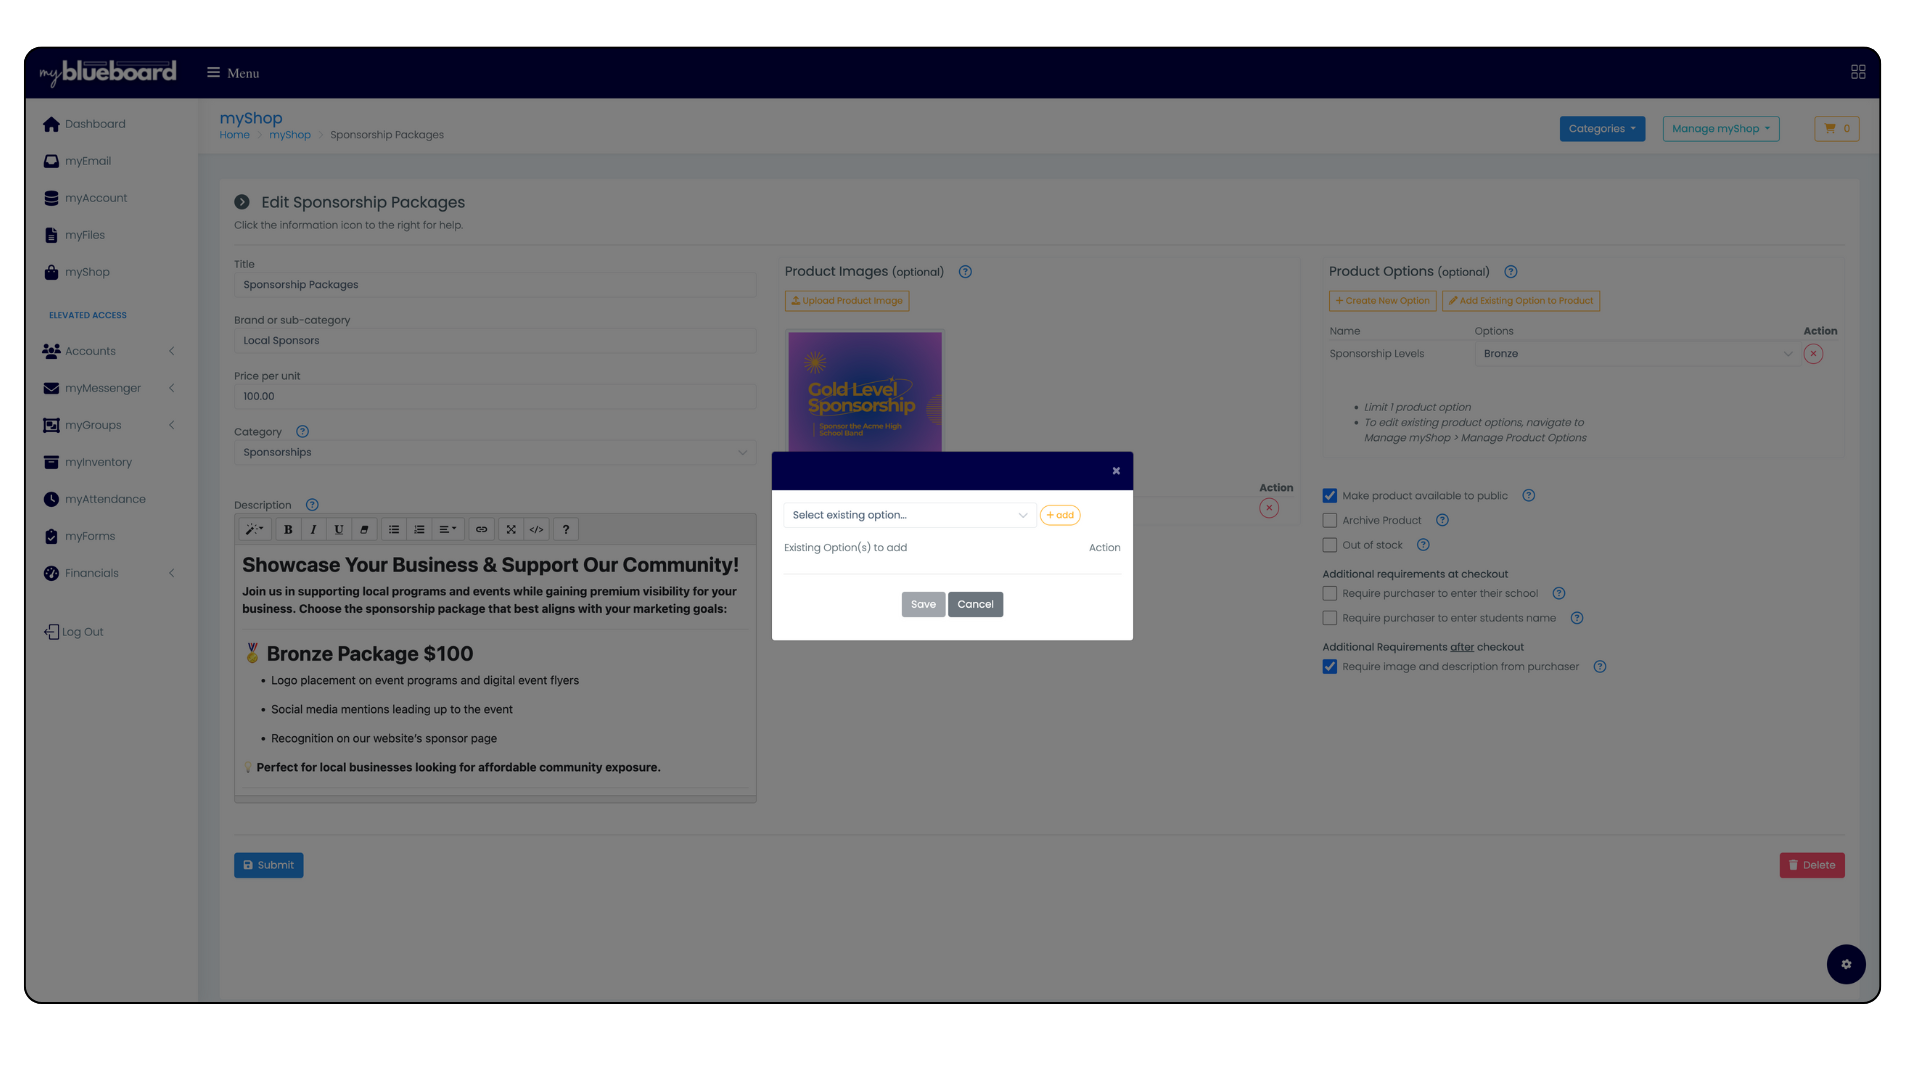
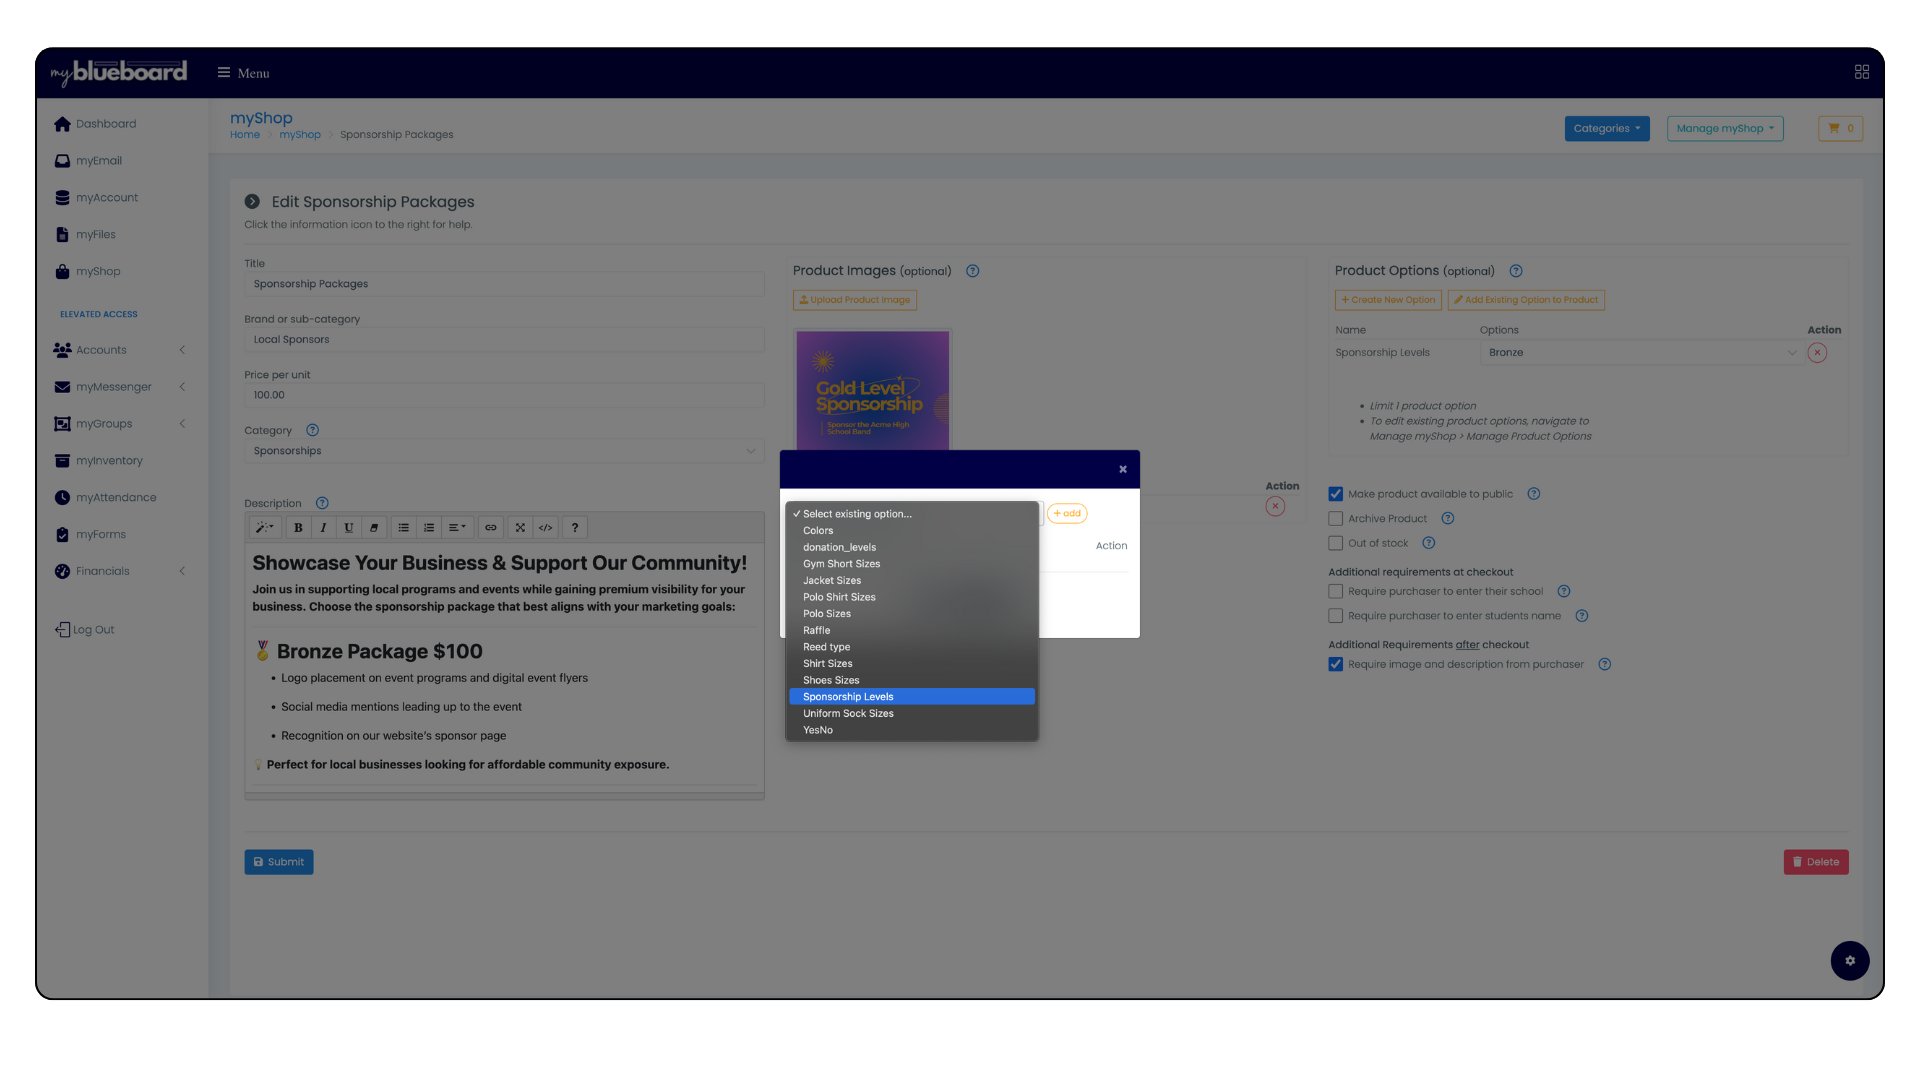
Click the Create New Product Option button (Image 14). (If you are using a previously created option, click the Add Existing Option to Product button.
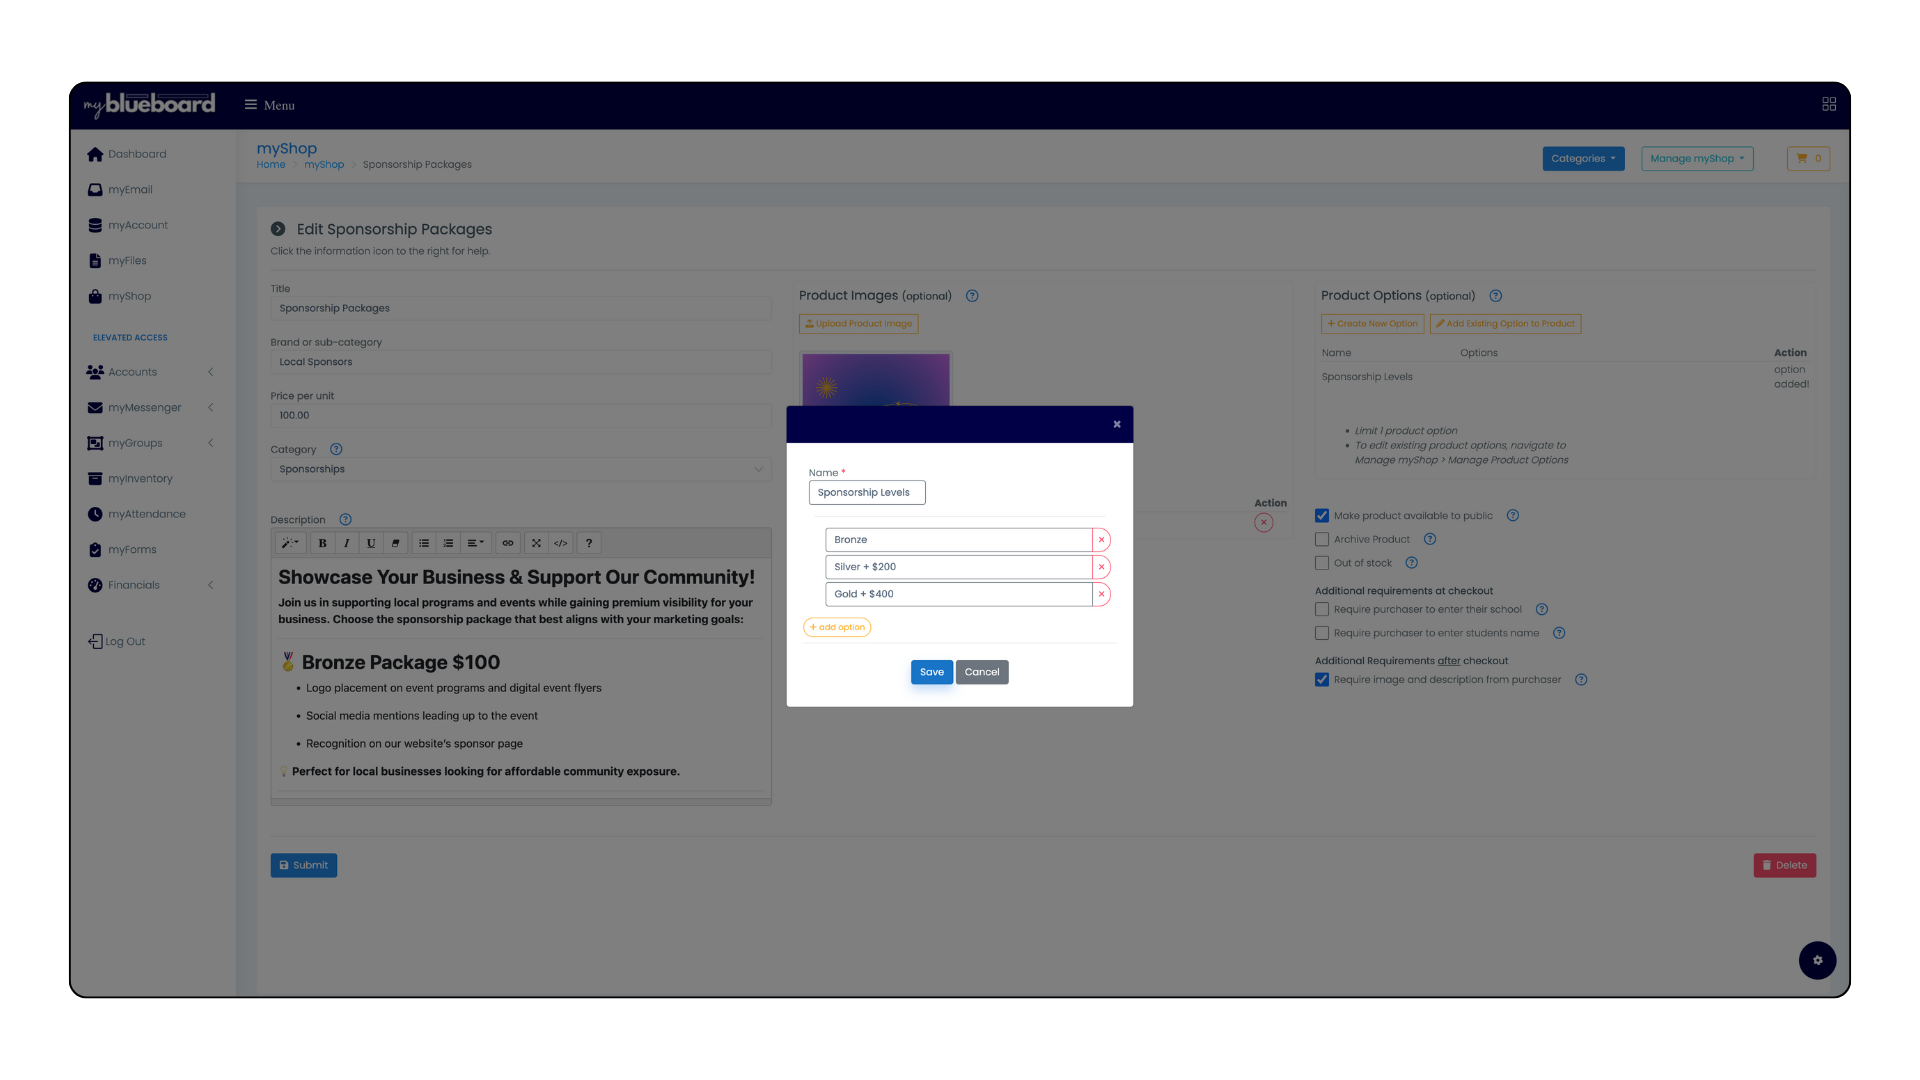
Create a product option name (ie. Sponsor Levels). Add your levels one at a time, starting with the lowest tier.
Click the yellow + button to add additional options (Image 15).
For each level after the base level, add the name of the level plus the additional cost.
For example, If Bronze is $100, Silver is $300, and Gold is $500, you would list the options like this:
1. Bronze
2. Silver + $200 (because the Silver package is $200 more than the base level of Bronze.
3. Gold + $400 (because the Gold package is $400 more than the base level of Bronze.
You do not need to add any pricing info next to the base level of Bronze, because you have already listed the price when you created your product.
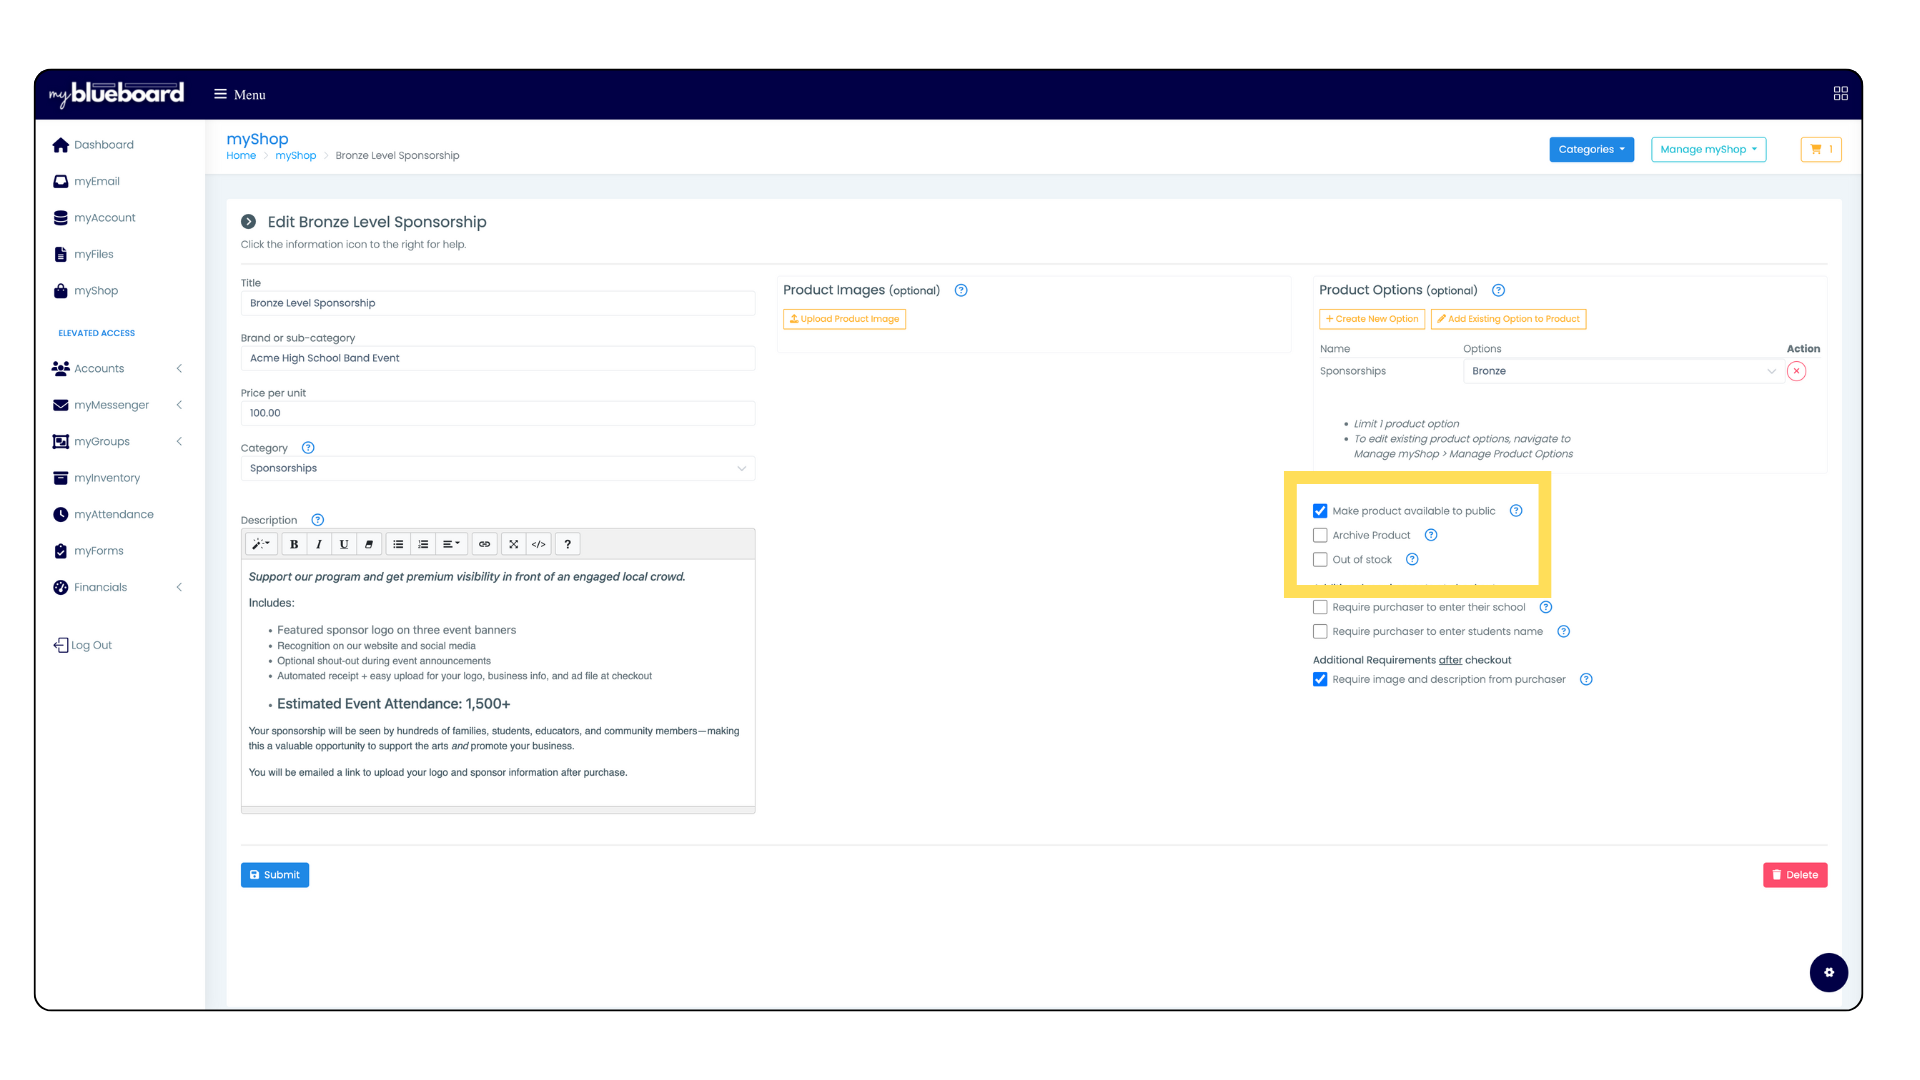
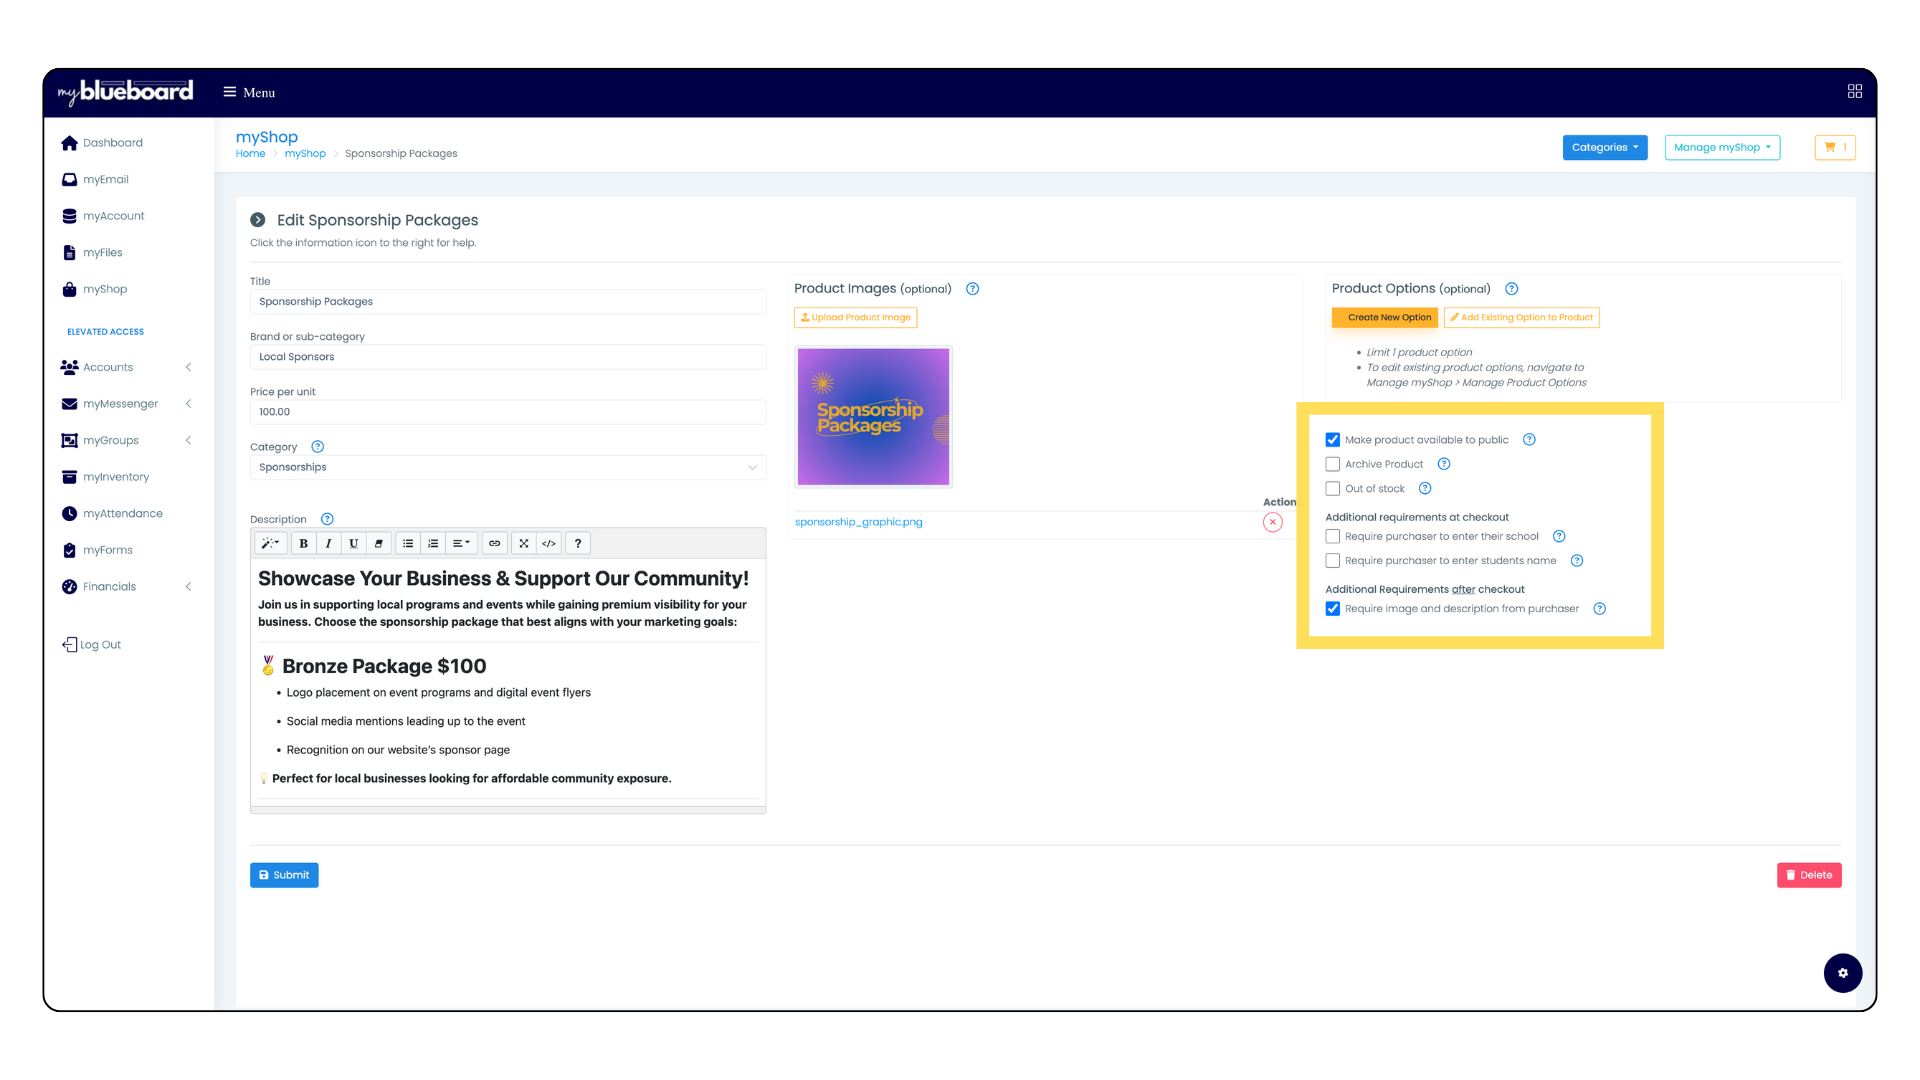
Click the Make product available to the public box and the Require image and description from purchaser box under Product Settings (Image 16).
Click the Submit button to save your listing.
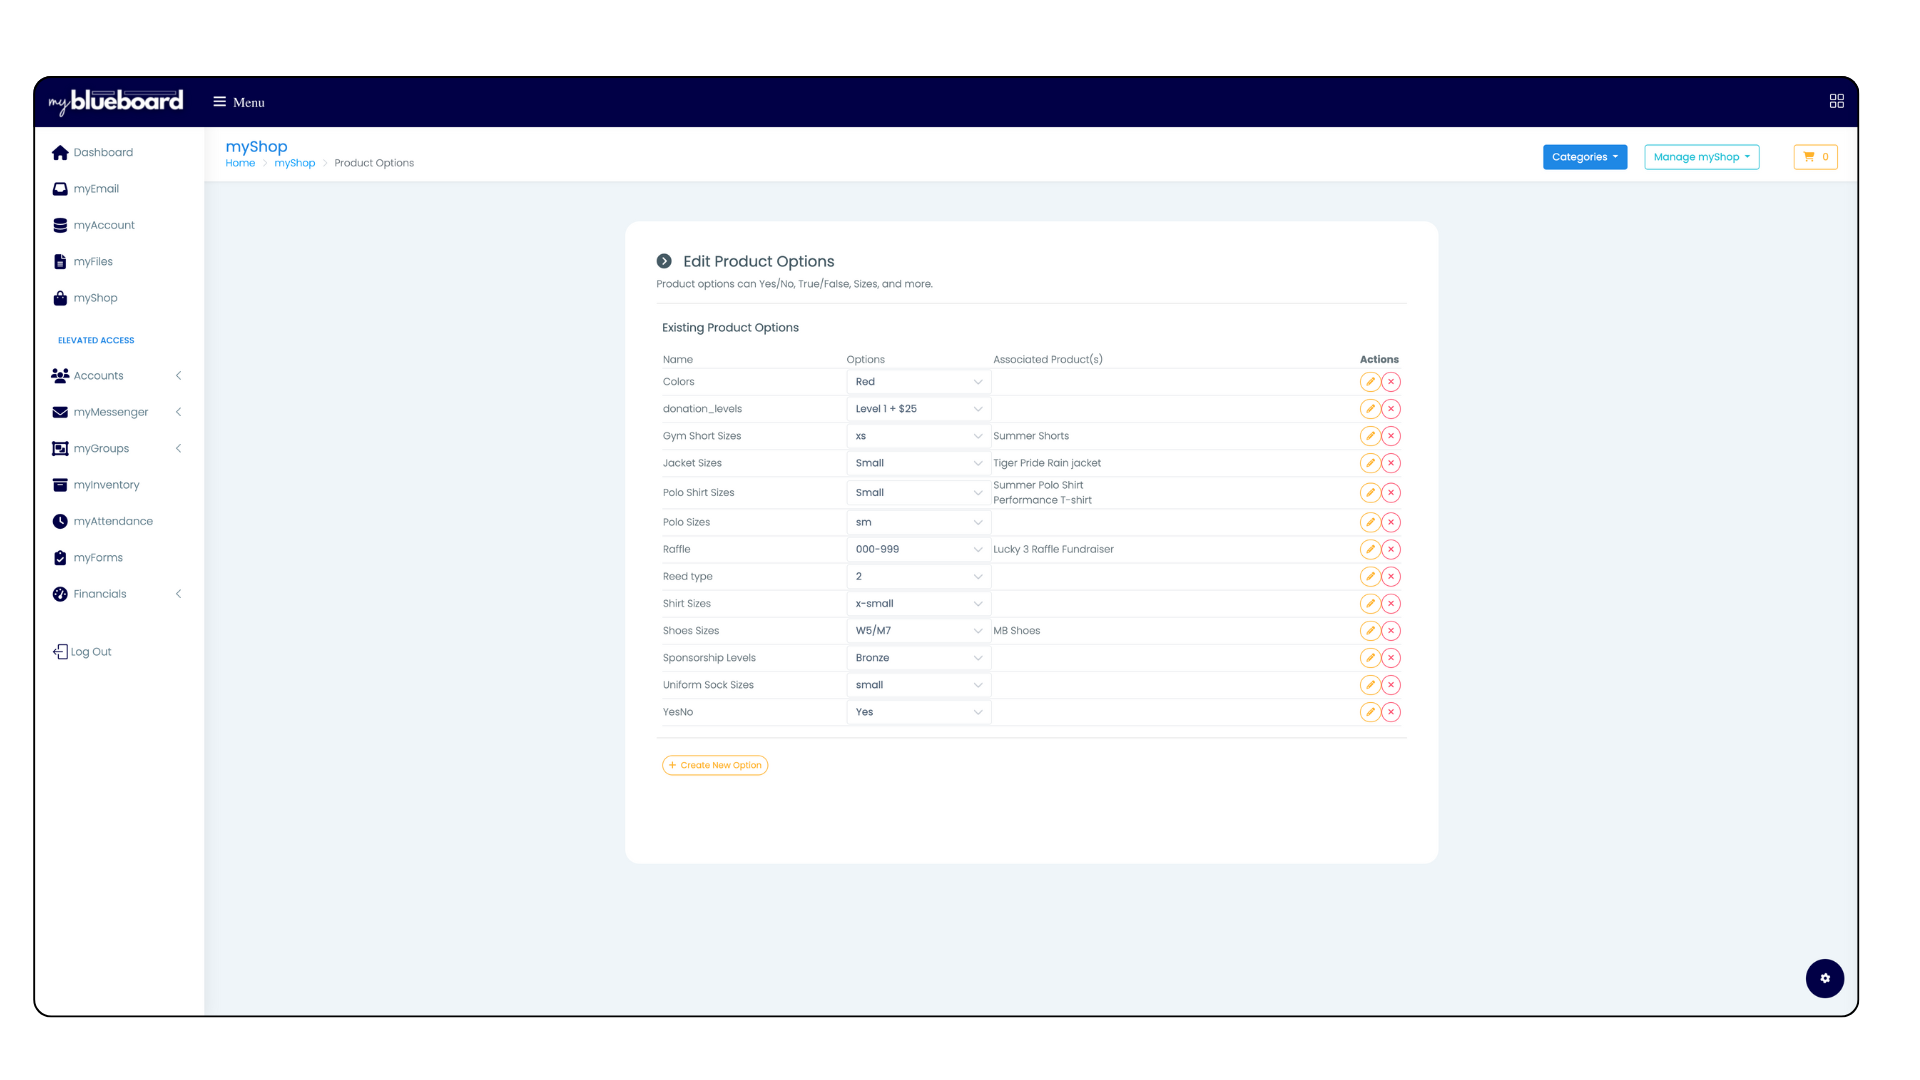
Managing Product Options
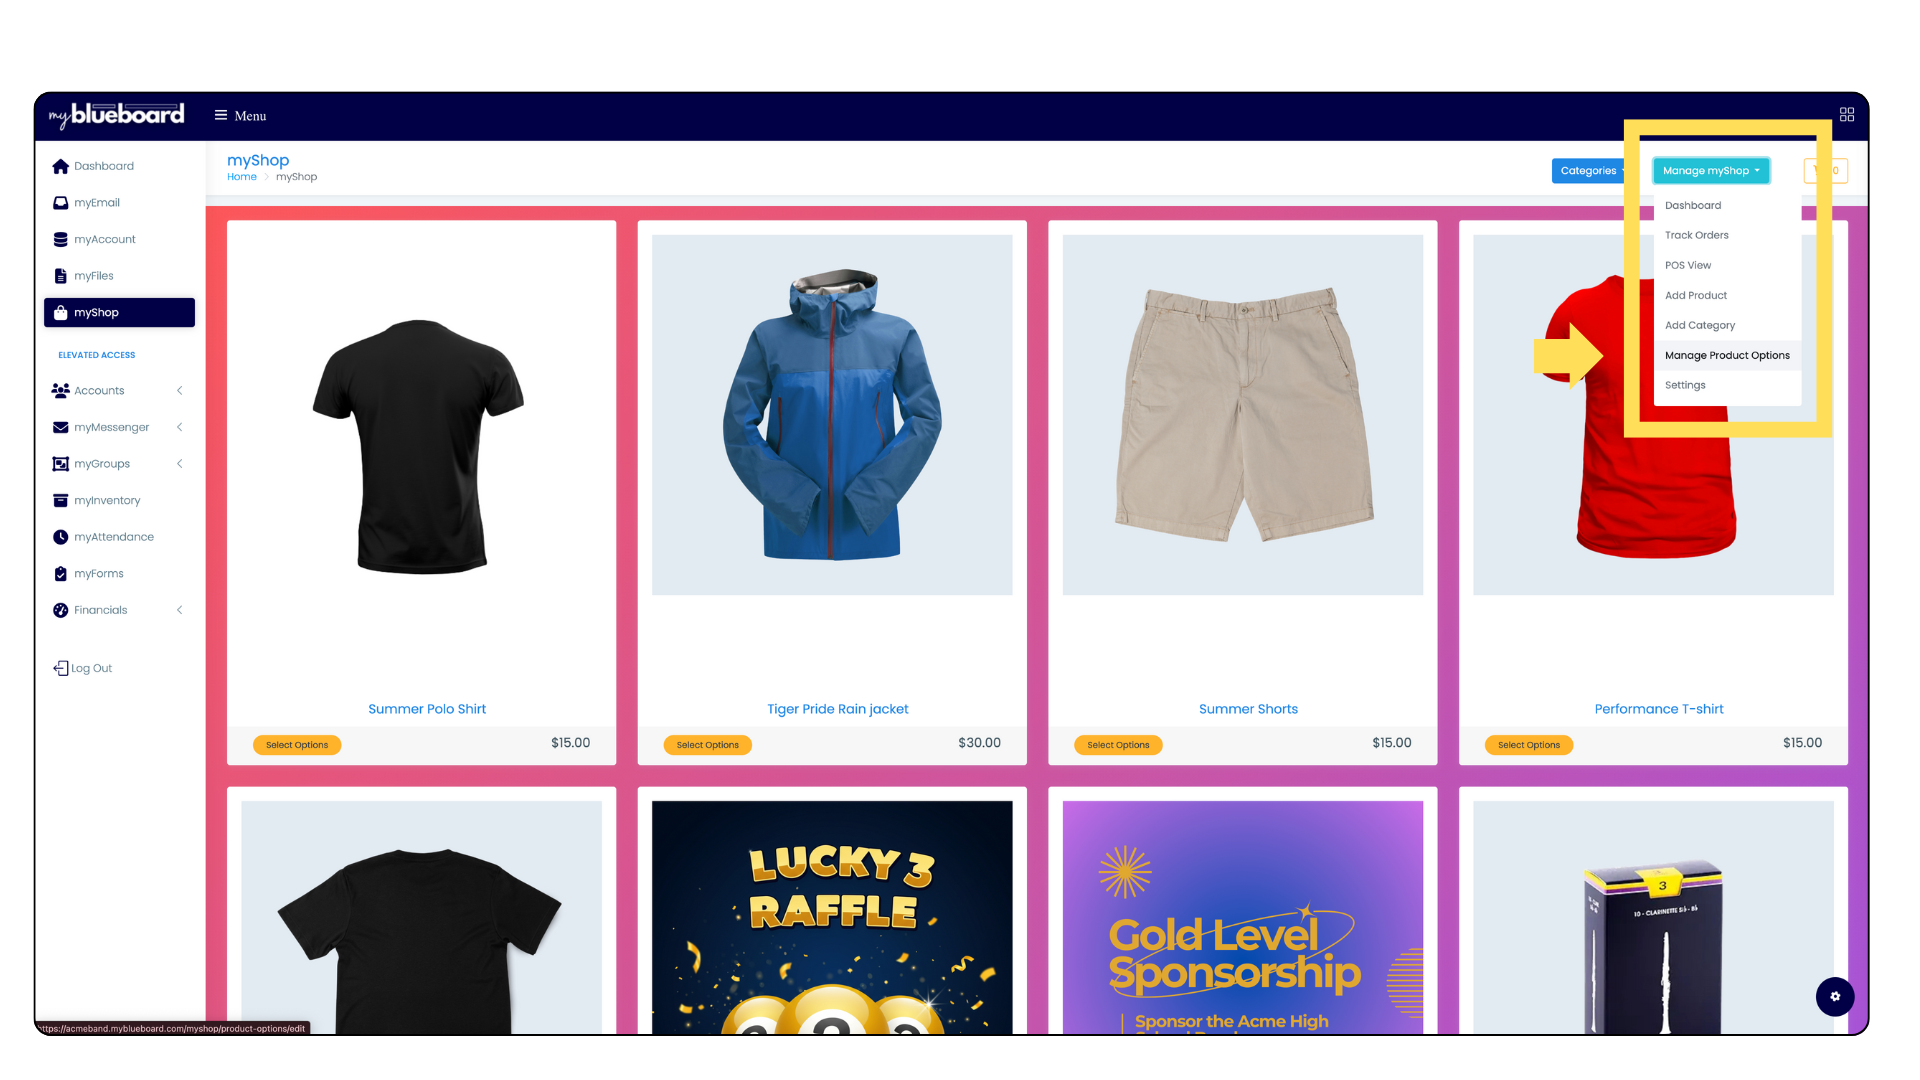
Select the Manage myShop button in the top right of your dashboard (Image 20).
Select Manage Product Options from the dropdown.
All existing product options will populate (and the products they are associated with) (Image 21).
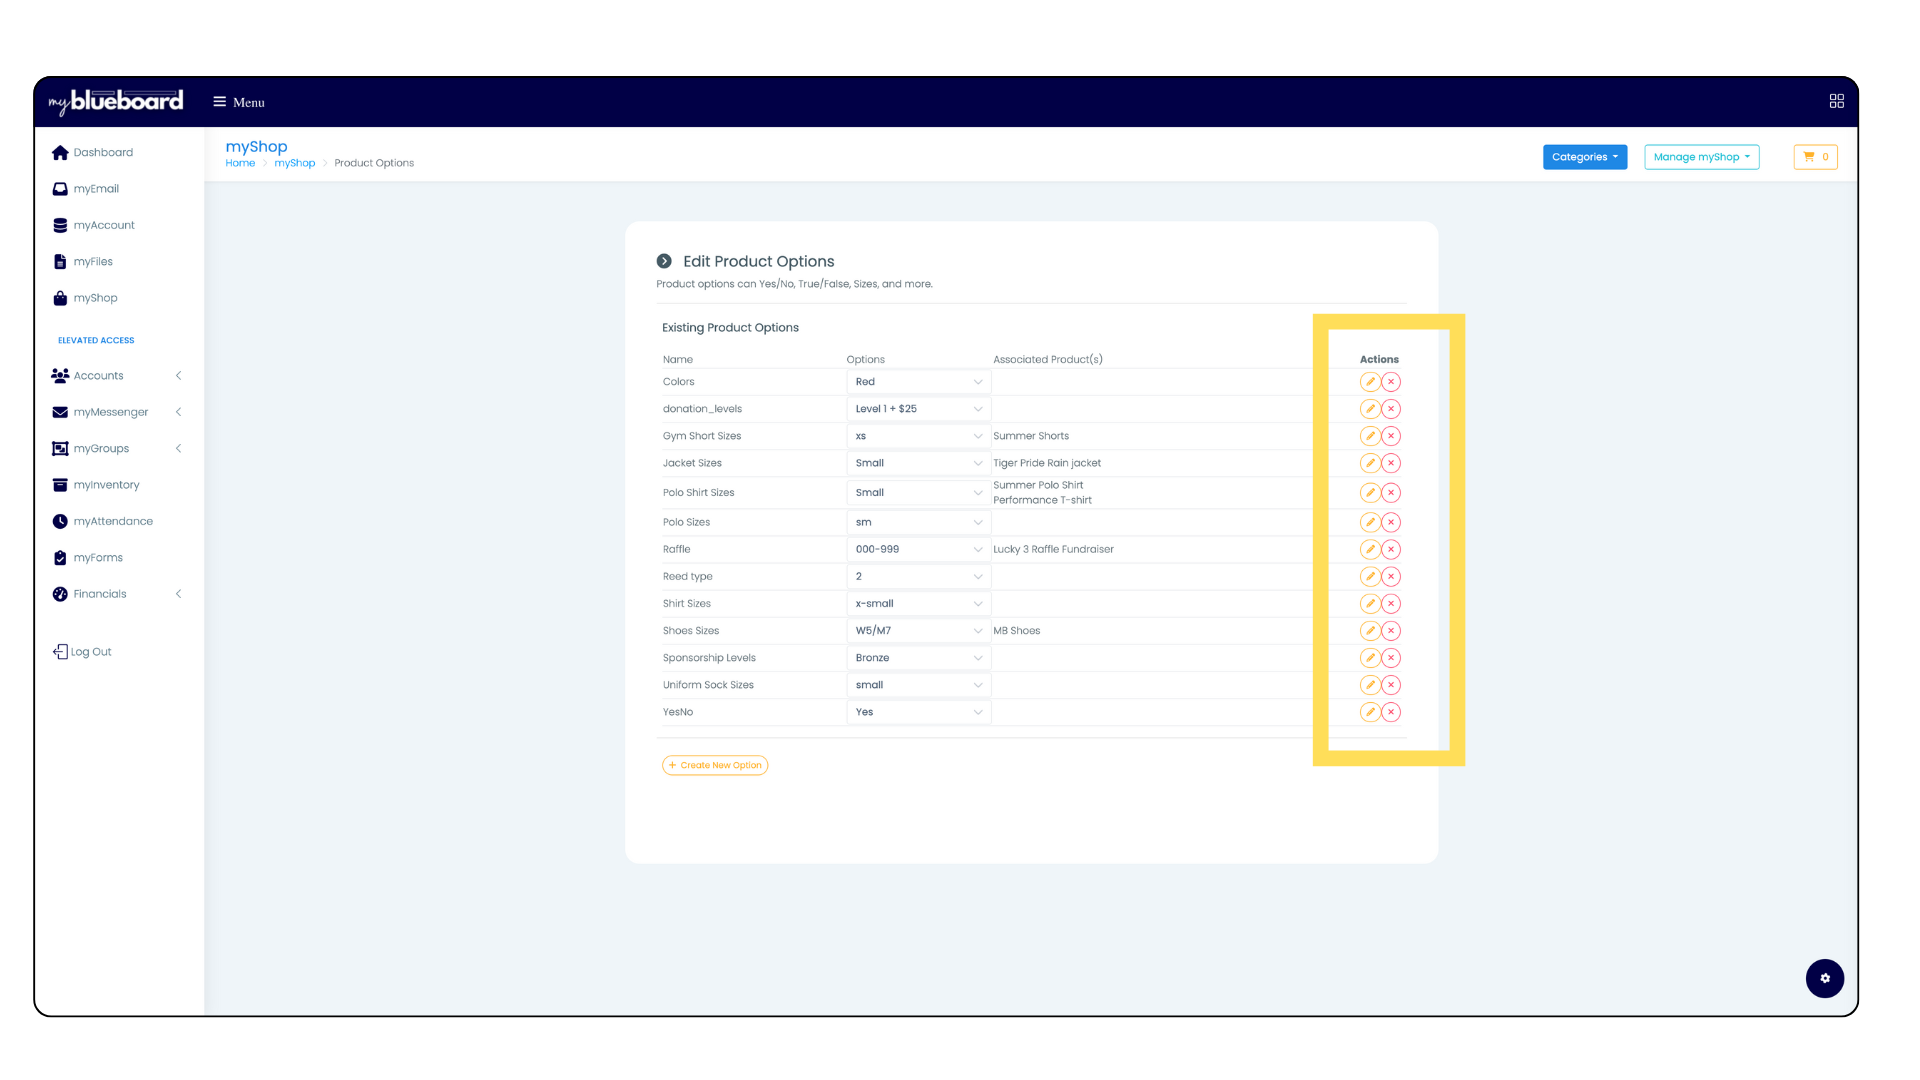
You can edit a product option by clicking the yellow Edit icon (Image 22).
You can delete product options by clicking the red X (Image 22).
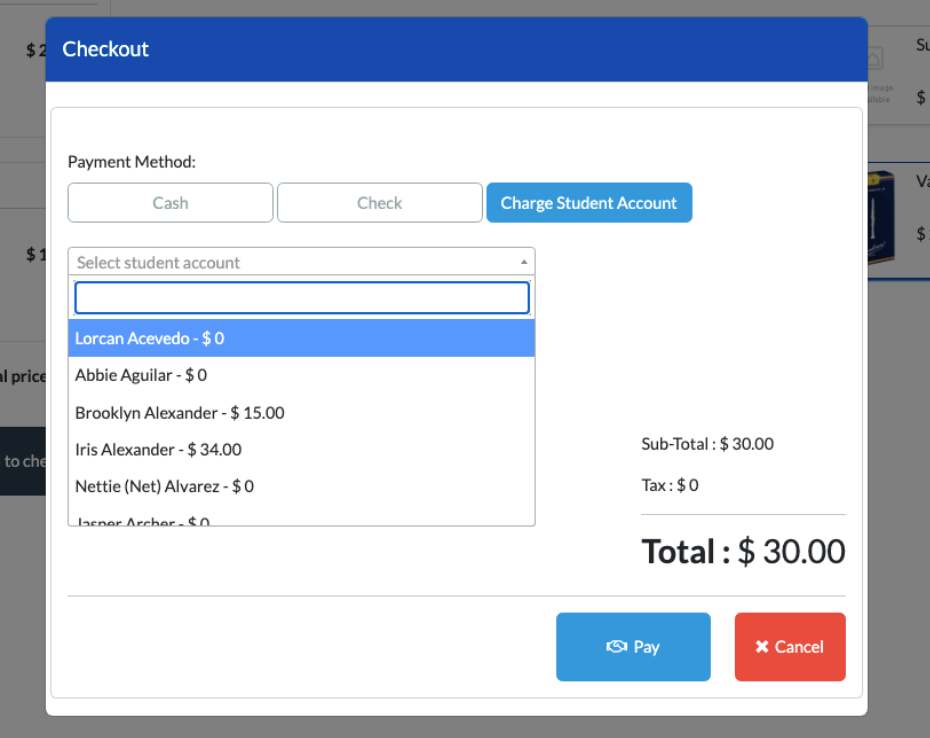
Charging to a Students Account
(Account Credits Enabled)
- If Enable Account Credits is checked under Update School Settings (found by selecting the Window icon in the top right corner of your dashboard), then the amount will be deducted from the student's available credit balance.
- When selecting a student's account, you will see their available credit balance next to their name in the dropdown (Image 23).
- If the student's account does not have enough funds to cover the cost, then their credit balance will show in the negative.
- If students bring cash or a check to bring their account current, then you can simply apply the funds to their account by
adding a credit in
Account Credits view.
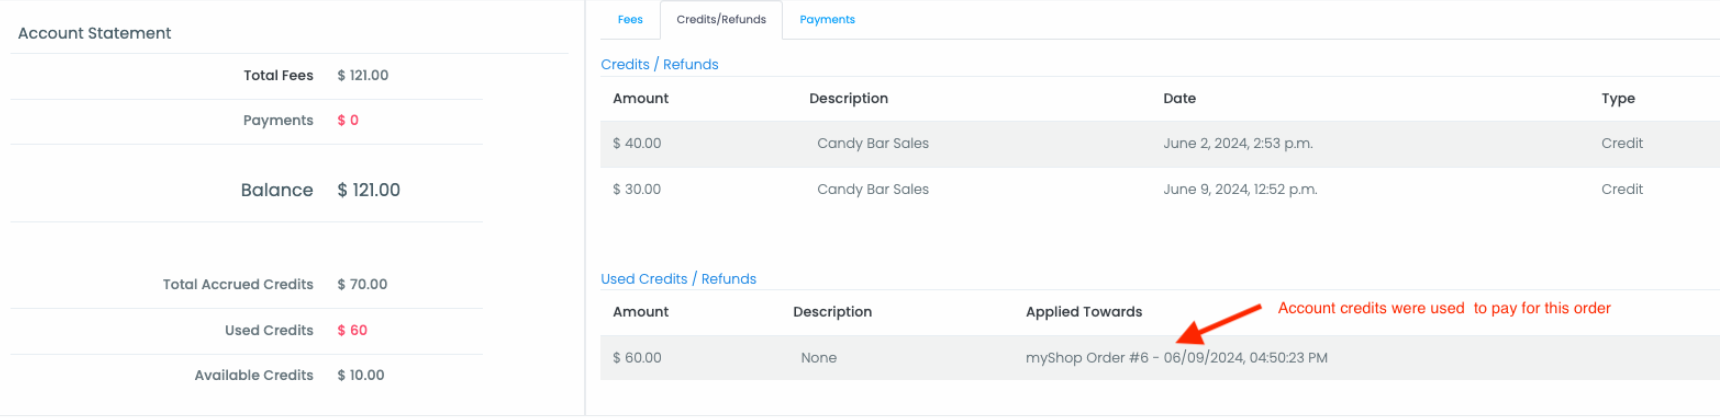
- Students and parents will be able to view all myStore purchases that were applied to the student's account under Credits/Refunds in myShop view (Image 24).
Tracking Orders
- In myShop, select the
Manage myShop dropdown, then select
Track Orders.
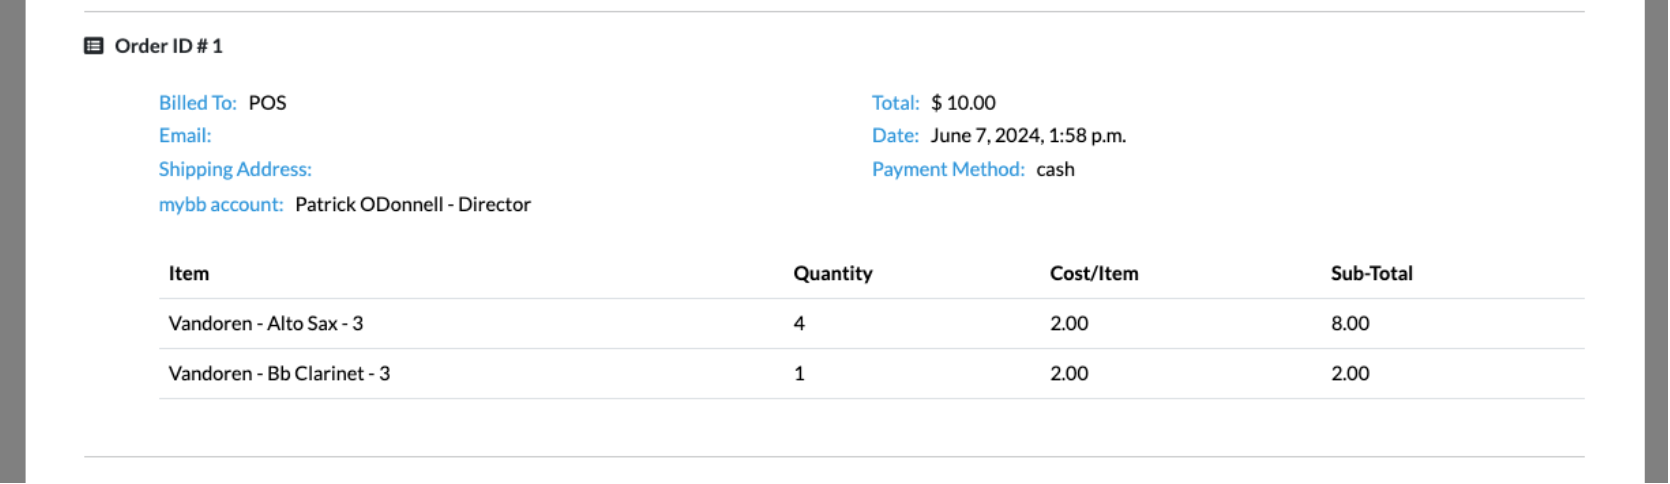
Cash and check orders completed using POS
- Billed to will show POS (Image 25).
- Email and Shipping Address will be blank.
- Mybb account will display the admin user who accepted the payment (see image below).
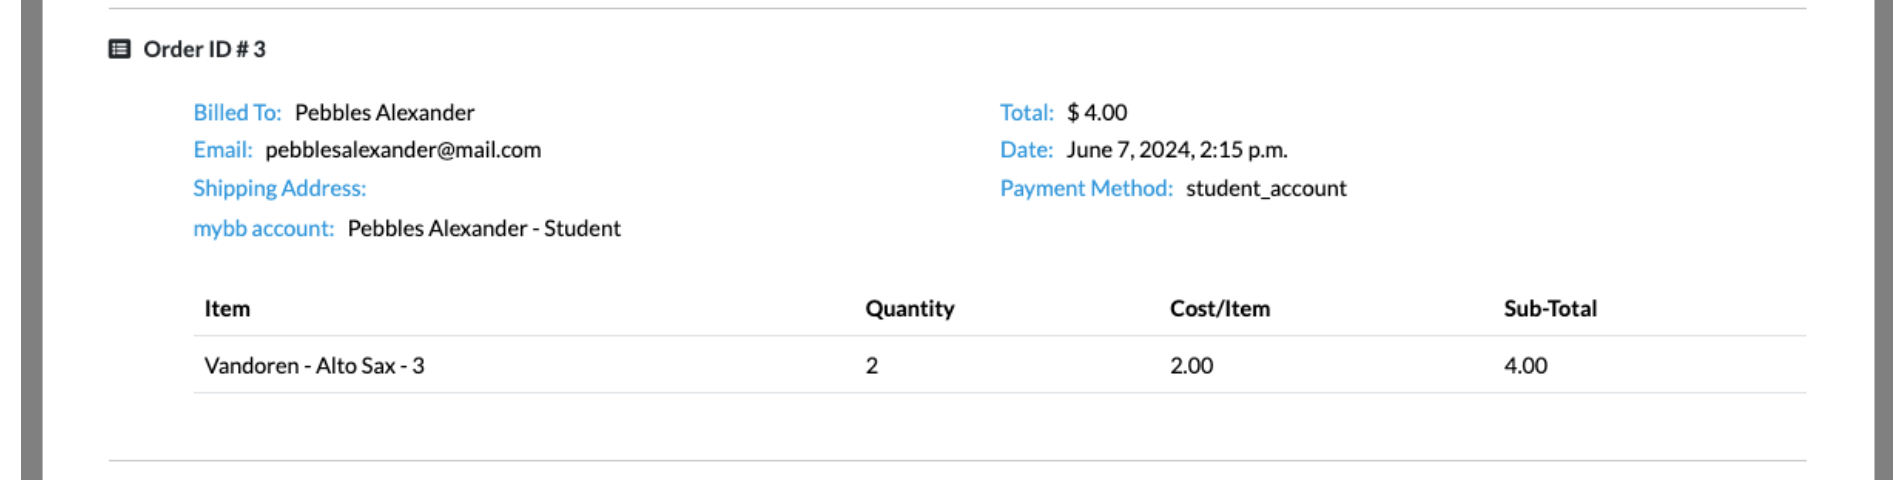
Charge student account using POS
- When charging an order to a student's account, their name and email address will be displayed.
- If Enable Account Credits is checked under Update School Settings, then the amount will be deducted from their available credit balance and the payment method will show student_account.
- Billed to will show the students name
- Email will show the students login email address
- Shipping Address will be blank.
- Mybb account will display the student's name (Image 26).
Orders completed with PayPal and credit card
- Mybb account will display the account that was logged in when the purchase was made (Image 27).
- The example image below shows the student that was logged in at time of purchase and a Credit Card or a PayPal account with the name Shannon Daugherty was used. If the parent was logged in at time of purchase,
mybb account would display the parent's name and “Parent".
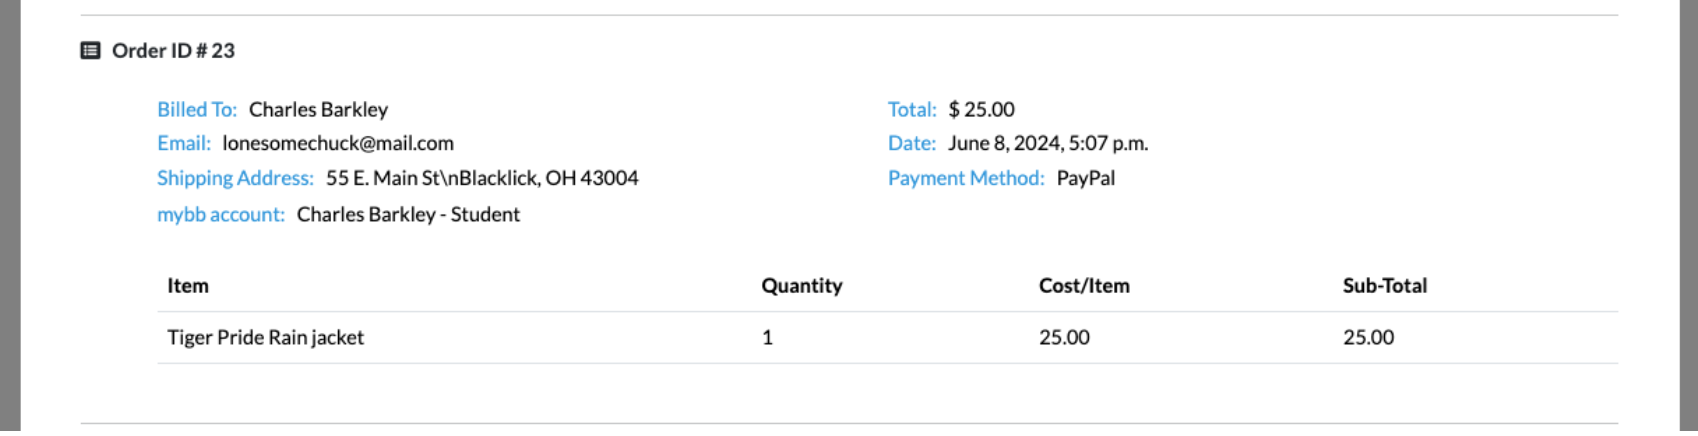
- Payment method will show as PayPal, including if a payment is processed using a credit card. This is because PayPal processes the credit card transaction.
- Email address and Billed to belong to the PayPal account or Credit Card owner that was used to make the purchase.
- Shipping address is provided by PayPal.
- This does not indicate if the buyer wants the item shipped, though shipping options will be added soon!
