

mybb Support
myTickets
Overview
myTickets is a comprehensive event ticketing system integrated into the myblueboard platform. It allows organizations to create and manage ticketed events, sell tickets, and handle event check-ins seamlessly.
Key Features
- Event Management- Create and manage ticketed events with complete details
- Ticket Sales- Sell tickets to anyone with the link, no myblueboard account sign up required for purchase
- Mobile Check-in- Scan and validate tickets using QR codes
- Email Confirmations- Automatic ticket delivery via email
- Analytics-
Track ticket sales and attendance
How to Create Events
Requirements: You must have myTickets admin access enabled on your account.
Contact your administrator if you need access. Learn more about enabling access here.
- To create event tickets, you first must Create an Event. Only admins using the desktop app can create events.
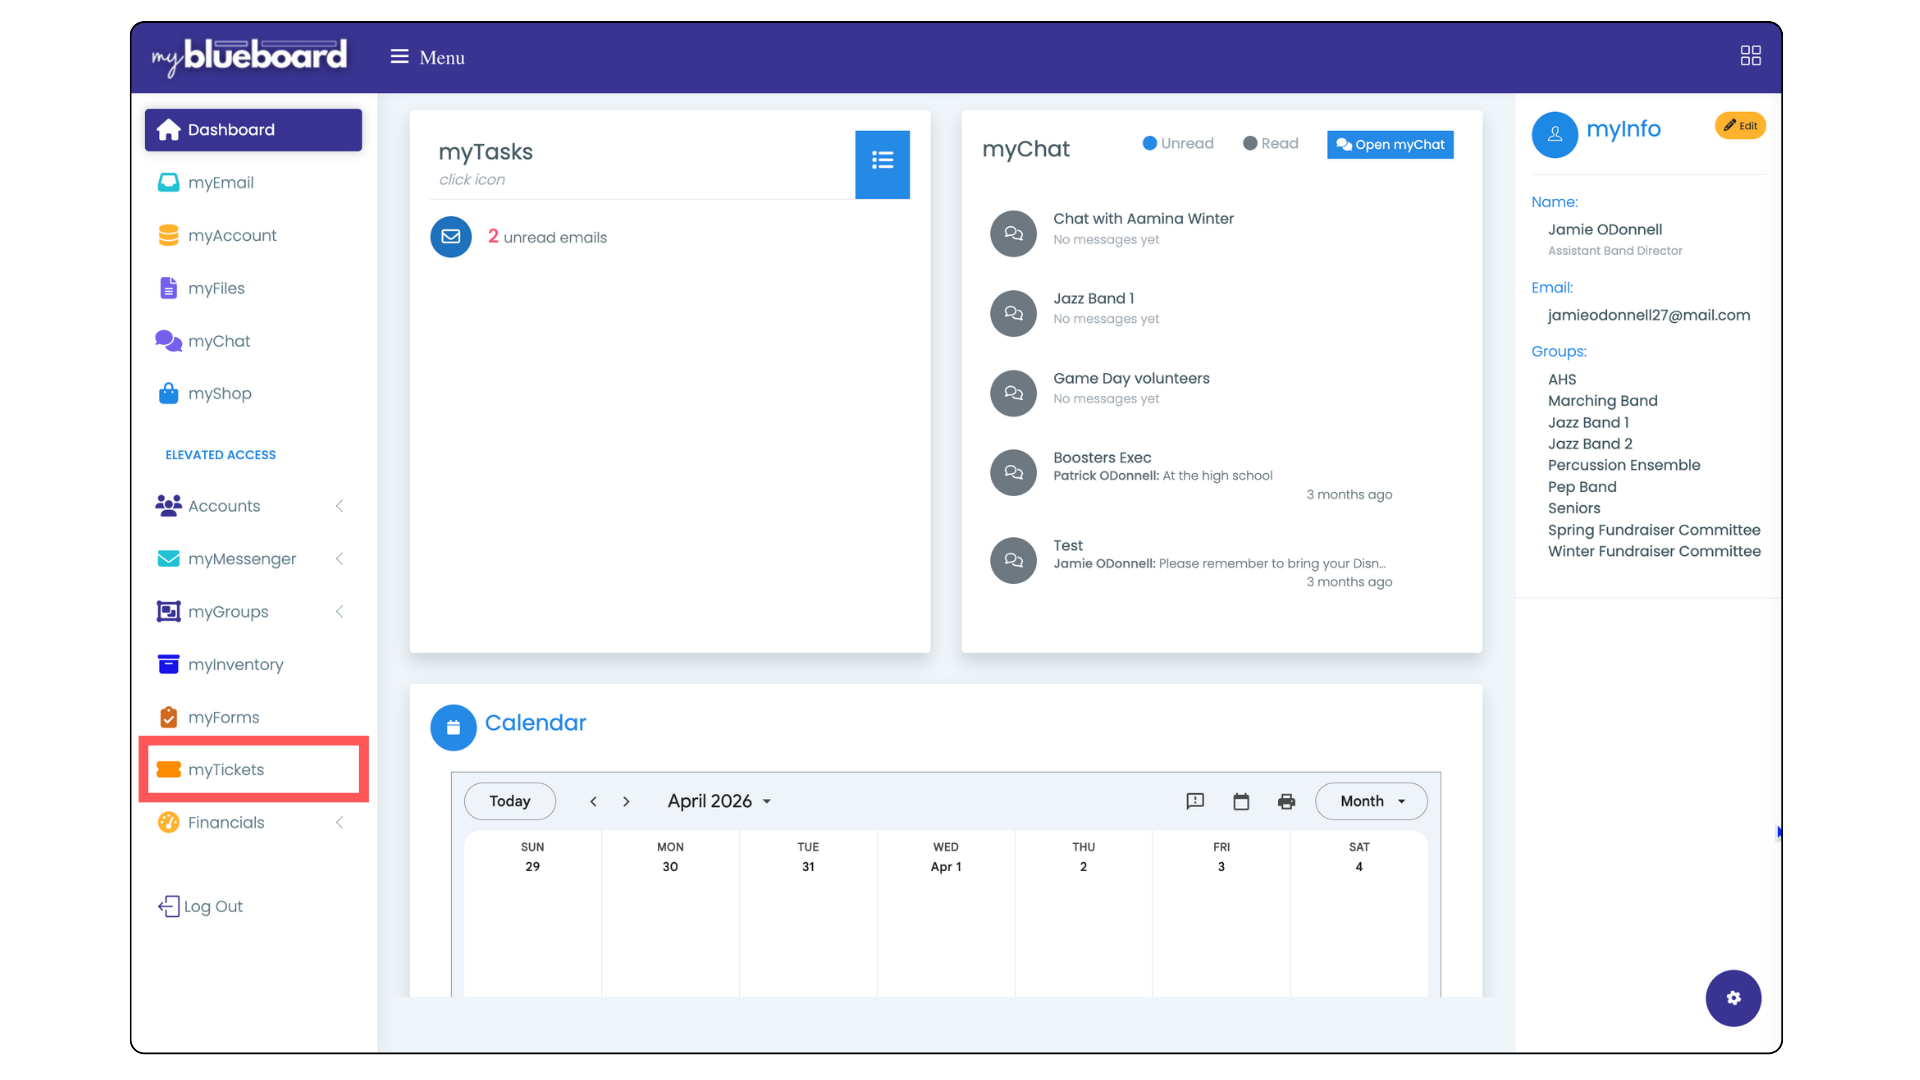
- From the left sidebar menu, select the myTickets tab (Image 1).
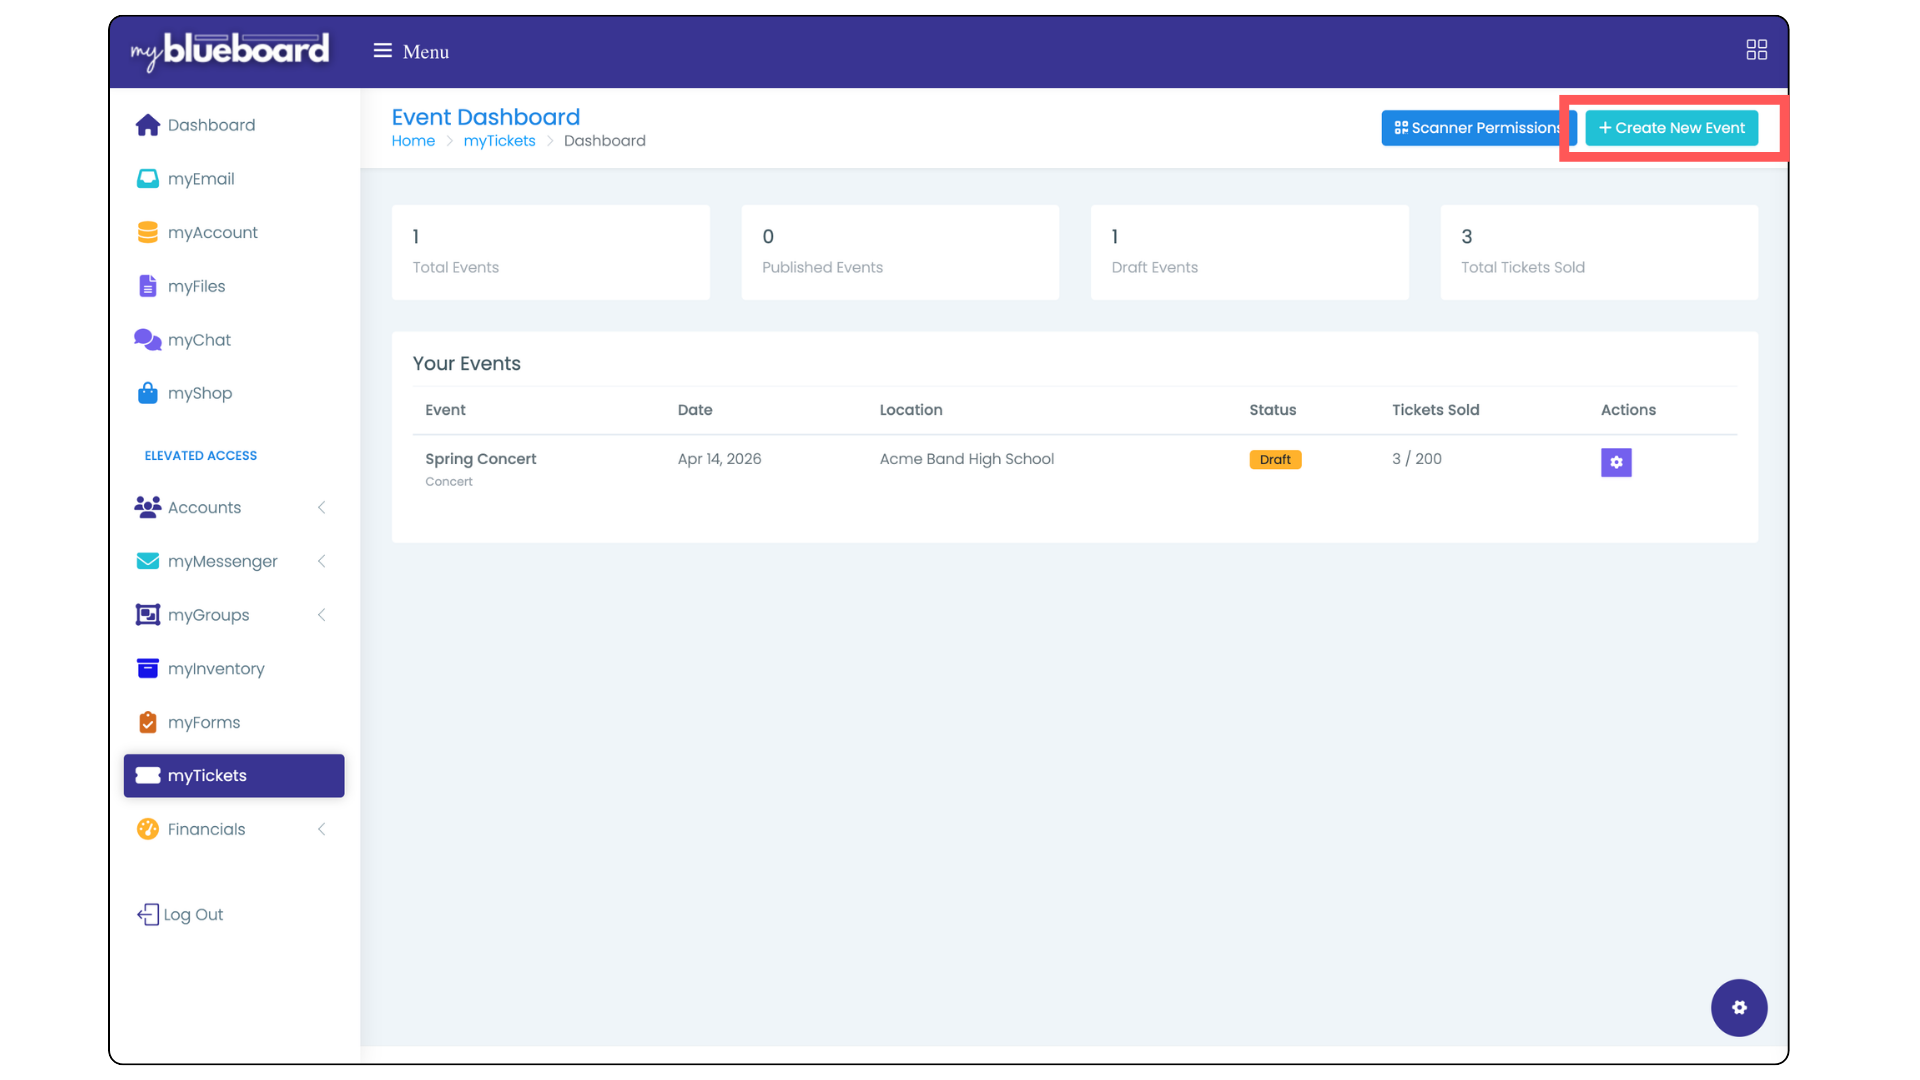
- This will open the myTickets dashboard, which will display all events.
- Click the Create New Event button (Image 2).
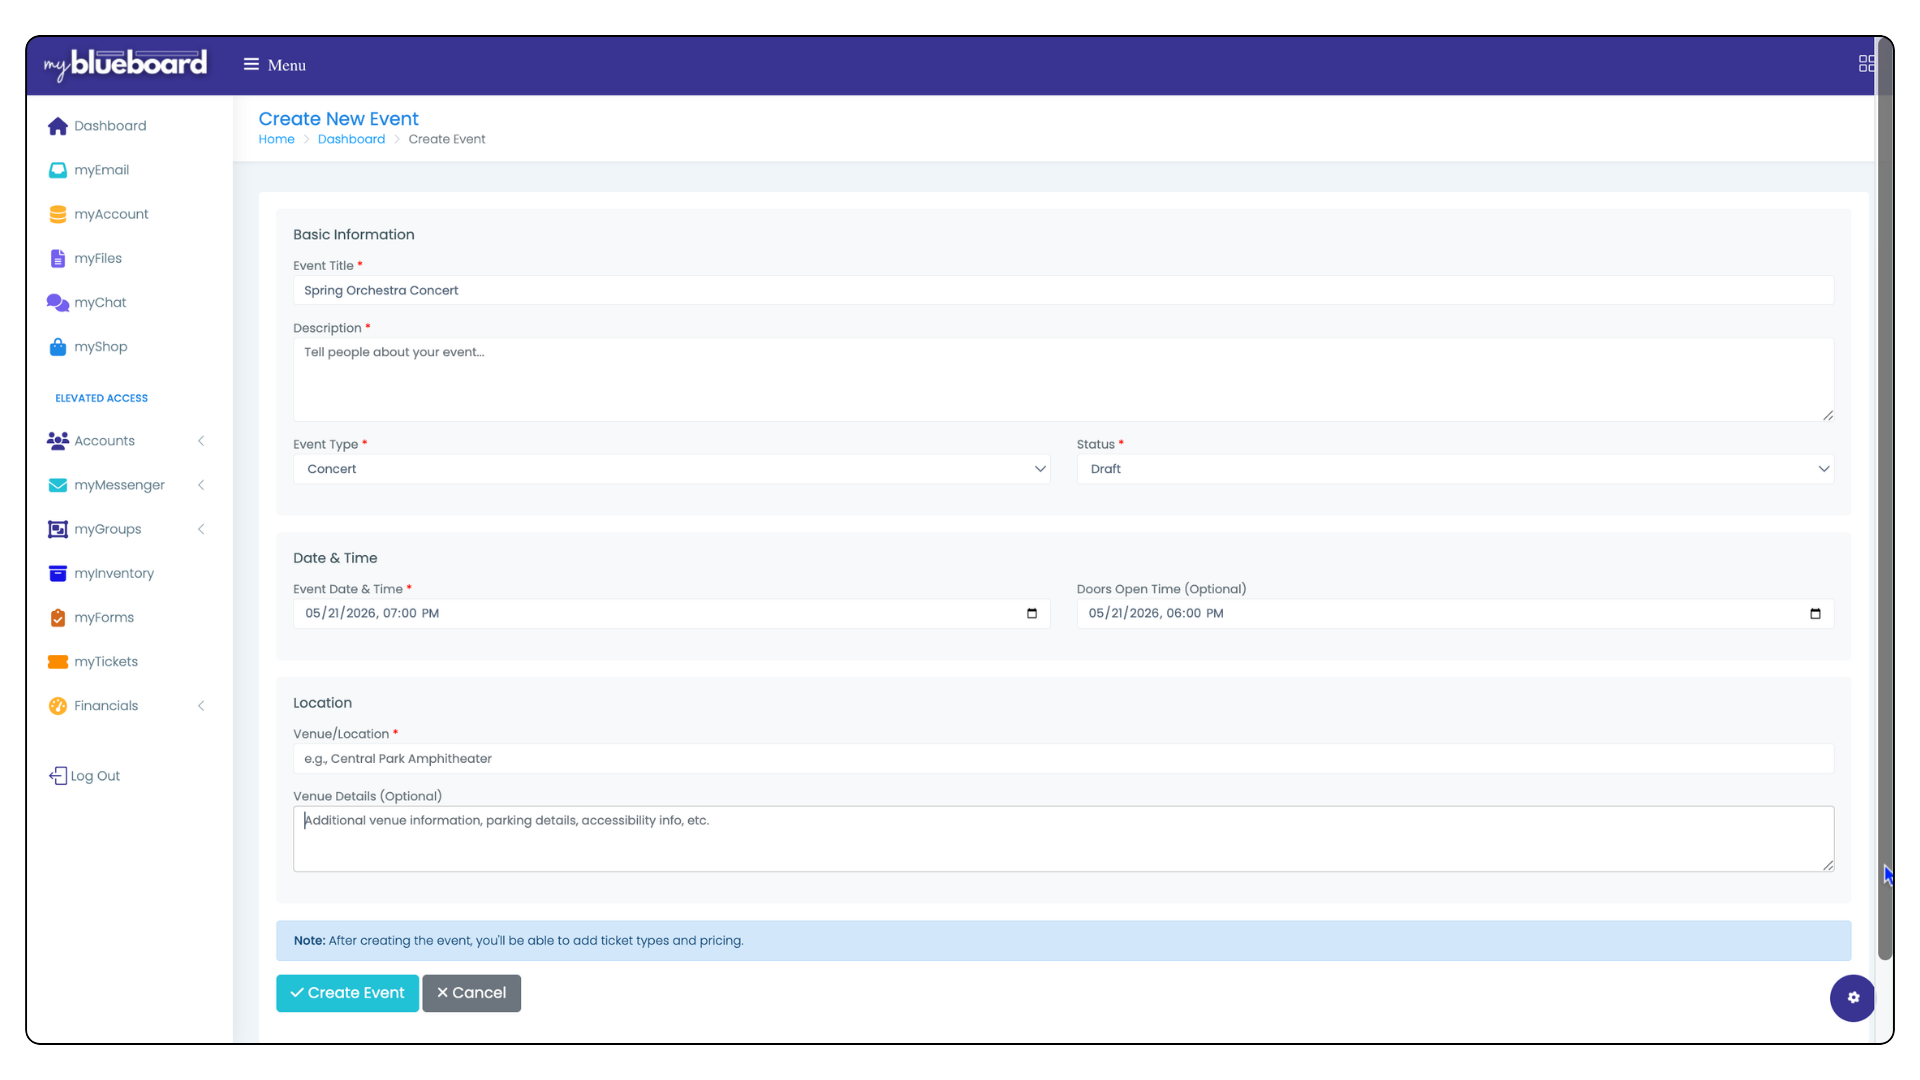
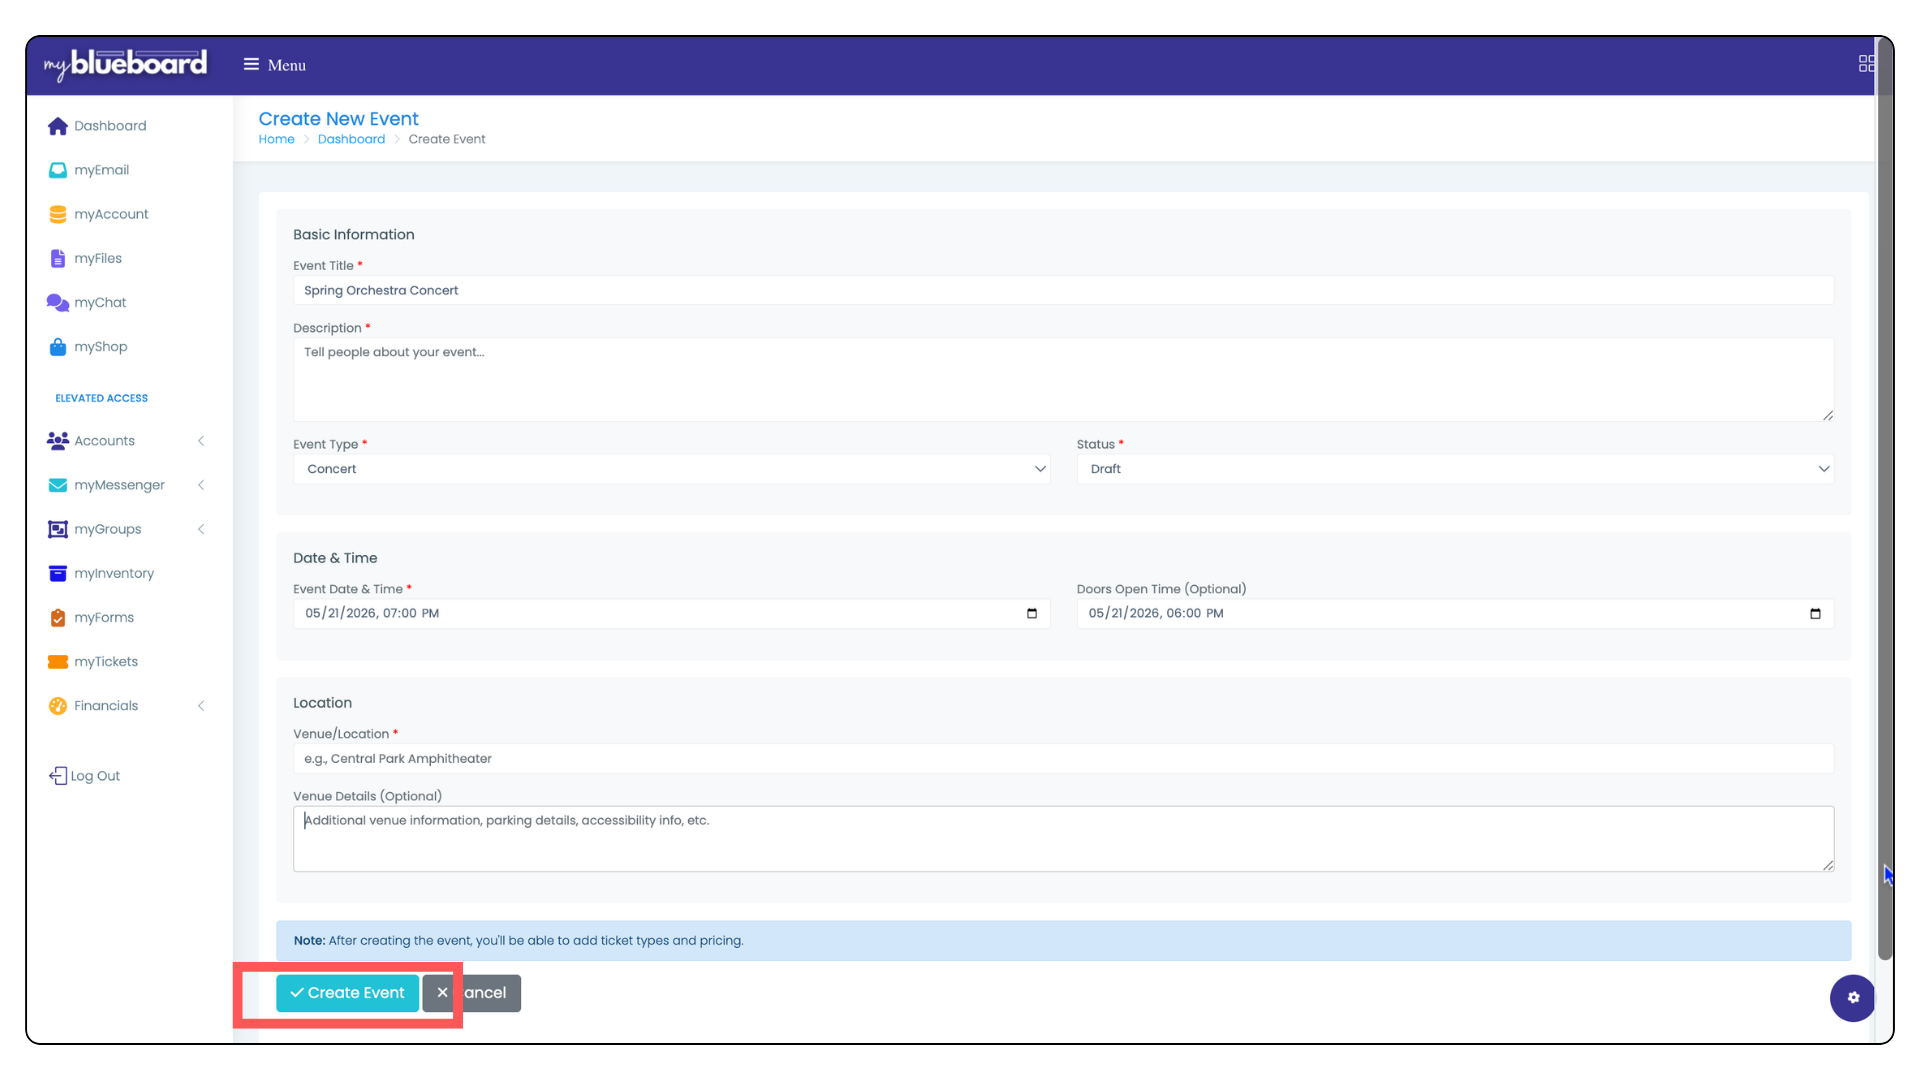
- Enter Event Information (Image 3)
- Title: Name of your event
- Description: Detailed information about the event
- Event Type: Choose from the dropdown: Concert, Sports, Theater, Conference, or Other
- Status: Draft (hidden) or Published (visible to users)
- Date & Time - When the event is scheduled to begin
- Doors Open (optional) - When doors open to attendees
- Location - Venue name or address
- Venue Details (optional) - Parking, accessibility, etc.
- Click the Create Event button to Save your event (Image 4).
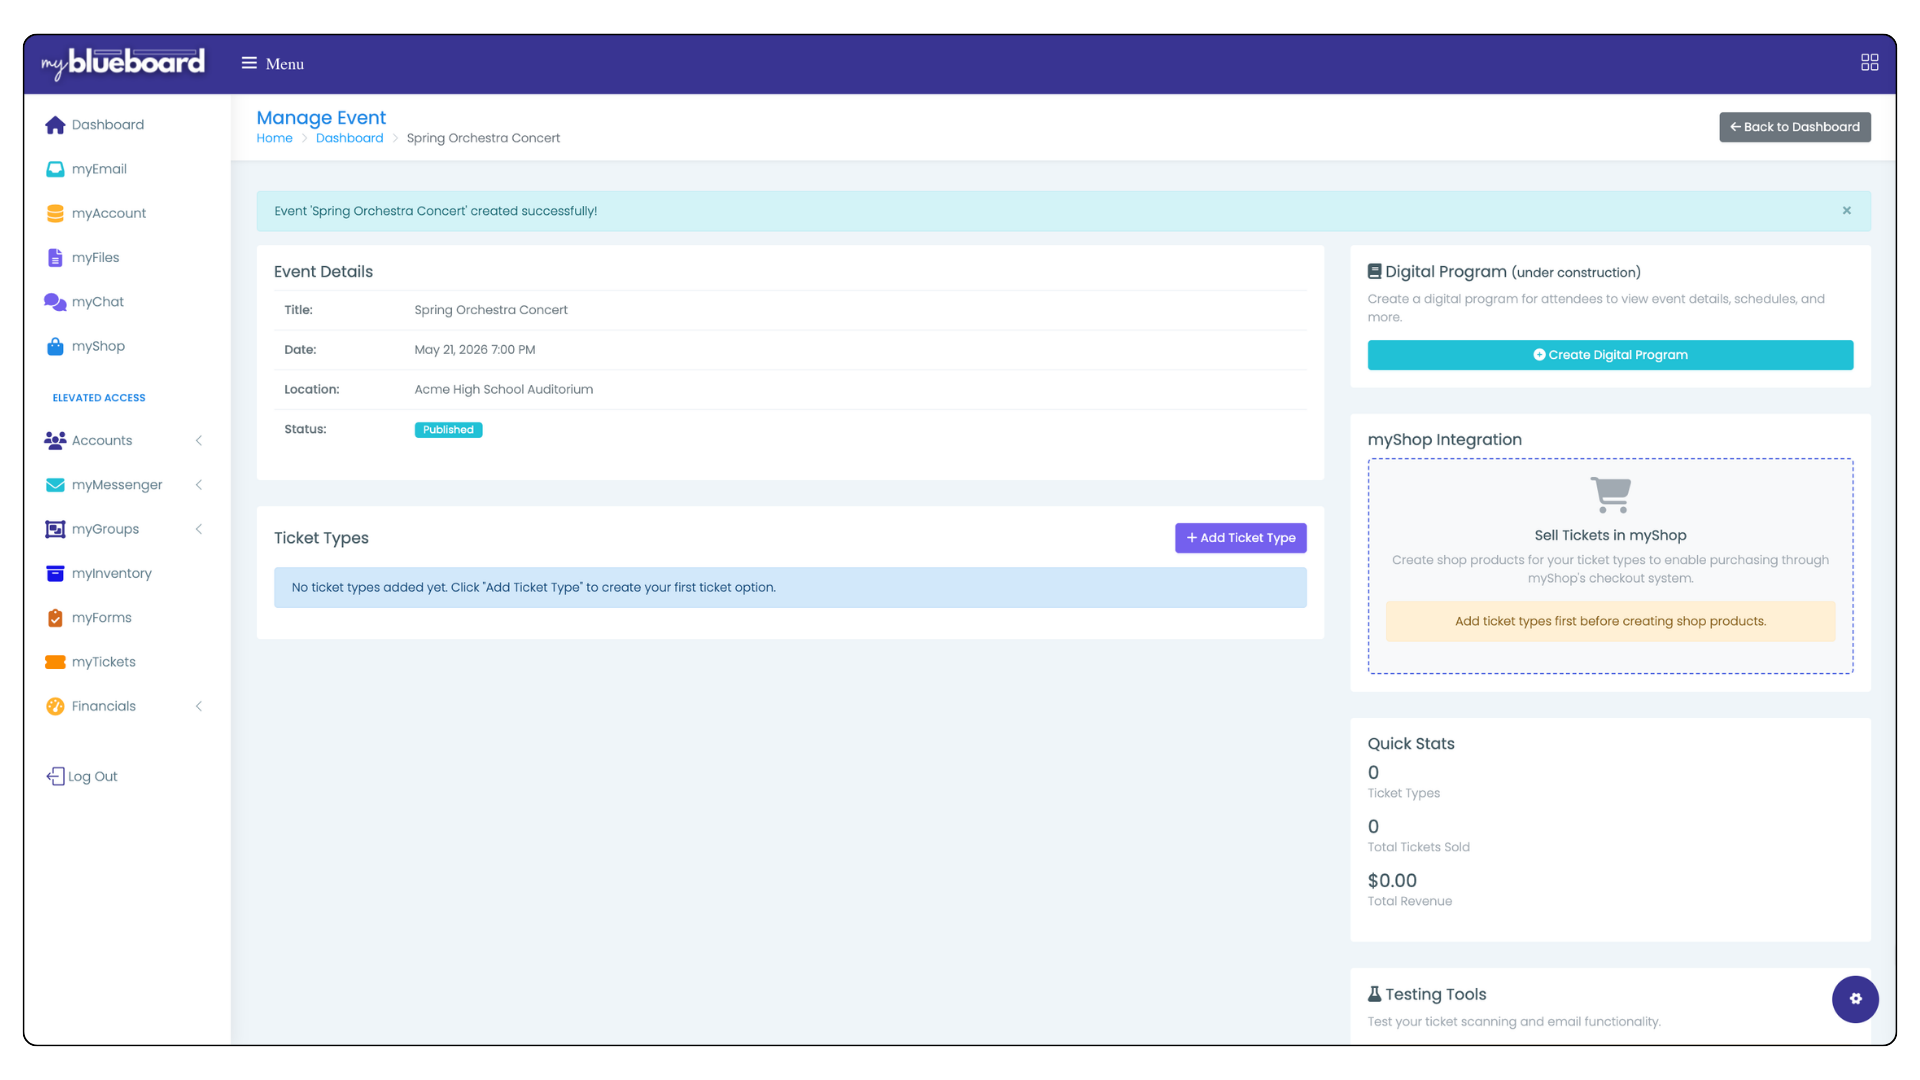
- If your event has been successfully created, you'll be taken to the Event Management page.
Creating Ticket Types
Each ticket type lets you set its own price, quantity, and rules—so you can offer options like general admission, student, VIP, or free entry. Ticket types define how people access your event, helping you control capacity, create pricing tiers, and give attendees clear choices when they register or purchase.
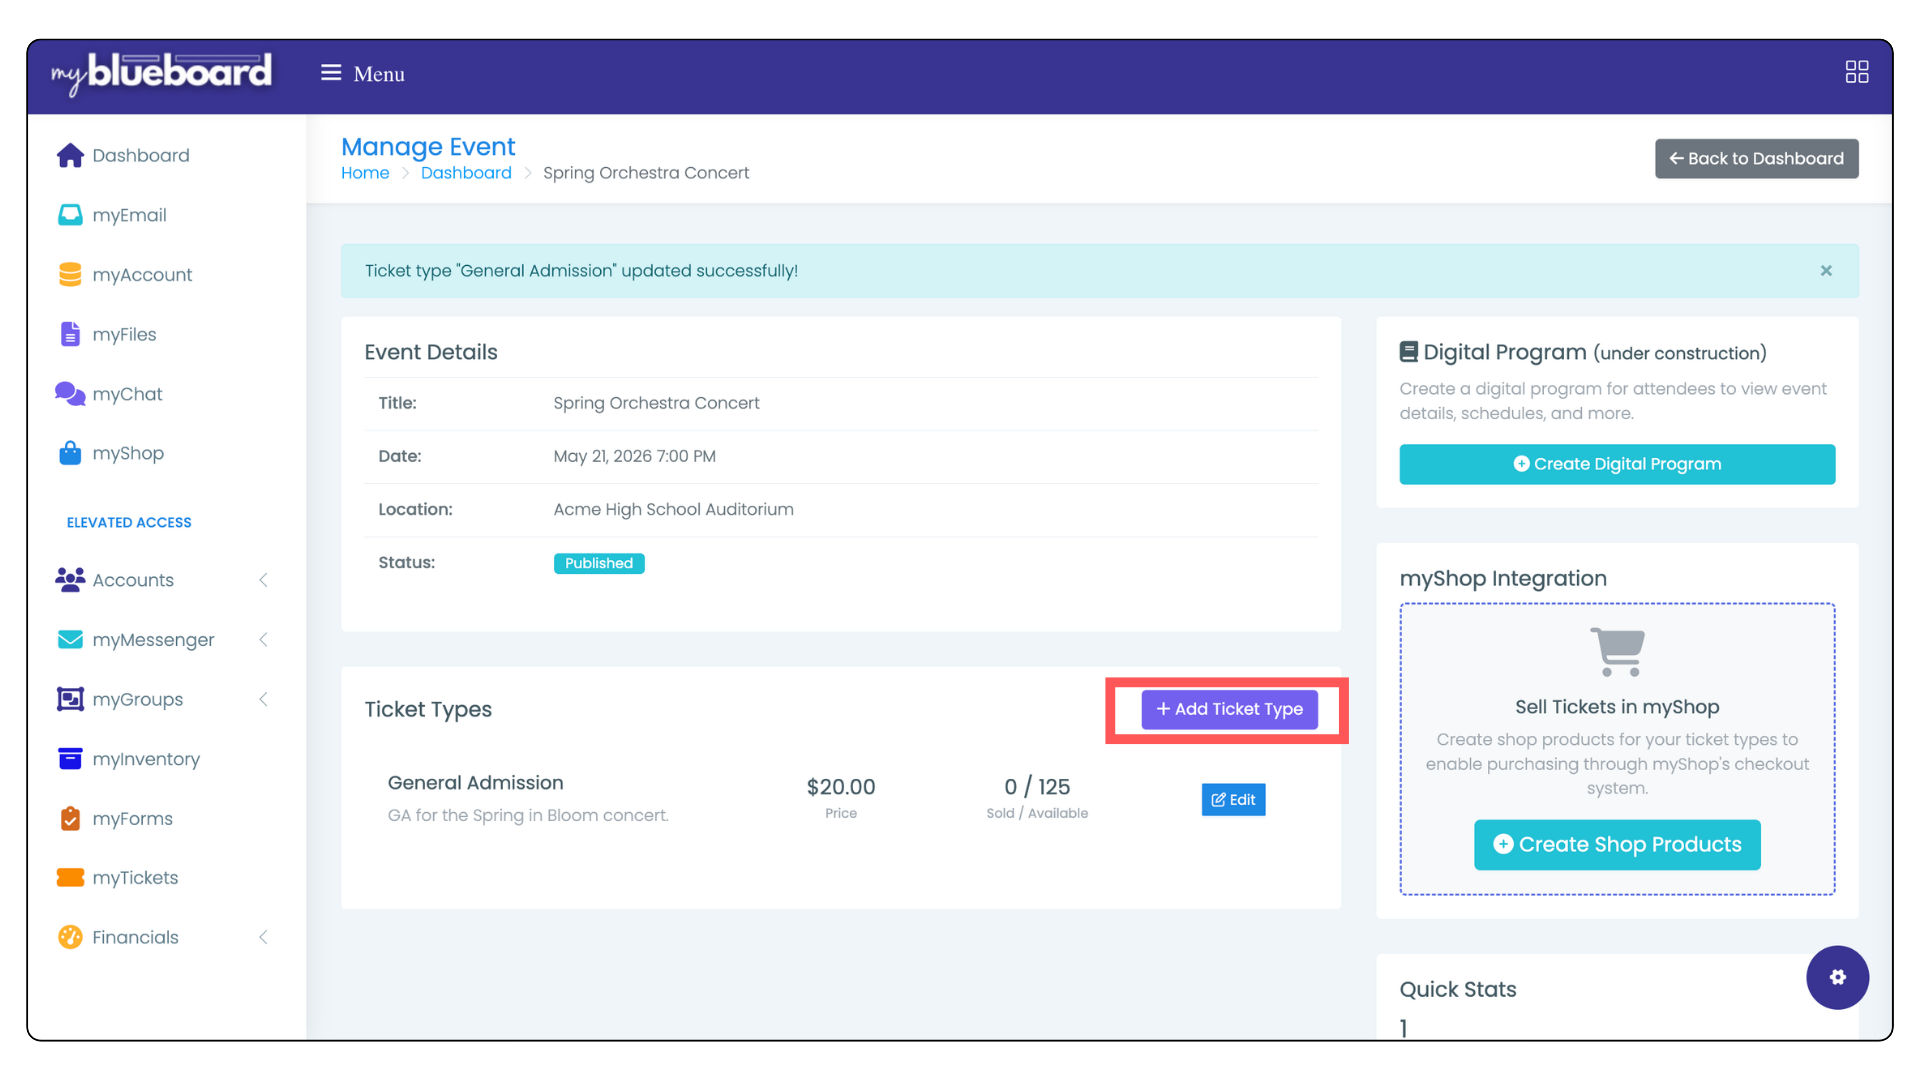
- Select the Add Ticket Type button from the Event Management page (Image 6).
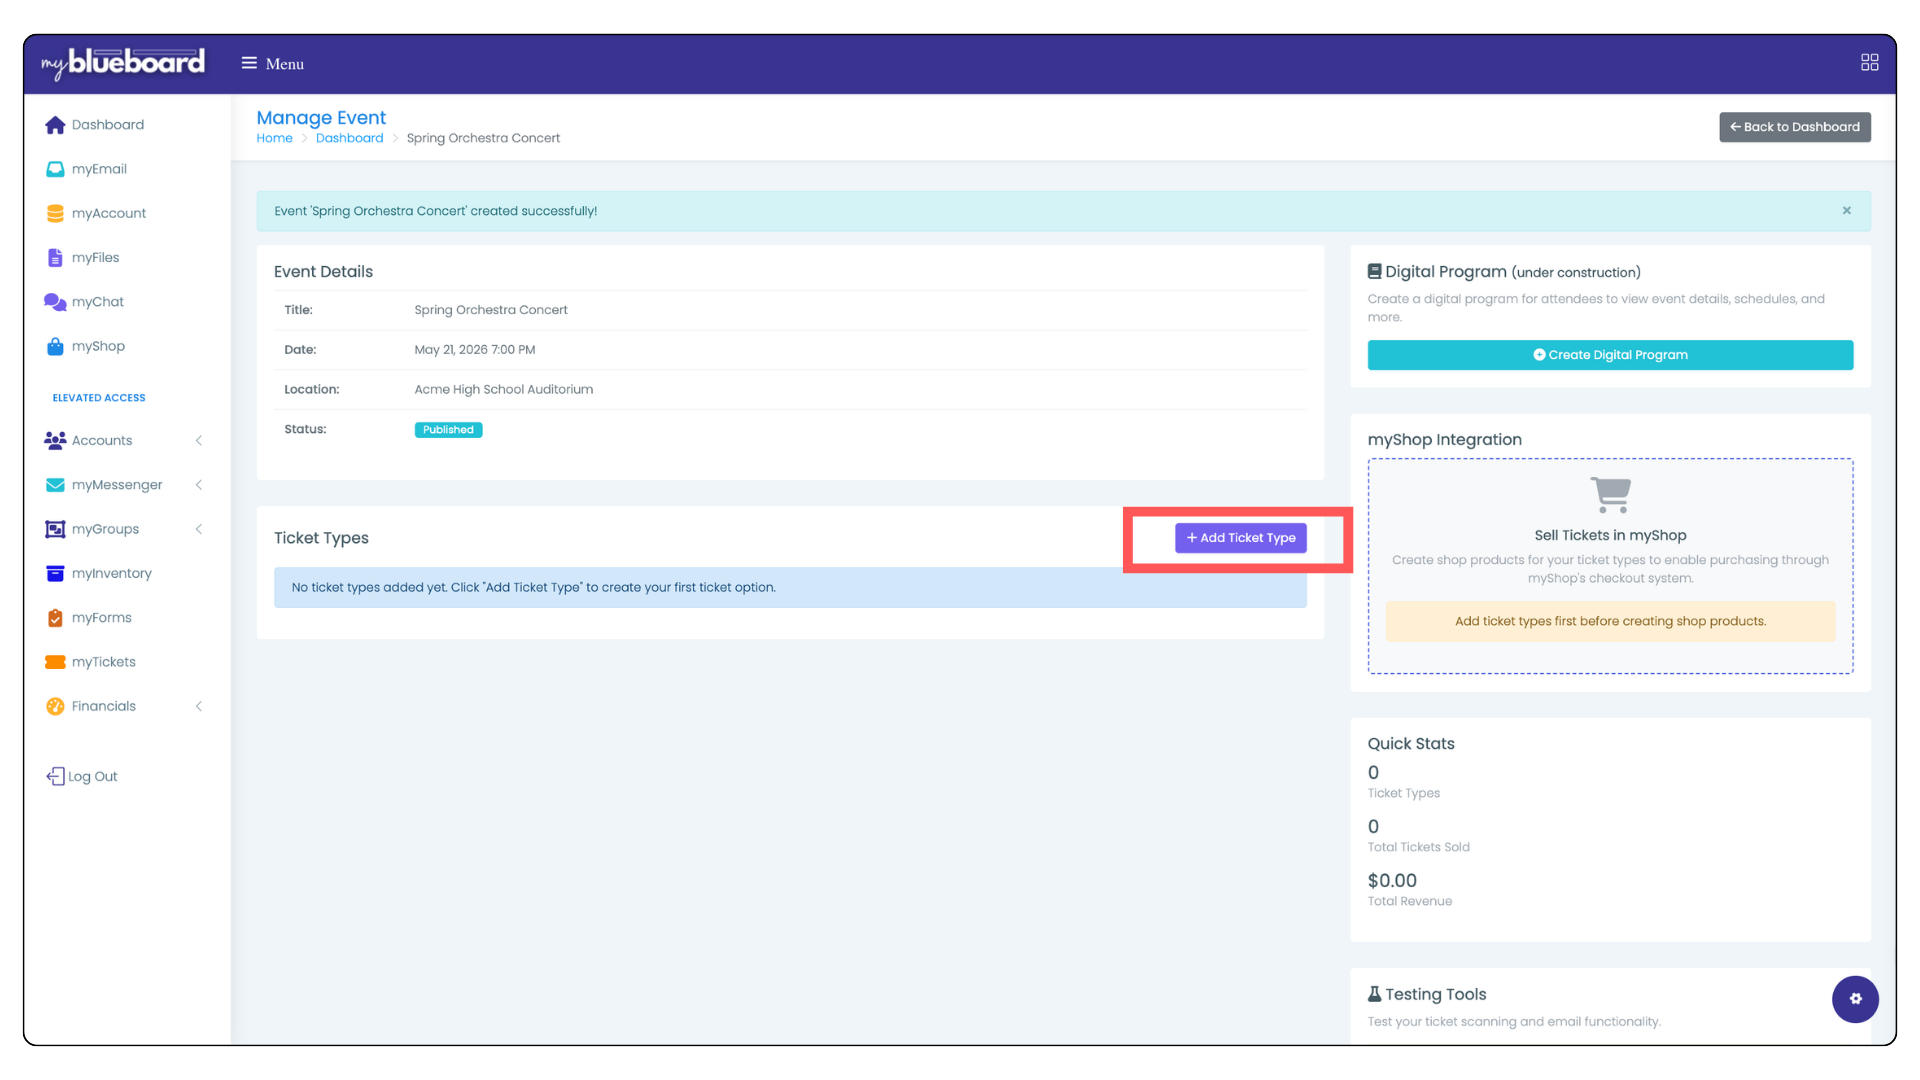
Image 6
Enter the information for your ticket type (Image 7).
- Add the name of the ticket type (General Admission, Student, Child, etc.)
- Add a description of the ticket type (optional).
- Add a price and quantity available.
- Add the maximum amount of tickets an individual can purchase per order.
- The Active toggle is on by default, which allows sales of this ticket type. Untoggle if they are not yet available for purchase.
- The Make Public in myShop toggle is on by default, which makes the ticket type visible to the public. Untoggle if you would not like this type to made visible to the public.
- Click the Save Changes button.
- Your ticket types will display in the Event Mangement Page (Image 8).
- You can continue to add ticket types by selecting the Add Ticket Type button.
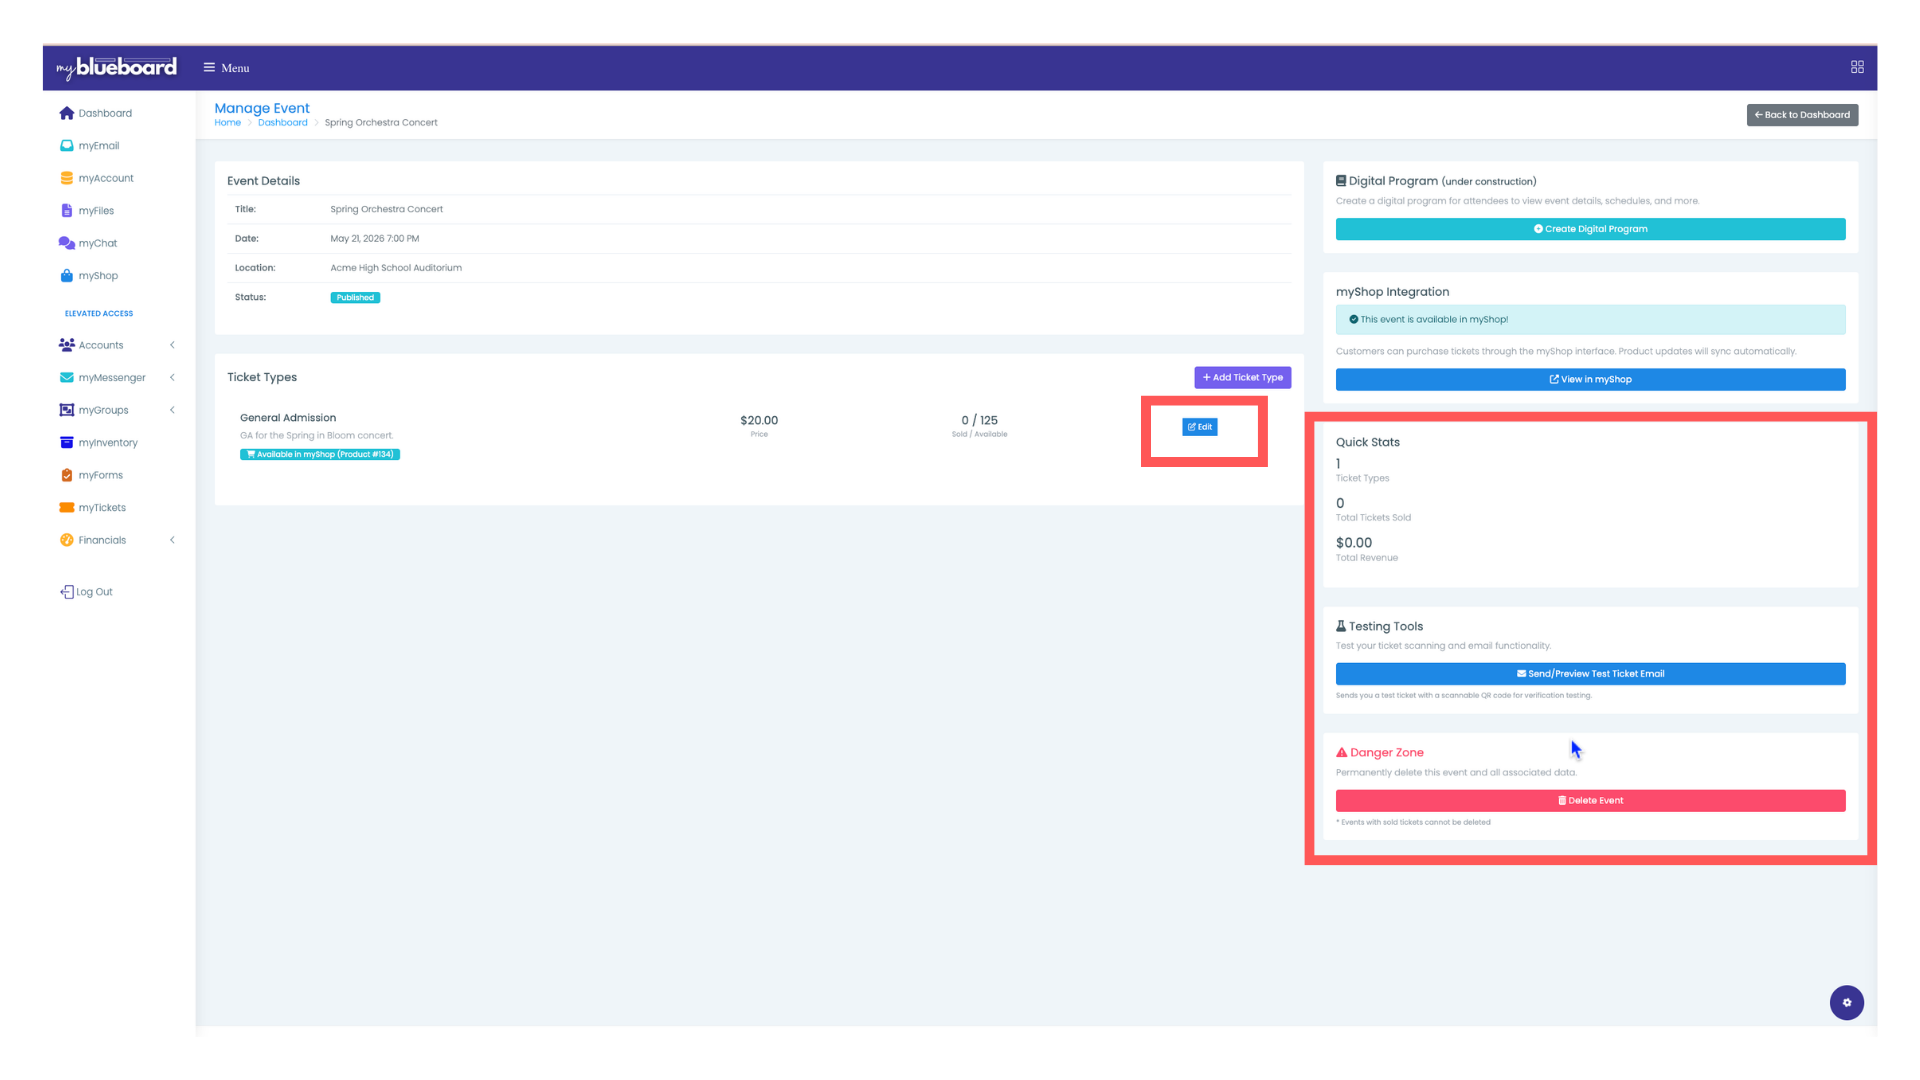
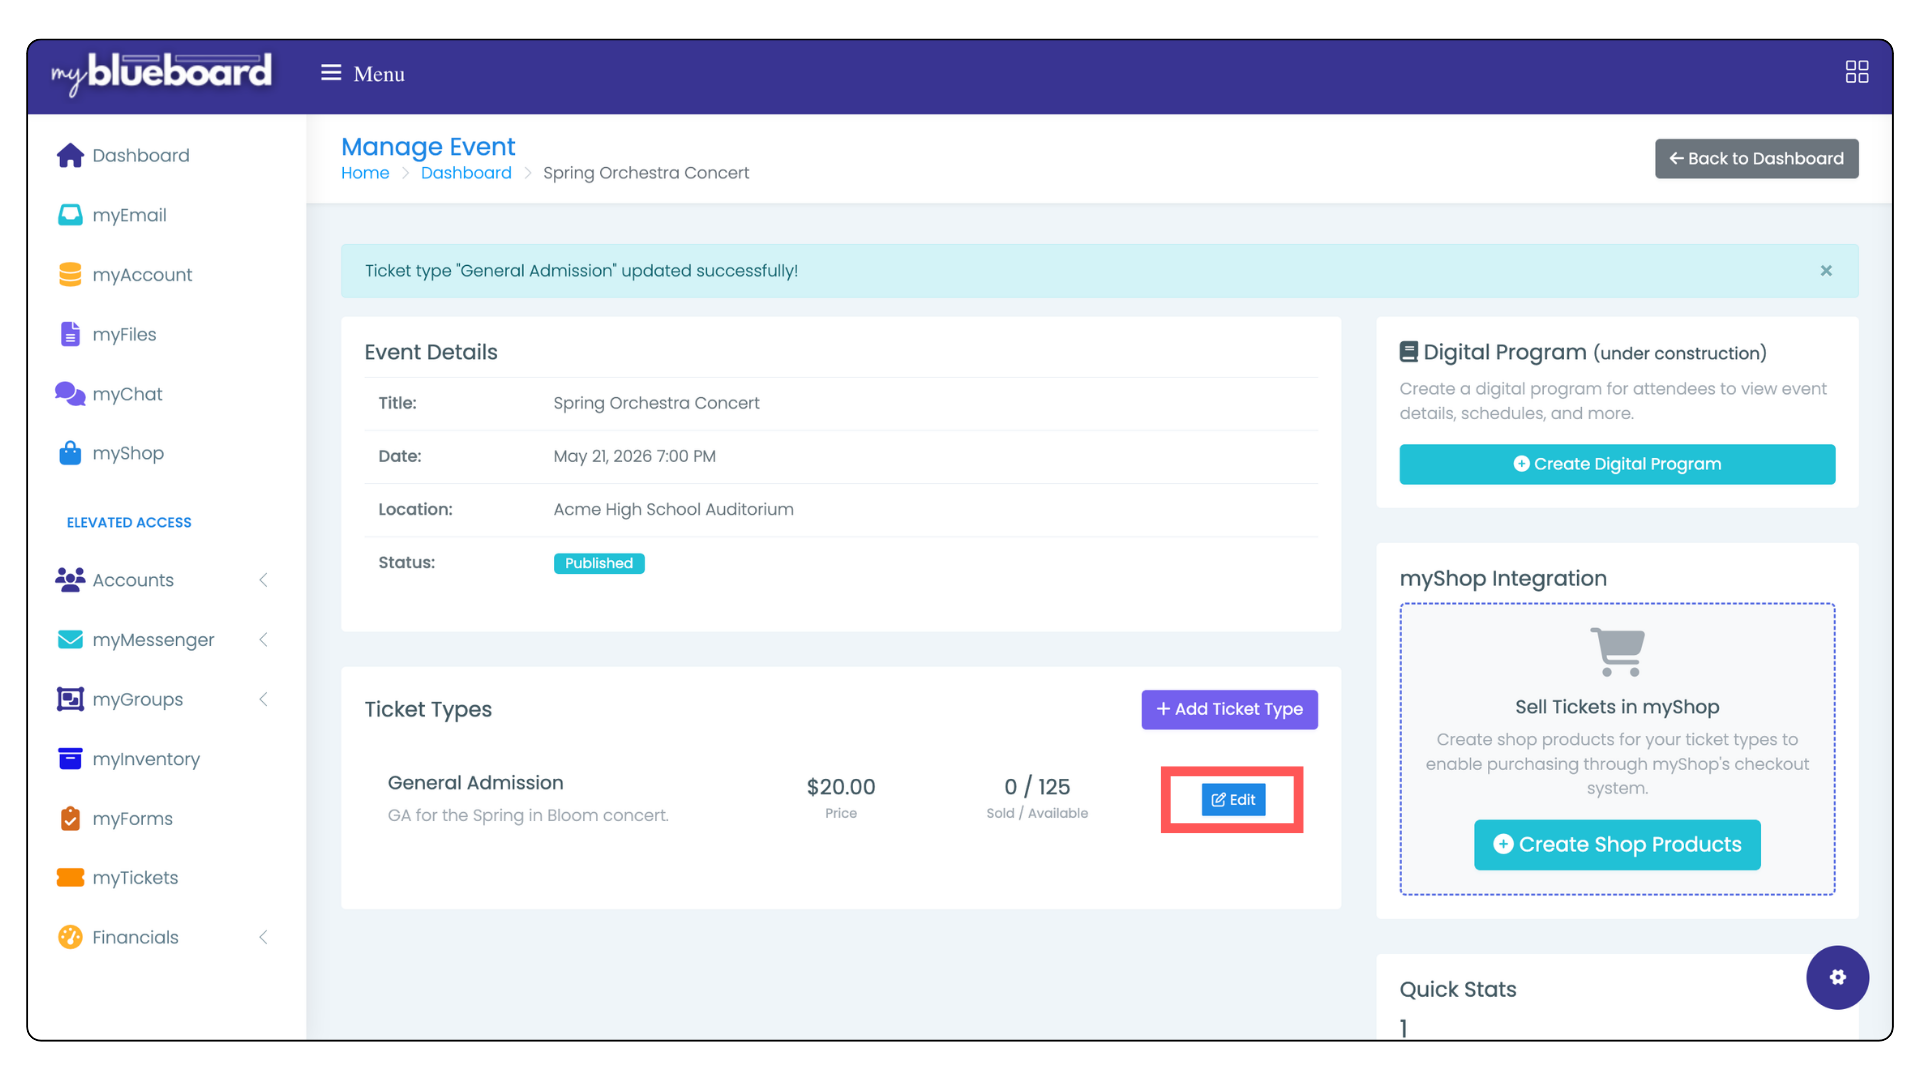
- You can edit your ticket types by selecting the Edit button (Image 9).
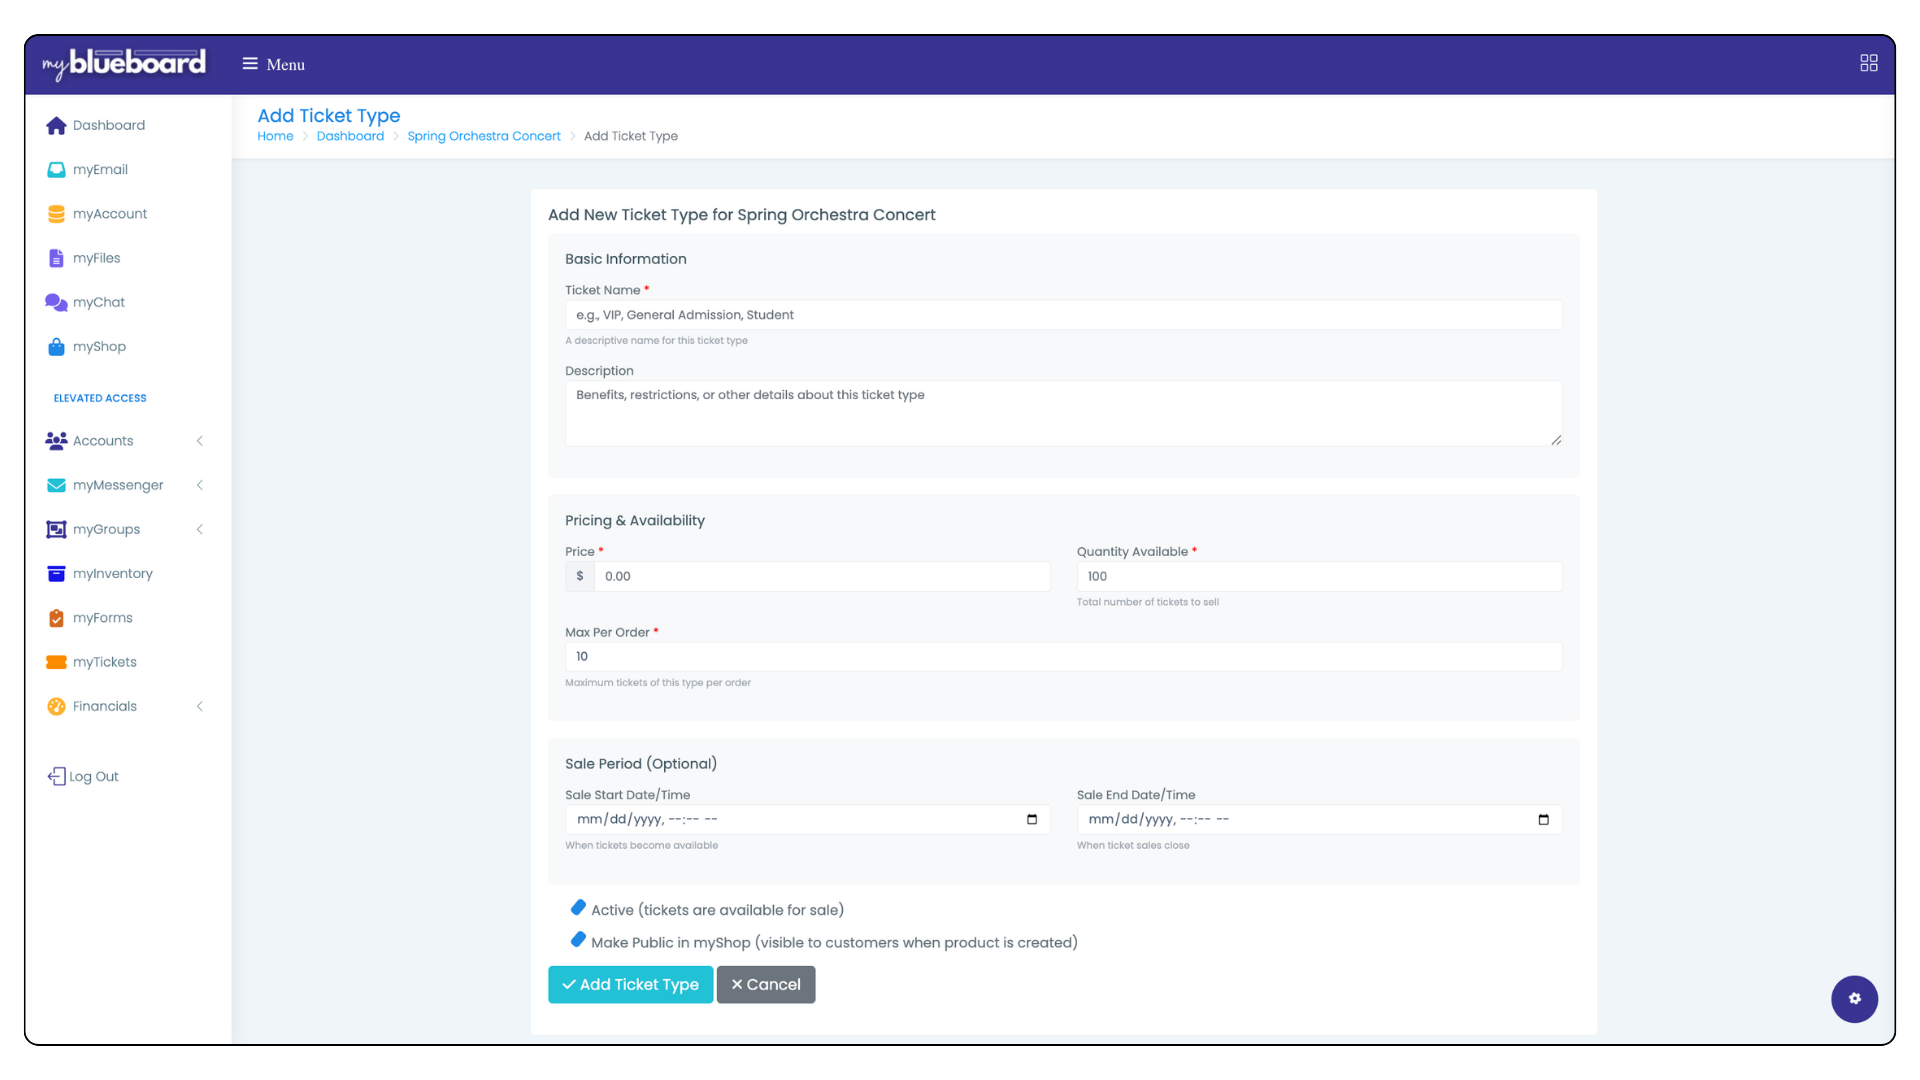
Image 7
Connecting your event to myShop
Connecting your event to myShop allows you to sell tickets seamlessly through your built-in shop. When enabled, a dedicated “Tickets” category is created (if it doesn’t already exist), and each ticket type becomes its own product. These products stay linked to your event and update automatically, so everything stays in sync. Customers can then easily purchase tickets using myShop’s checkout, just like any other item.
- Click the Create Shop Products button from the Event Management page (Image 10).
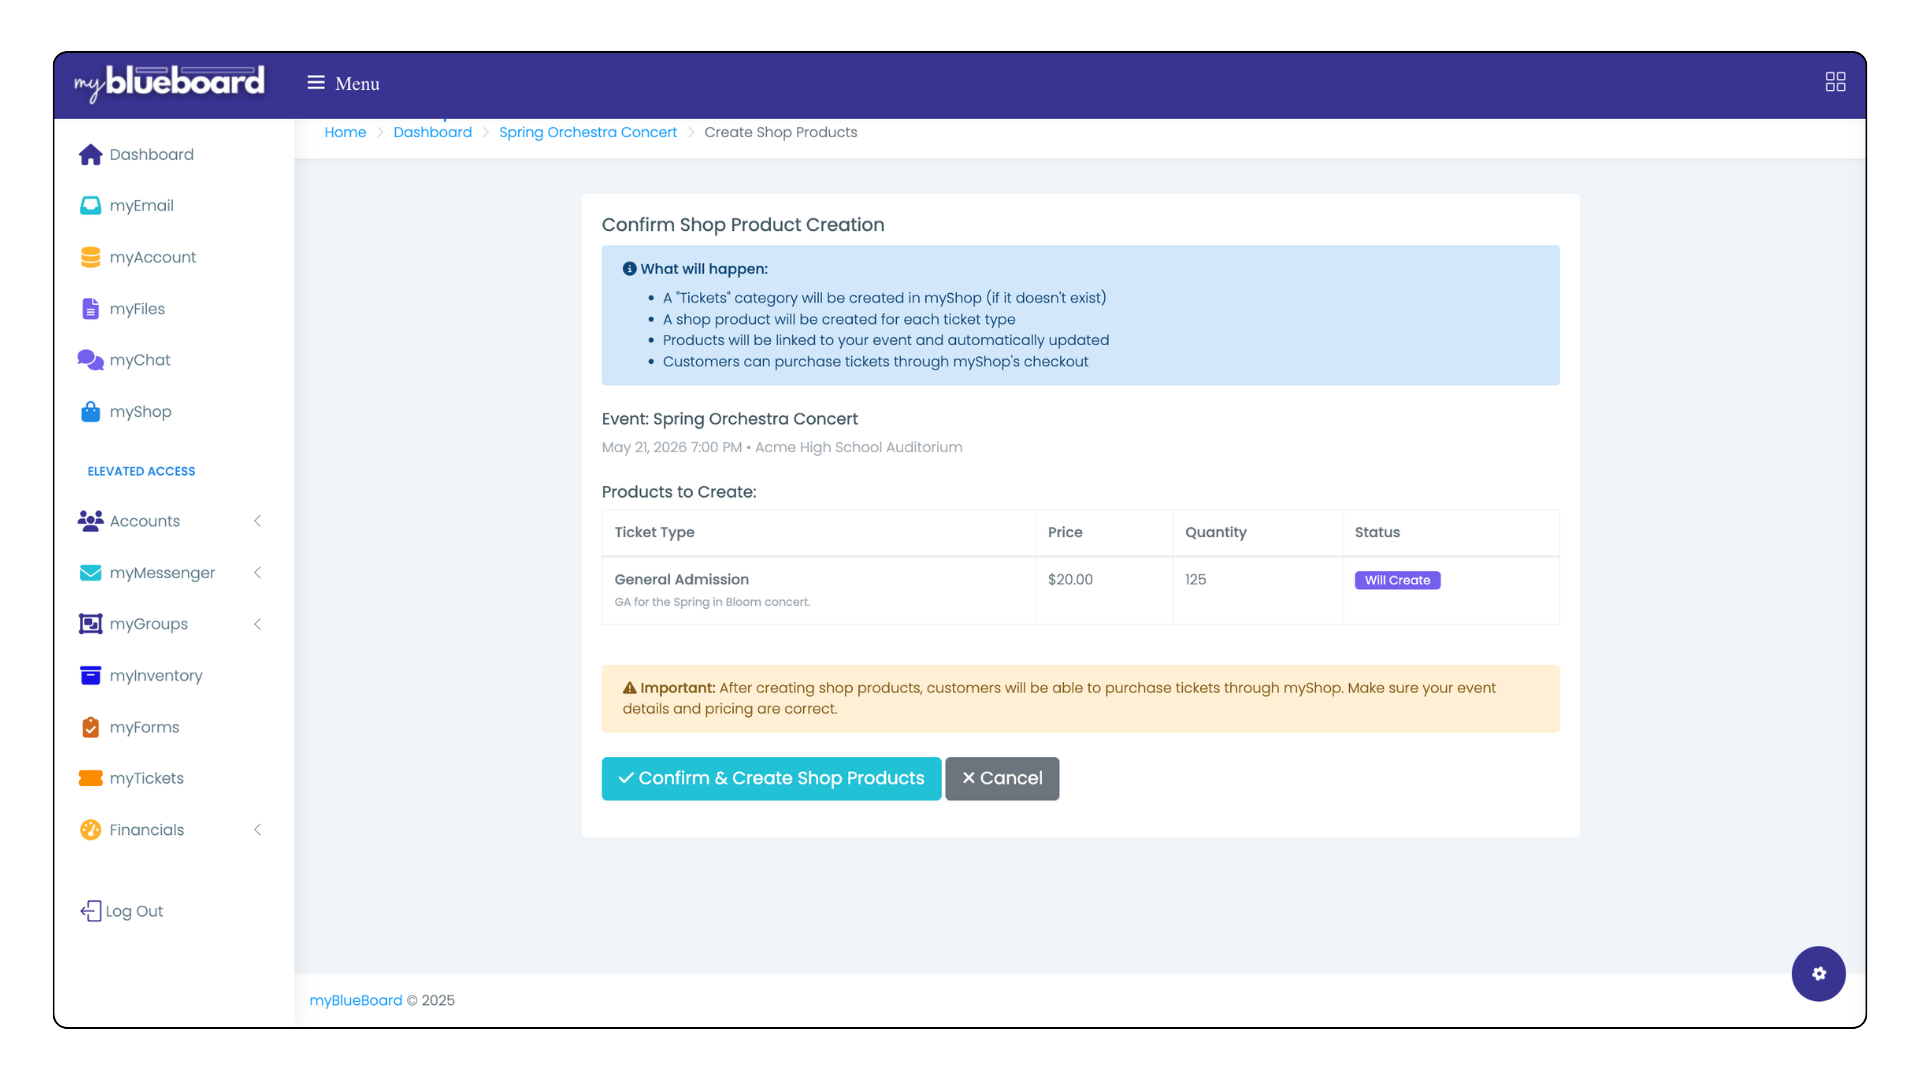
- A confirmation screen will display. Click the Confirm & Create Shop Products button to create your products (Image 11).
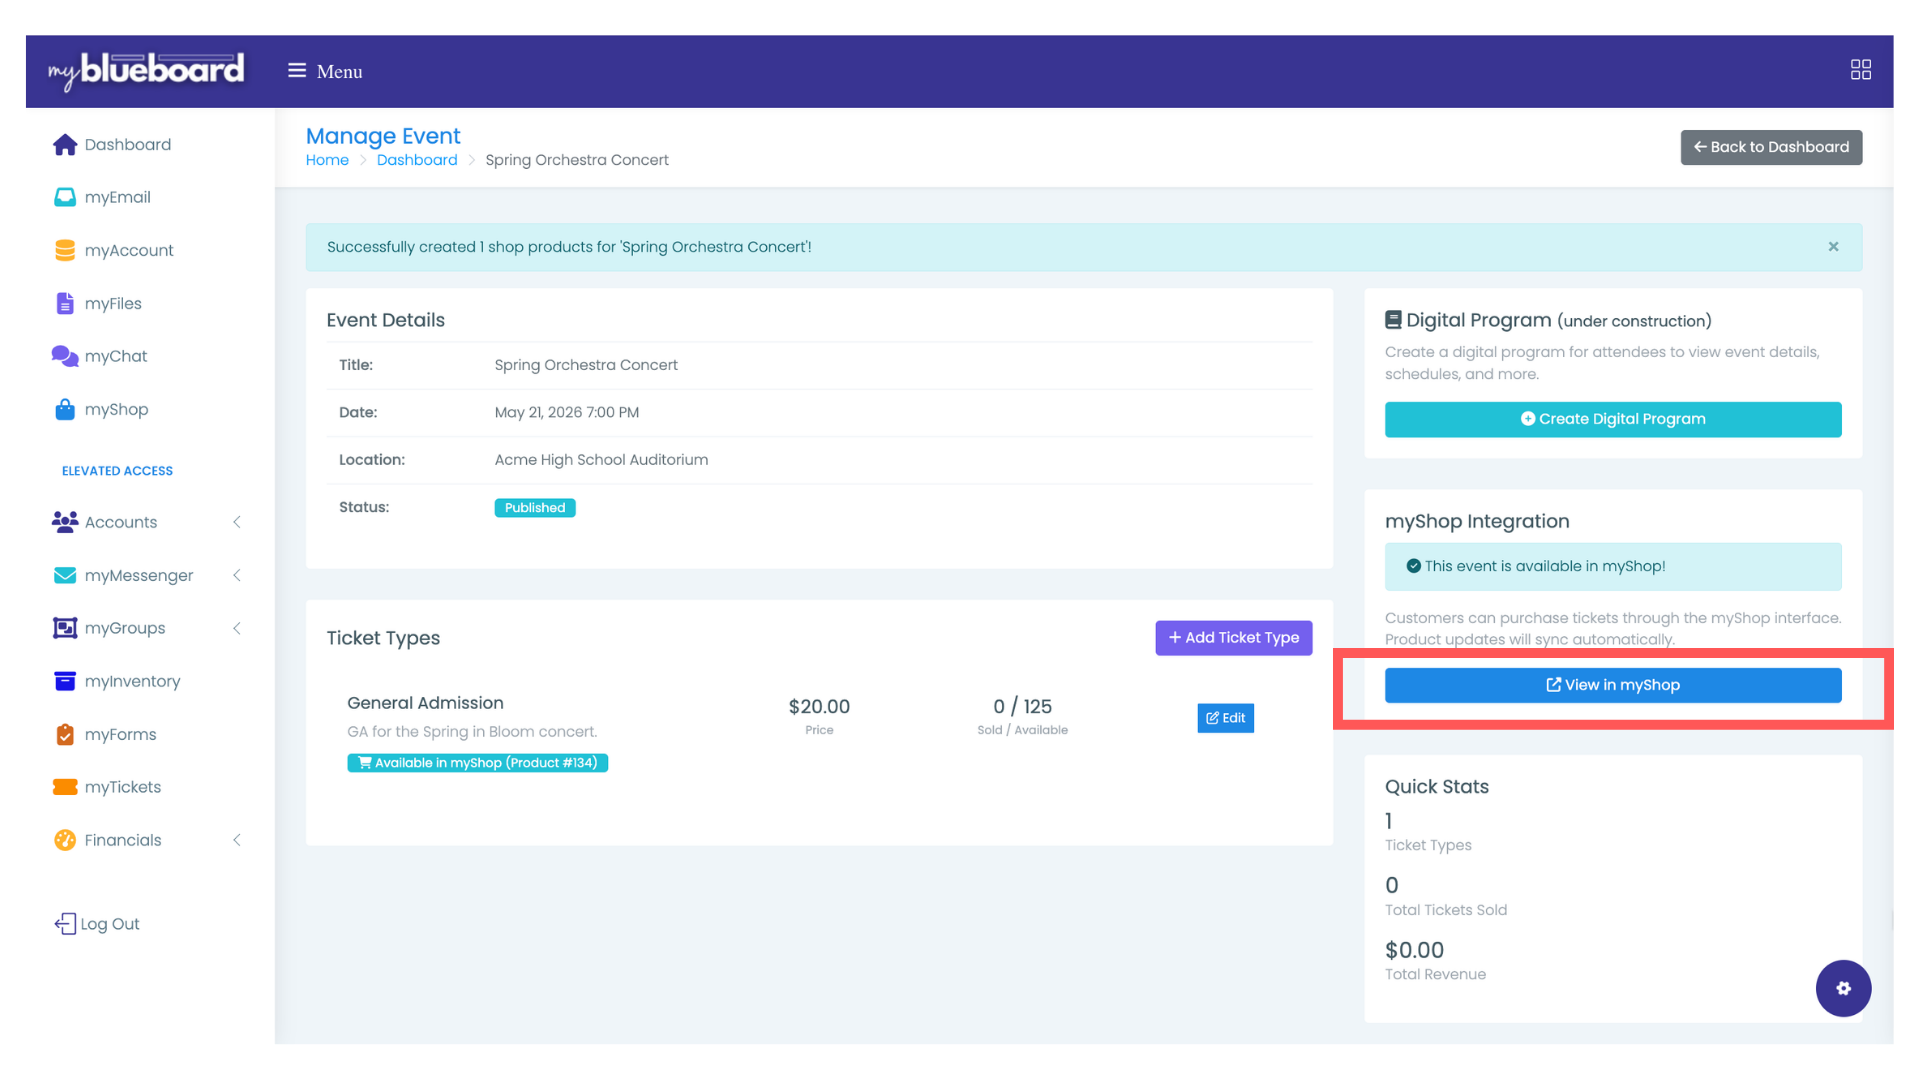
- You can view your ticket listing and make edits in myShop by clicking the blue View in myShop button (Image 12). View how to make edits to myShop listings here.
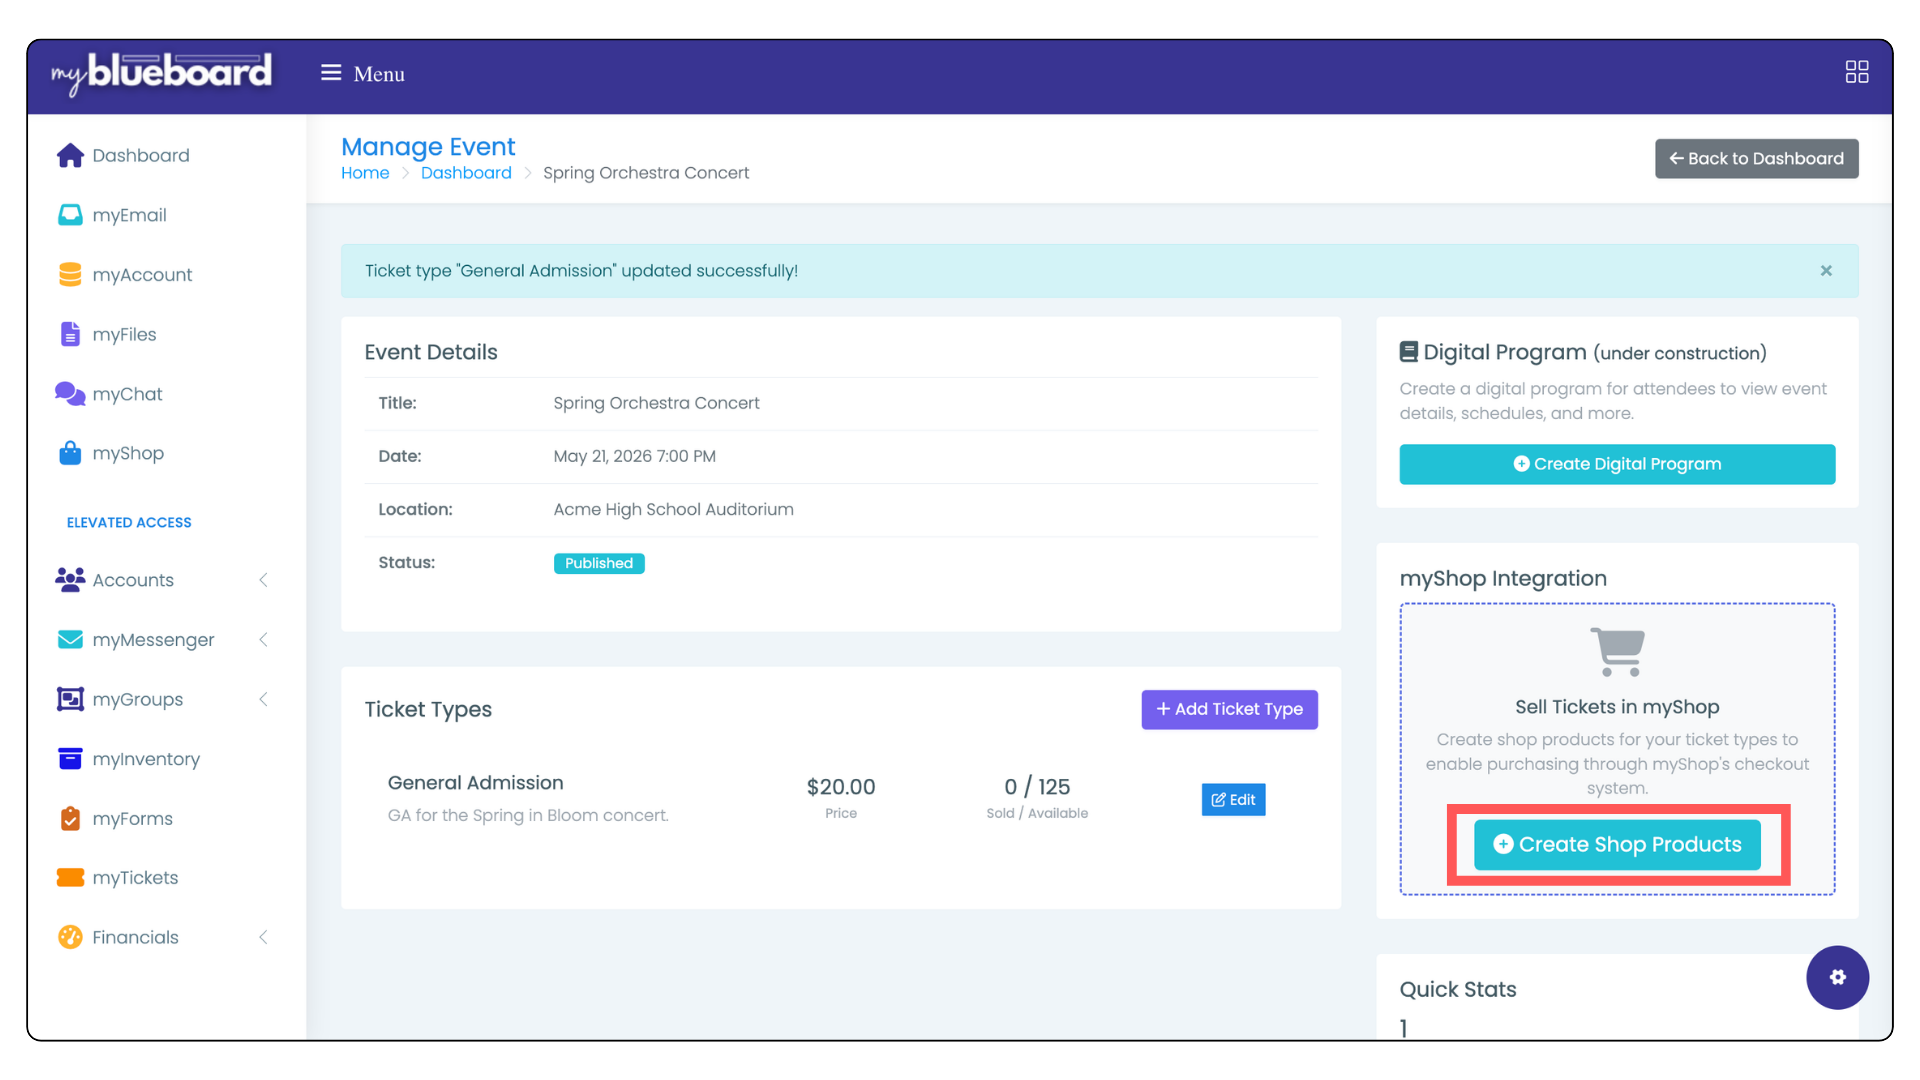
Image 10
Sharing your Ticket link with the public
Anyone can purchase event tickets. Purchasers do not need a myblueboard account and they will not be required to create an account to make their purchase.
You can organize your tickets in myShop in a few different ways.
When you create a ticket type and publish it to myShop, it will automatically appear in the Tickets category. If you don’t already have a Tickets category, one will be created for you when you publish your first ticket.
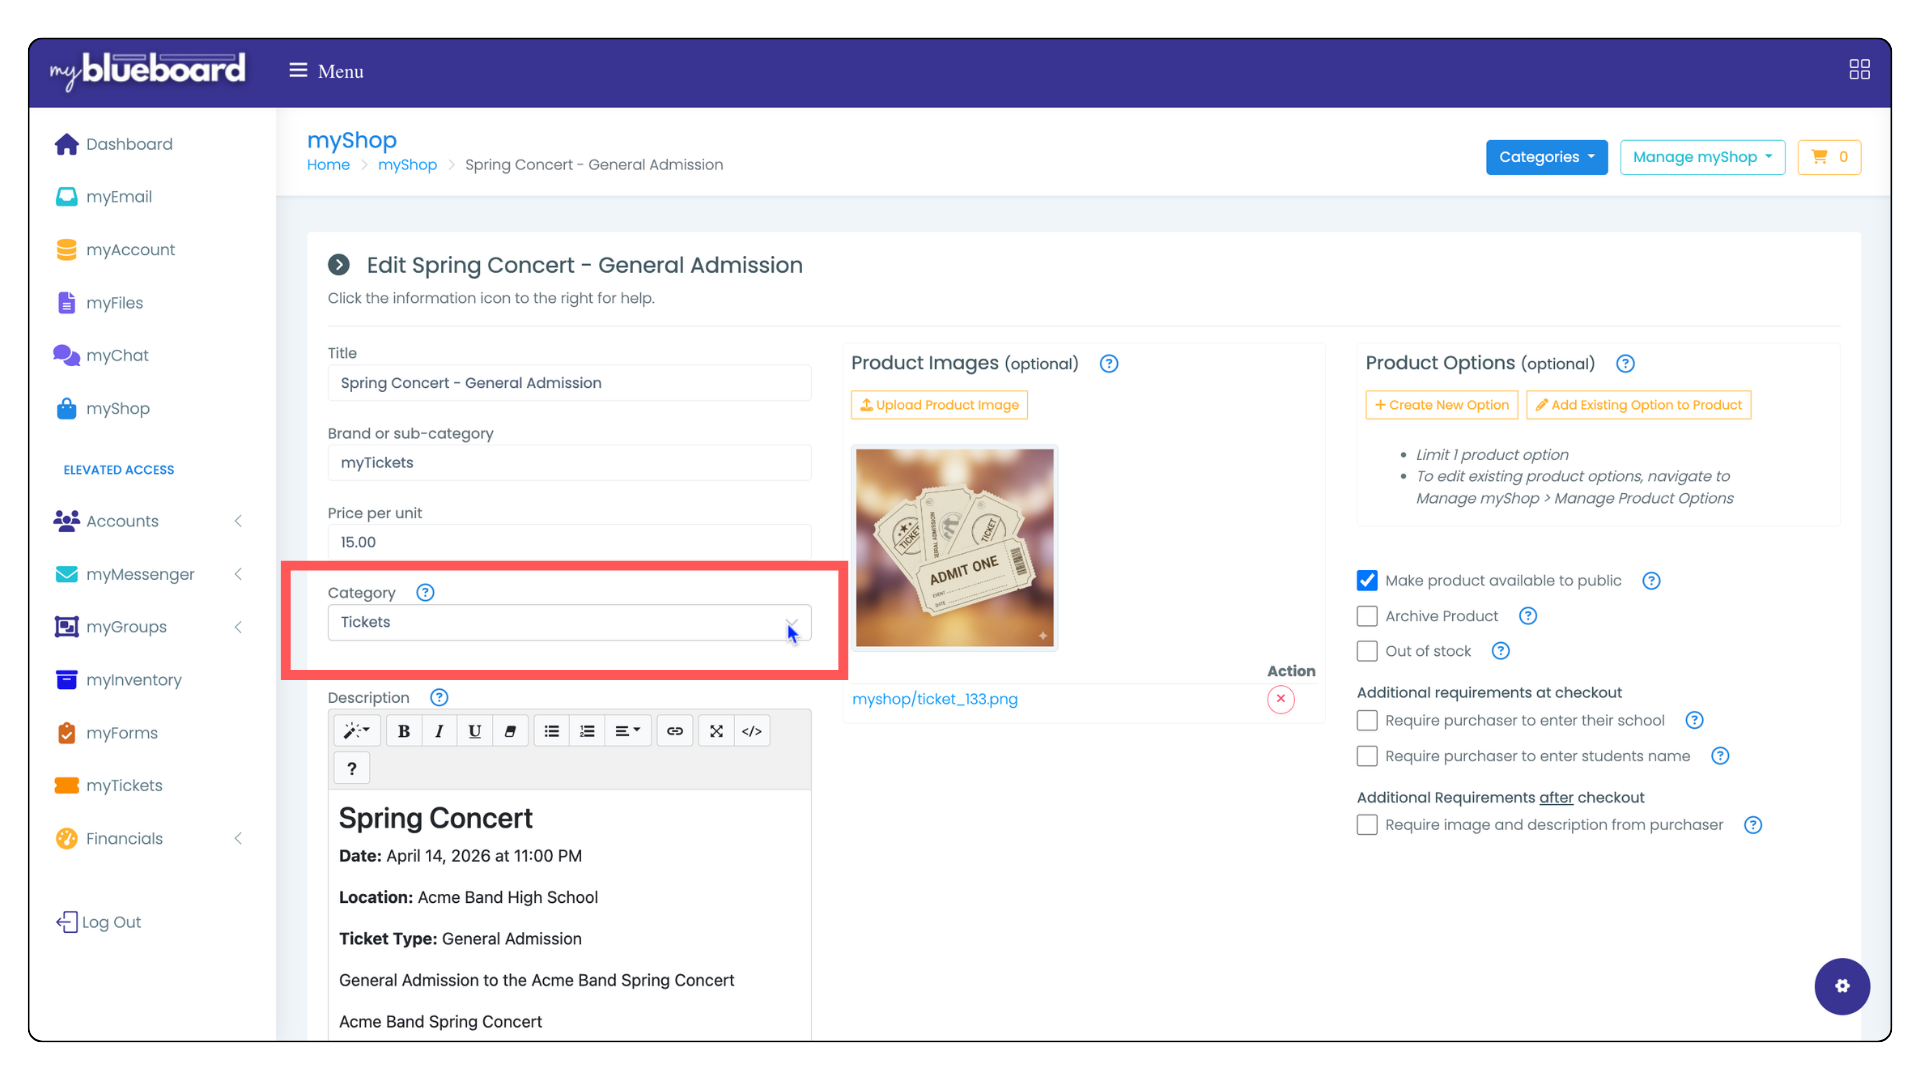
You can view all tickets by selecting the Tickets category from the Category dropdown (Image 13). If you prefer to organize tickets by event, you can create a new category and assign specific ticket types to it. This allows you to create a dedicated page for each event. You can do this by selecting the new category from the Category dropdown within the individual listing.
Each category has its own URL, and each individual ticket listing also has its own unique link.
You can copy the URL of the event page or product listing on desktop or mobile to share with the public.
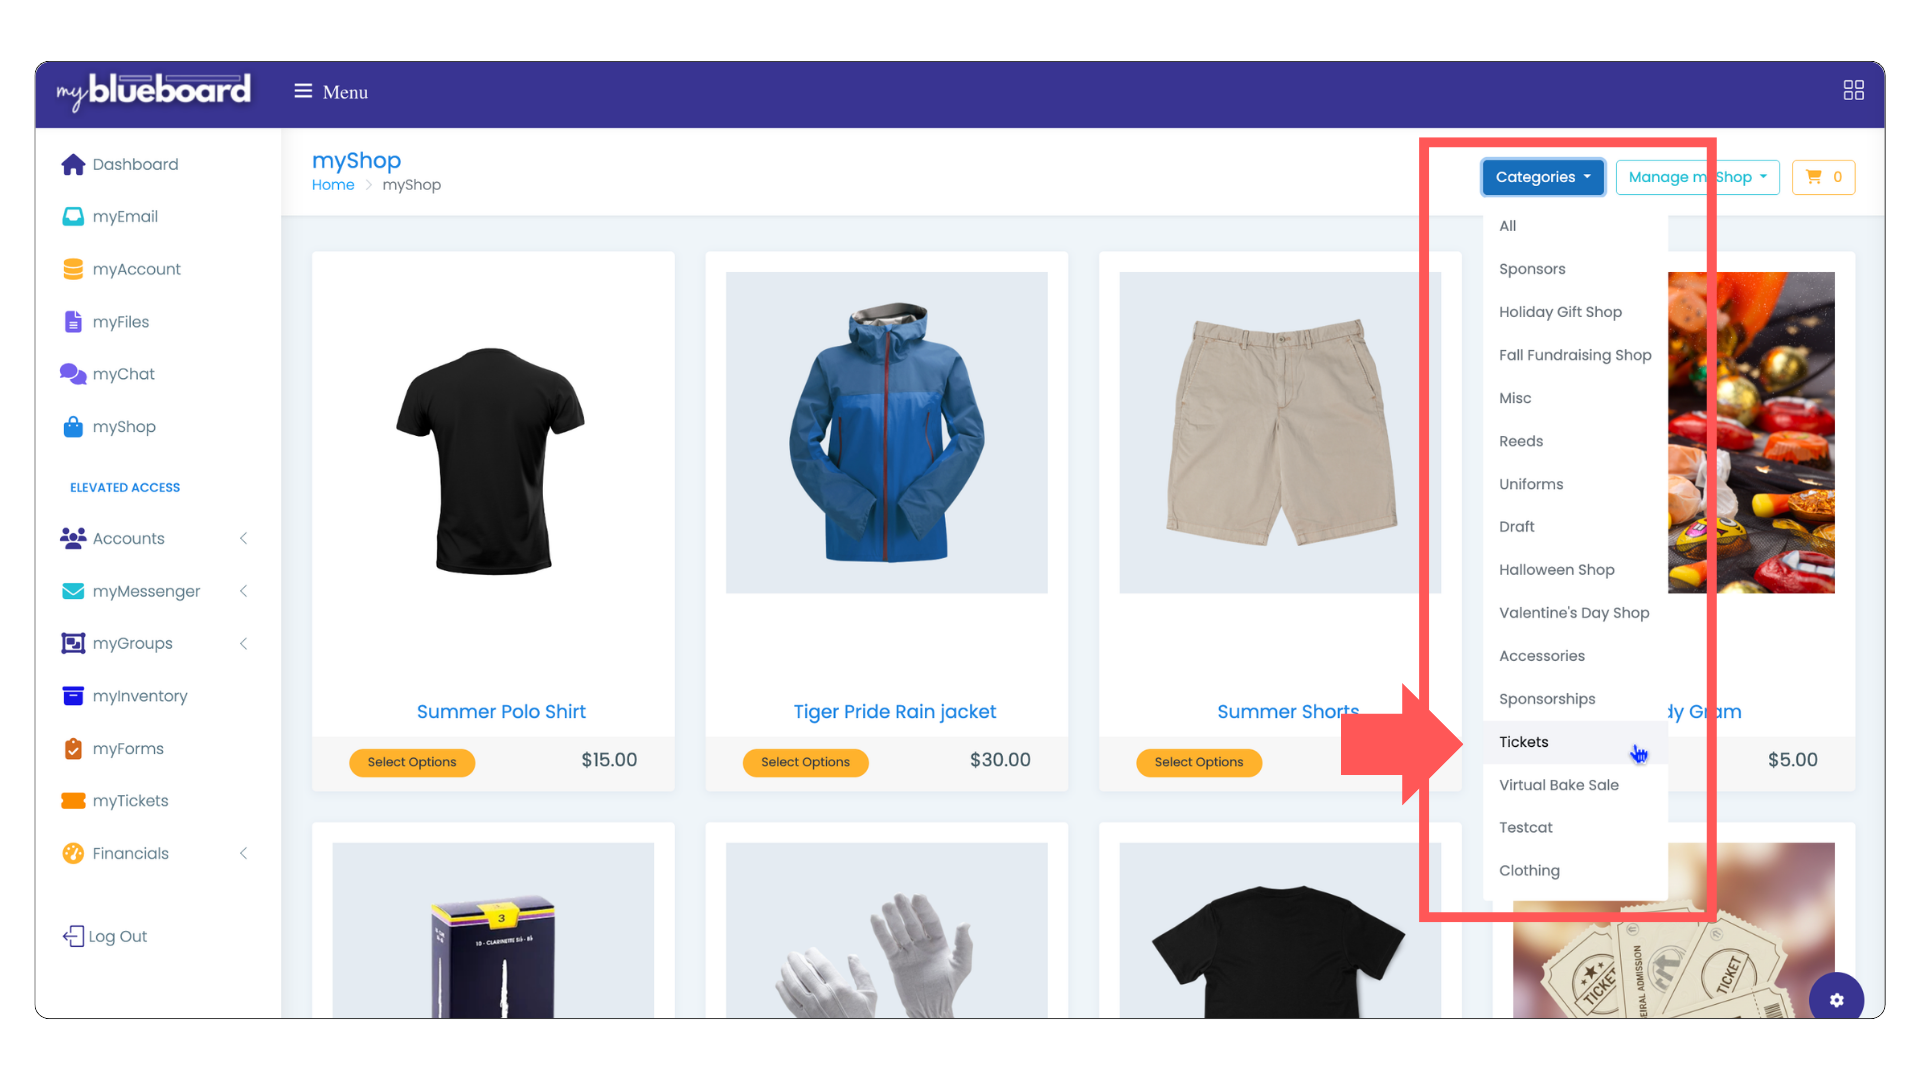
Image 13
Scanner Permissions
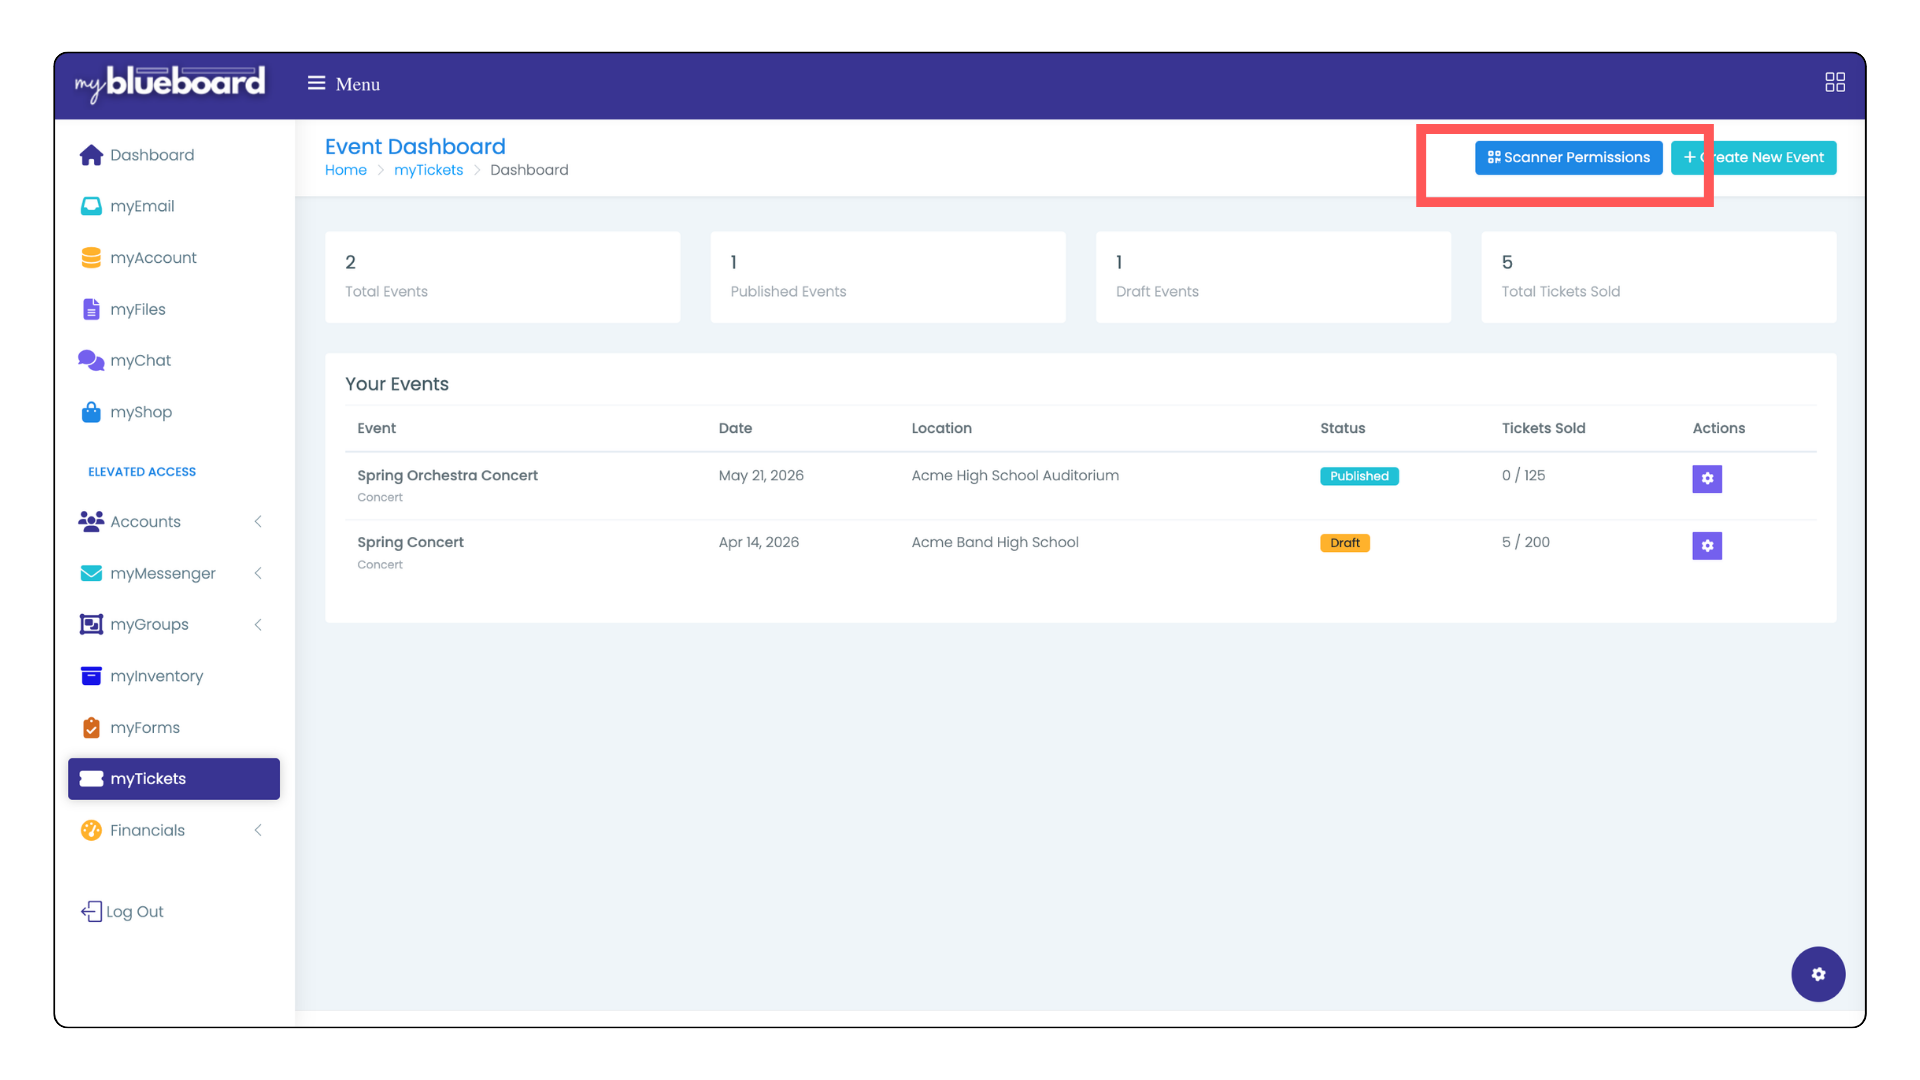
- Admins can manage scanner permissions by clicking the blue Scanner Permissions button (Image 15).
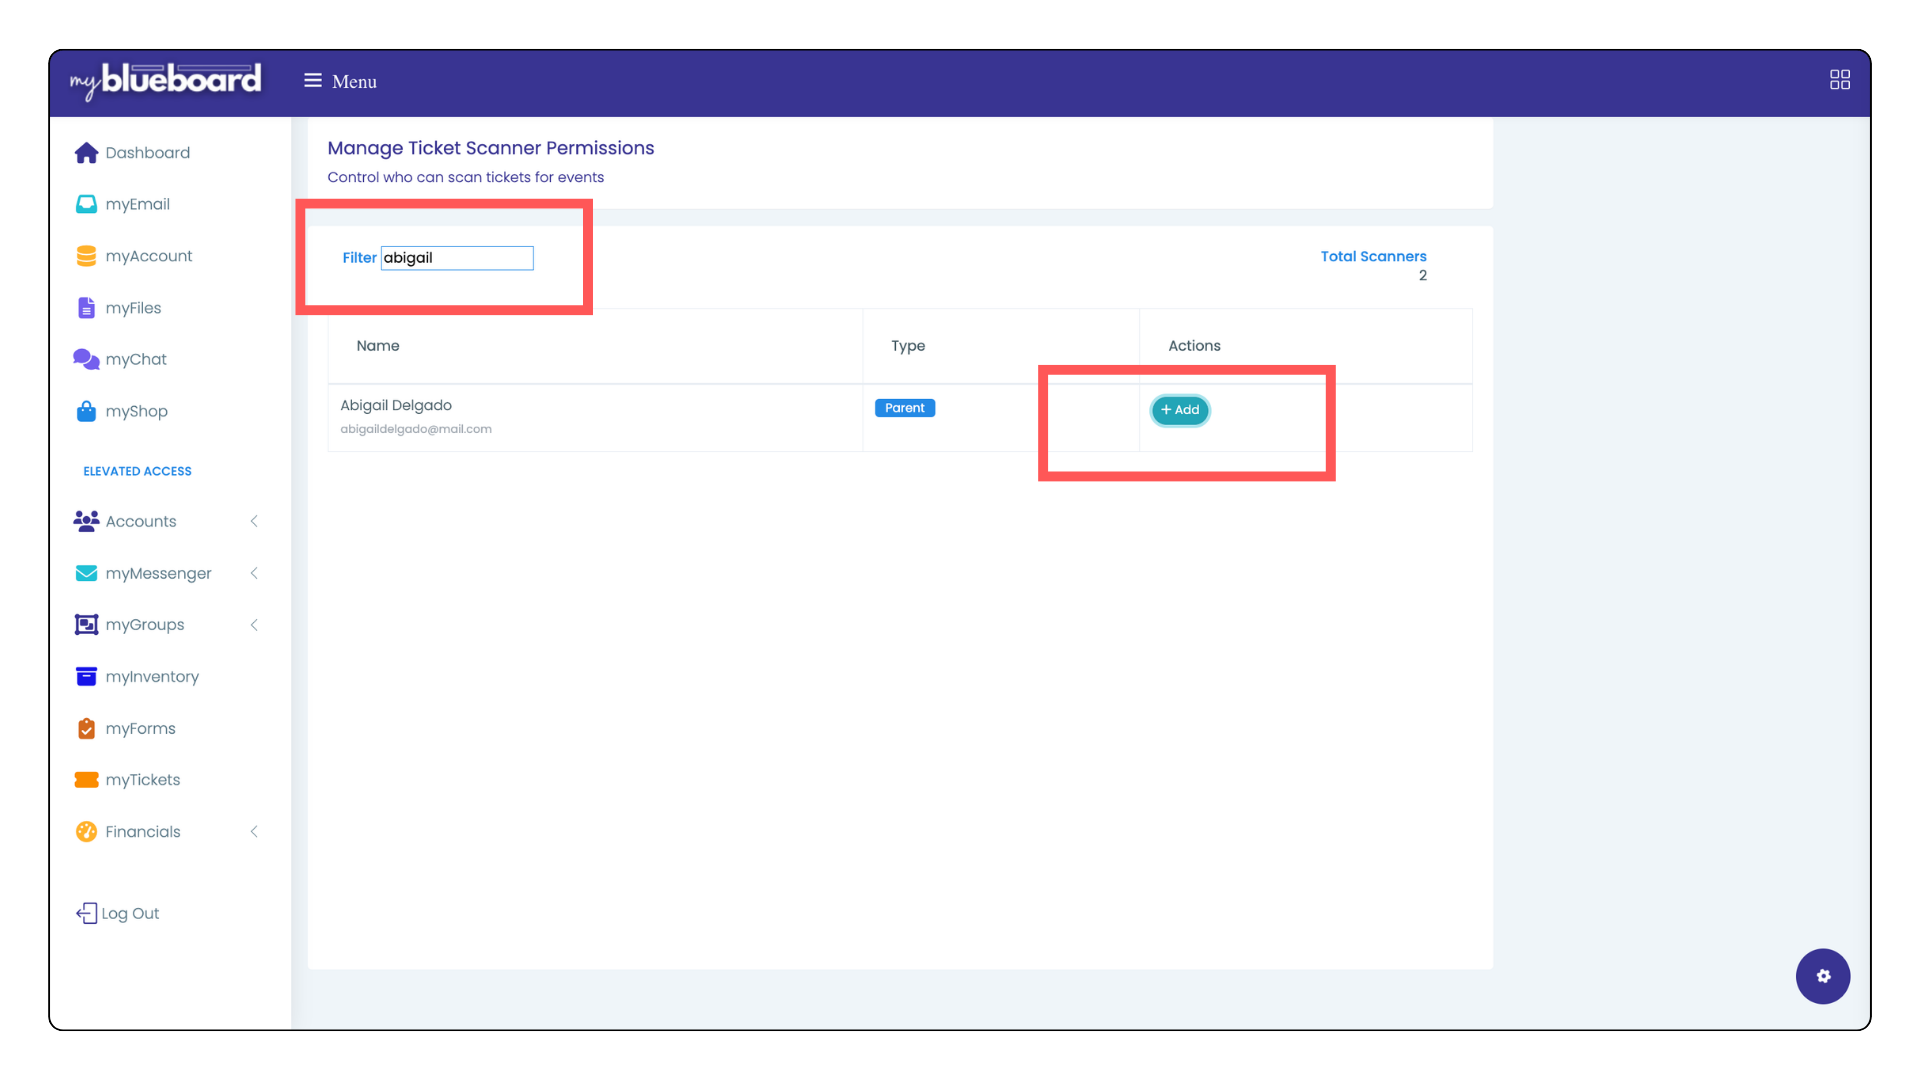
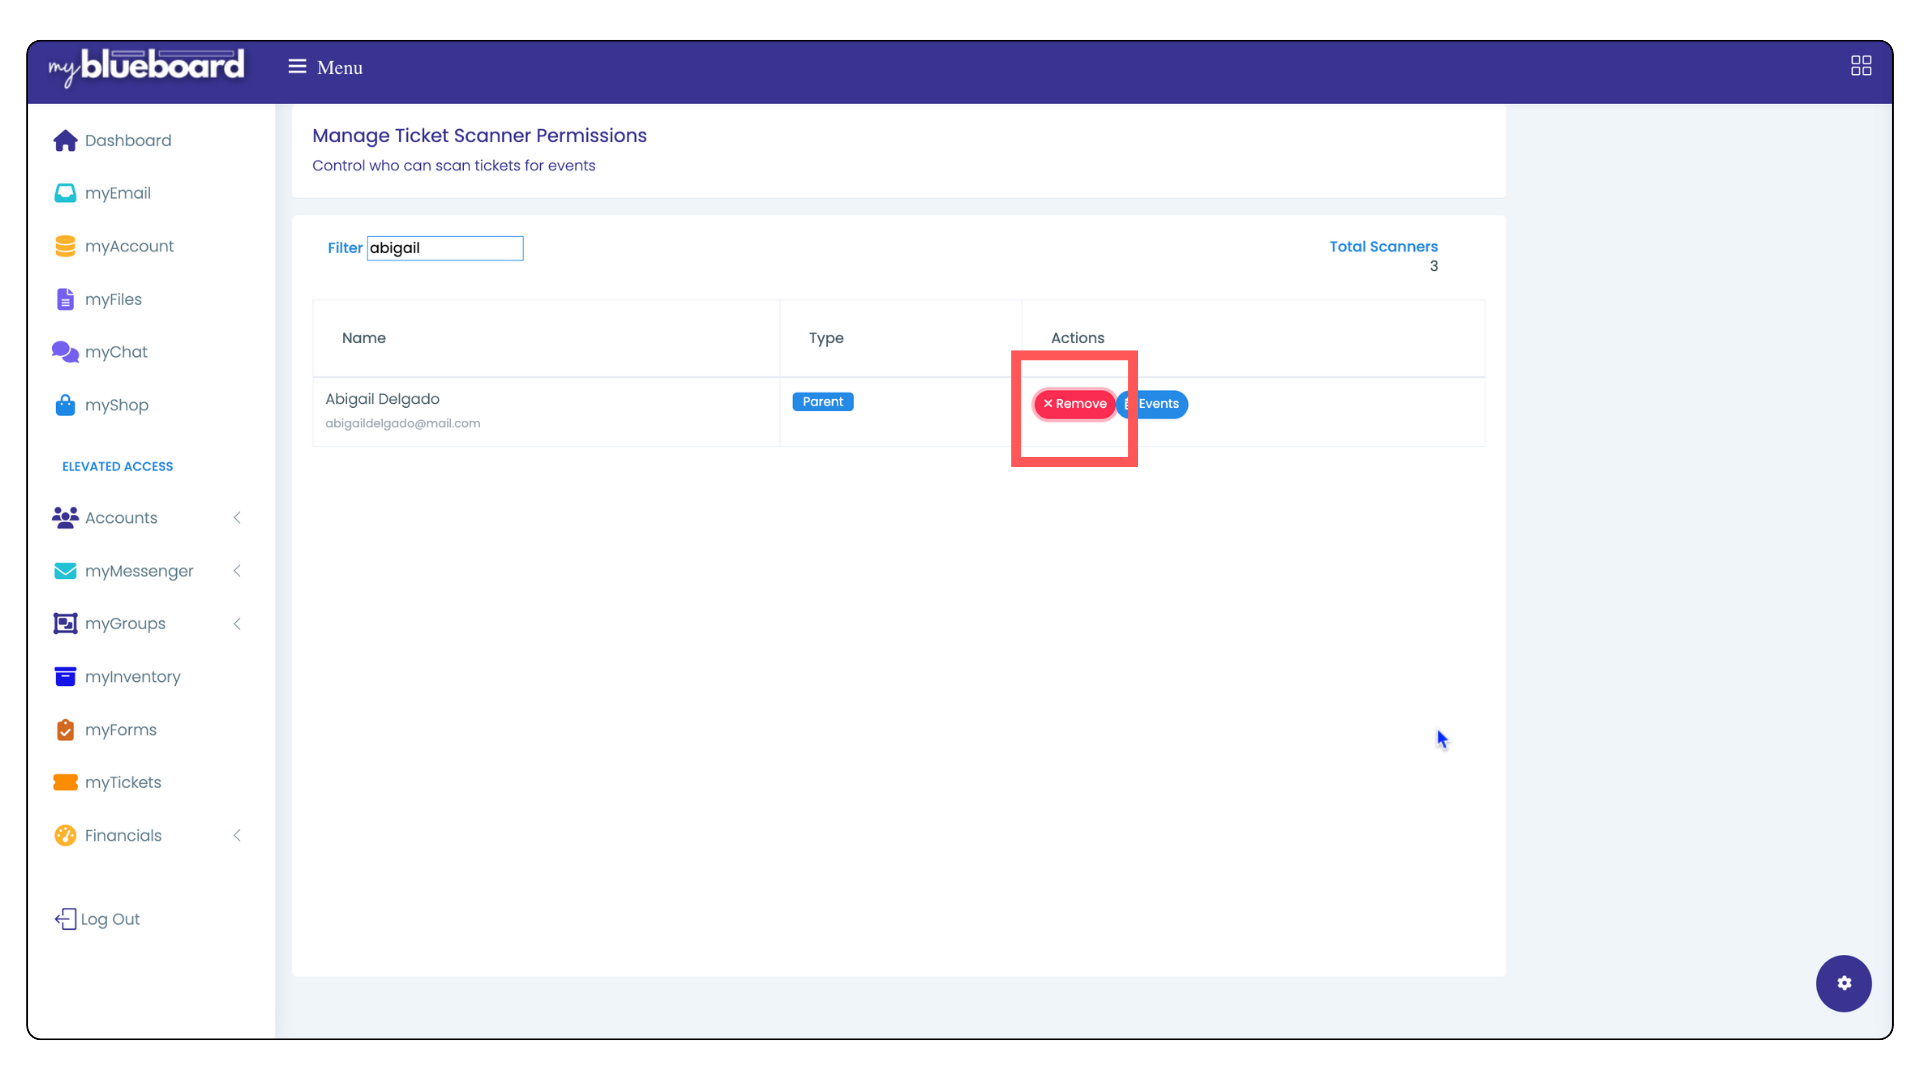
- Use the filter box to search for the person you want to grant access to (Image 16), then click Add next to their name to enable permissions. To remove access, click Remove (Image 17).
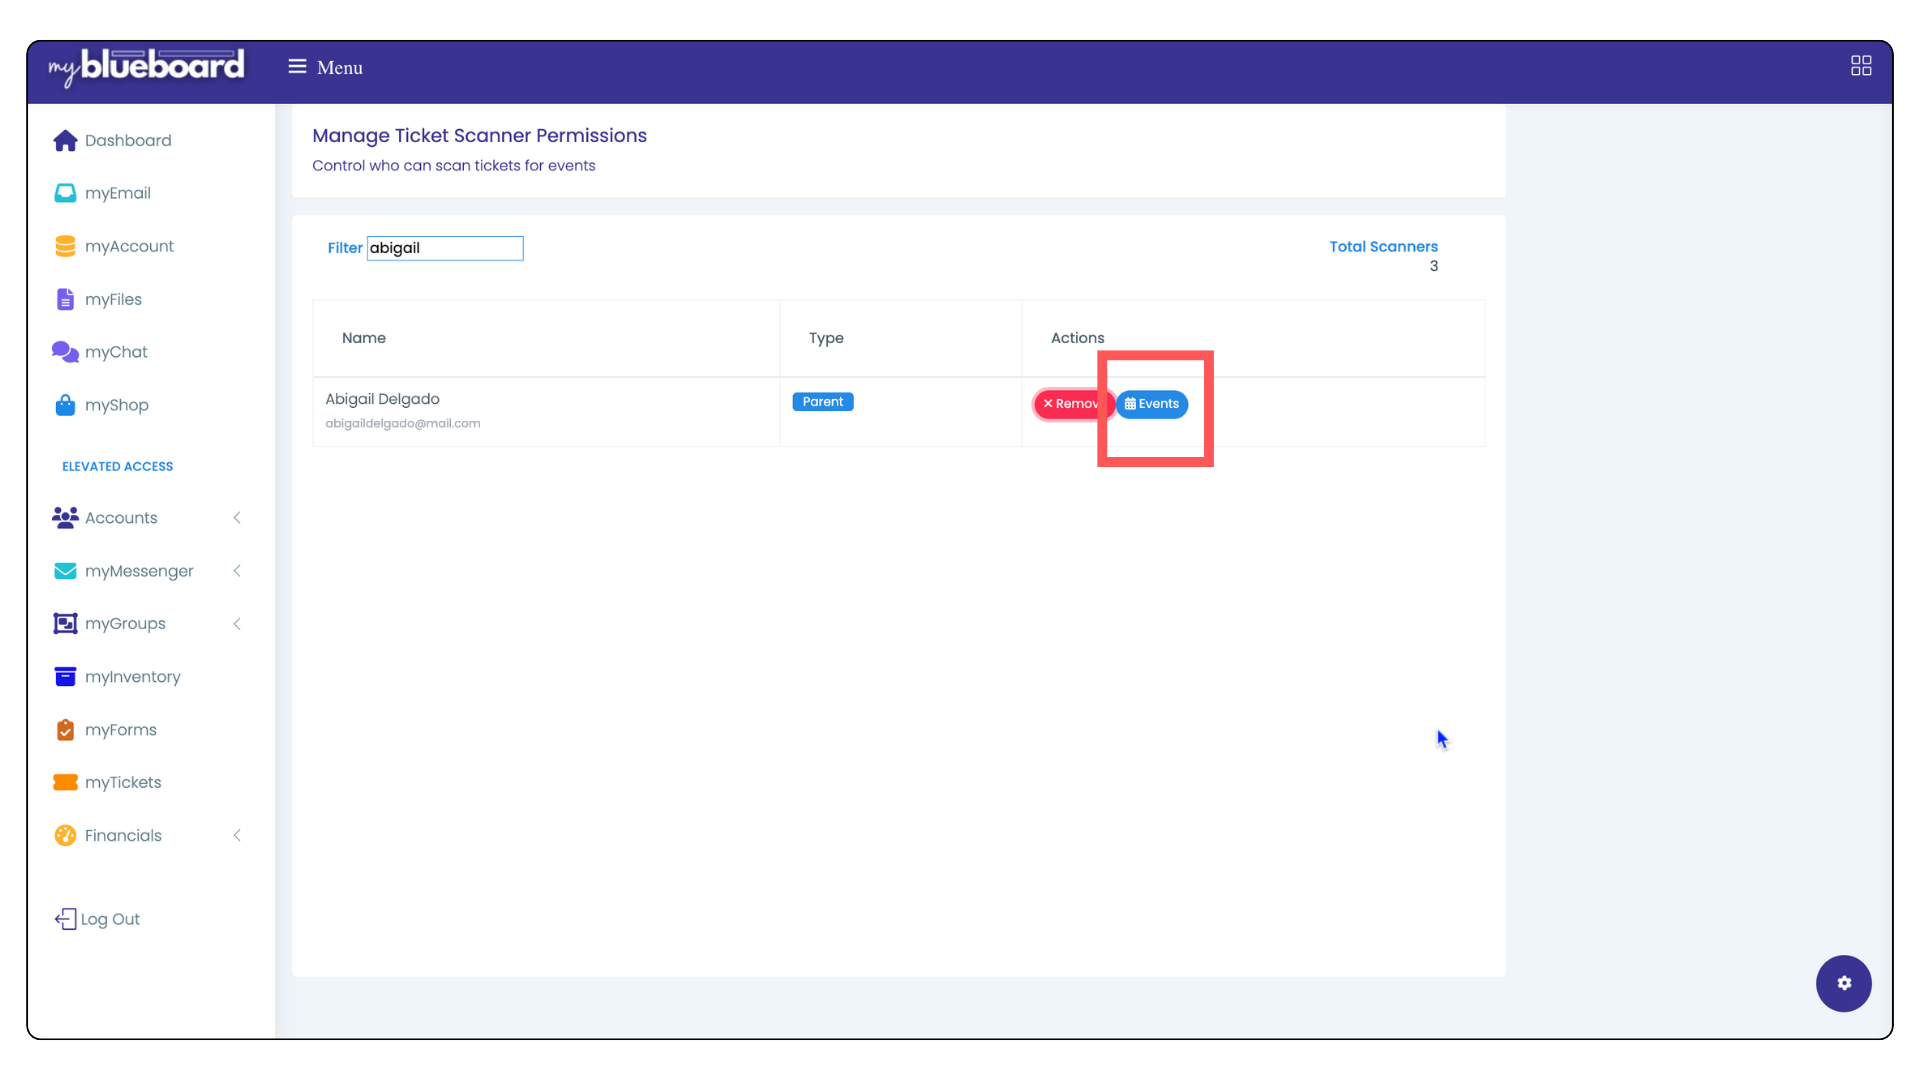
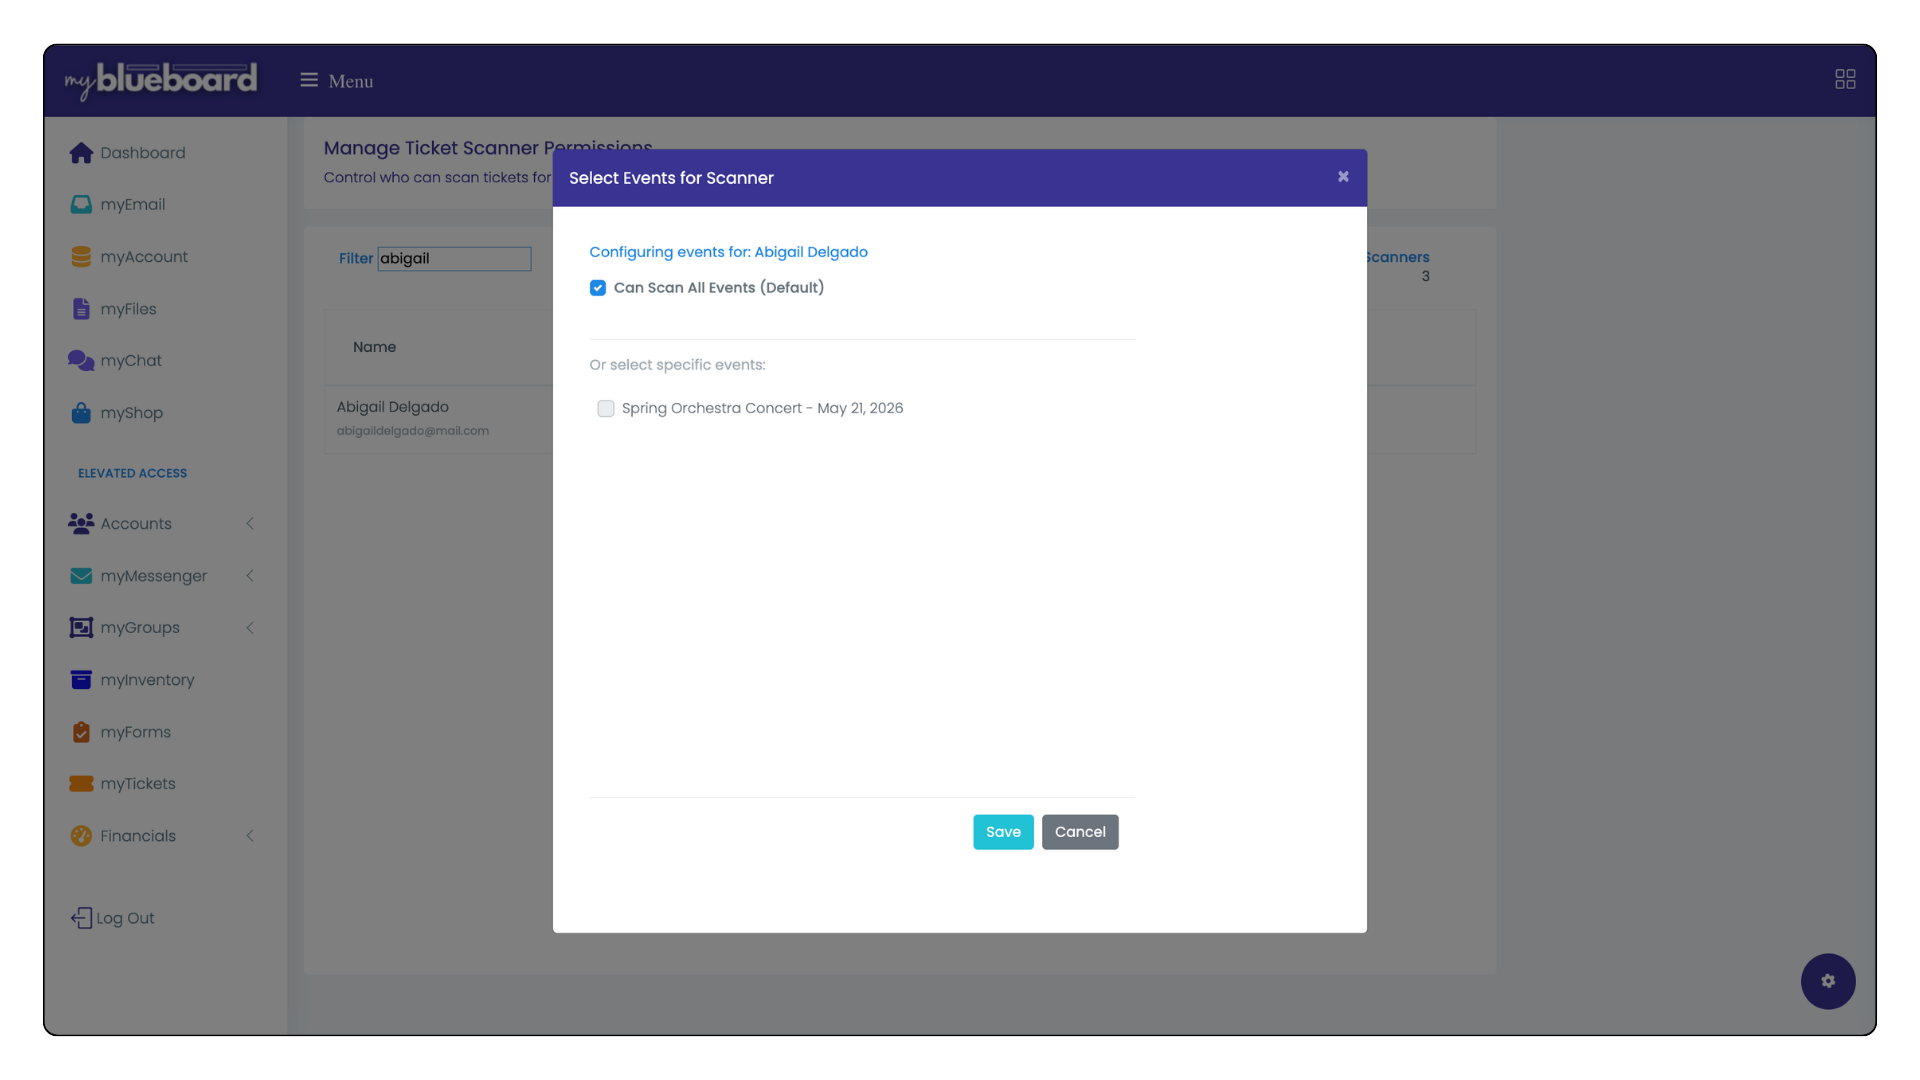
- To limit access to specific events, click the Events button next to their name (Image 18). By default, Can Scan All Events is selected. Uncheck this option to choose which event(s) they can scan (Image 19).
Scanning Tickets
Requirements: - Volunteers must have a myblueboard account with scanner permissions. Permissions can be granted for specific events or all events by account administrators. Volunteers will also need to allow myblueboard to access their camera in their device's settings.
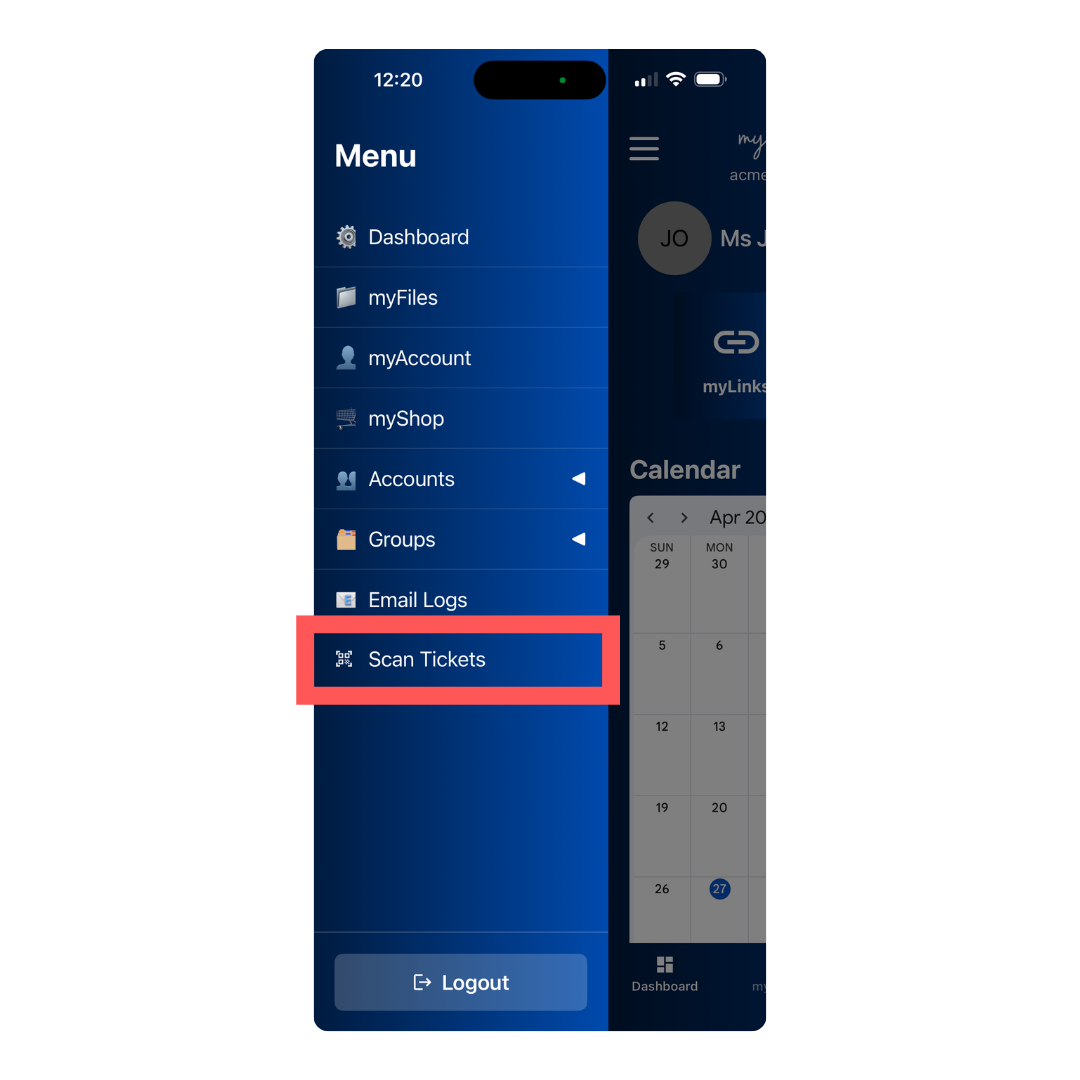
Open the mybb mobile app on your device and log in.- Select Scan Tickets from the left sidebar menu (Image 20).
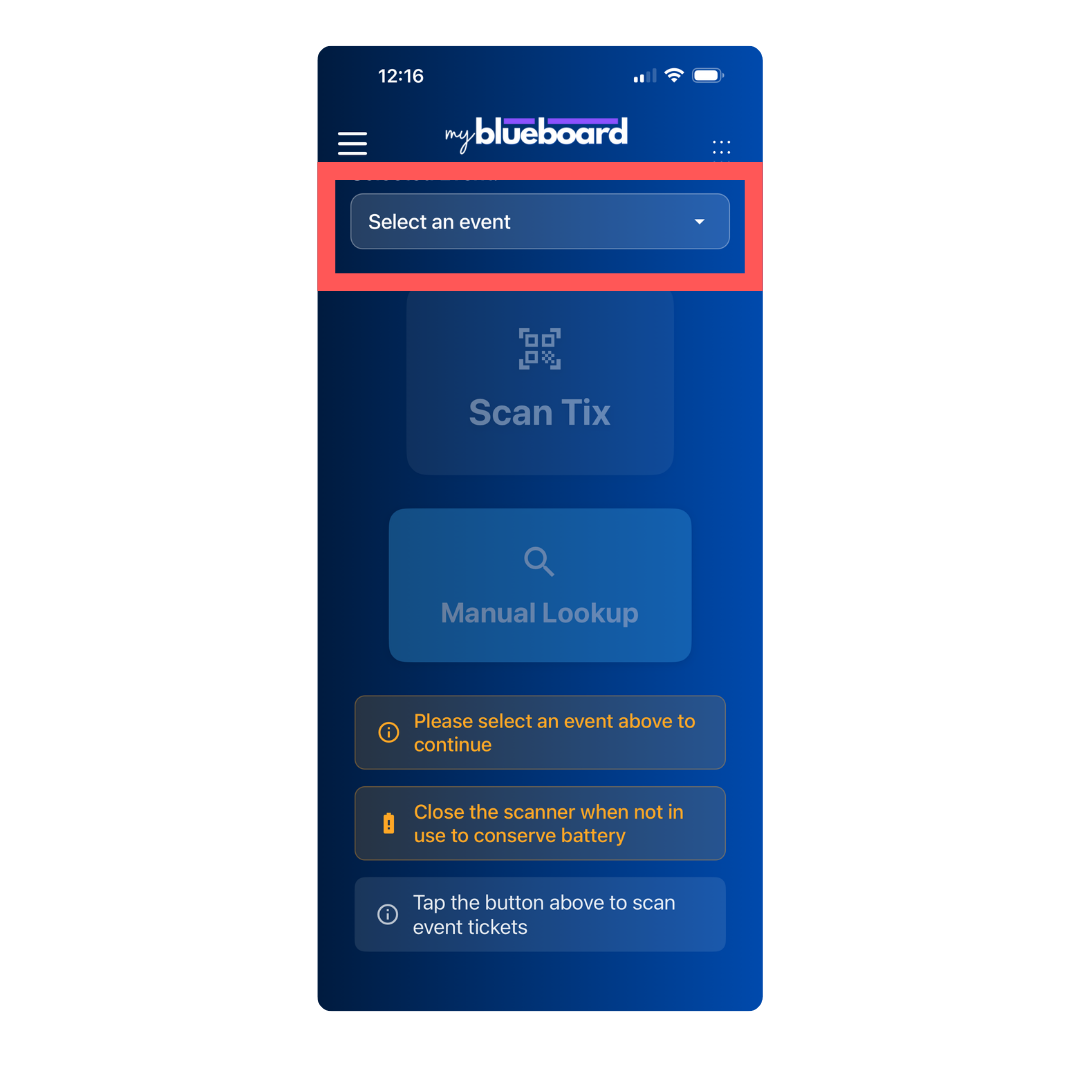
- Select an event from the dropdown (Image 21).
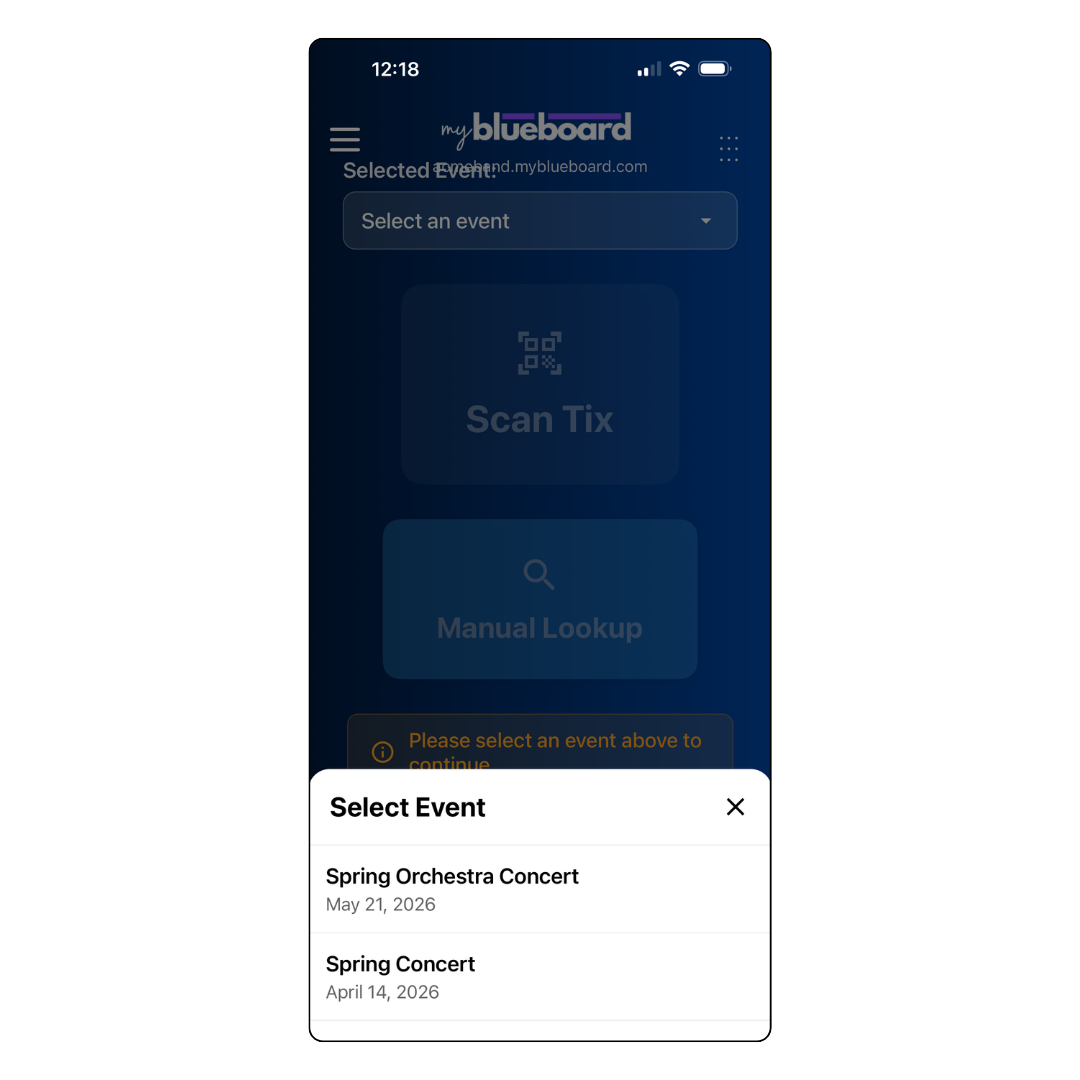
- Choose your event from the populated list (Image 22).
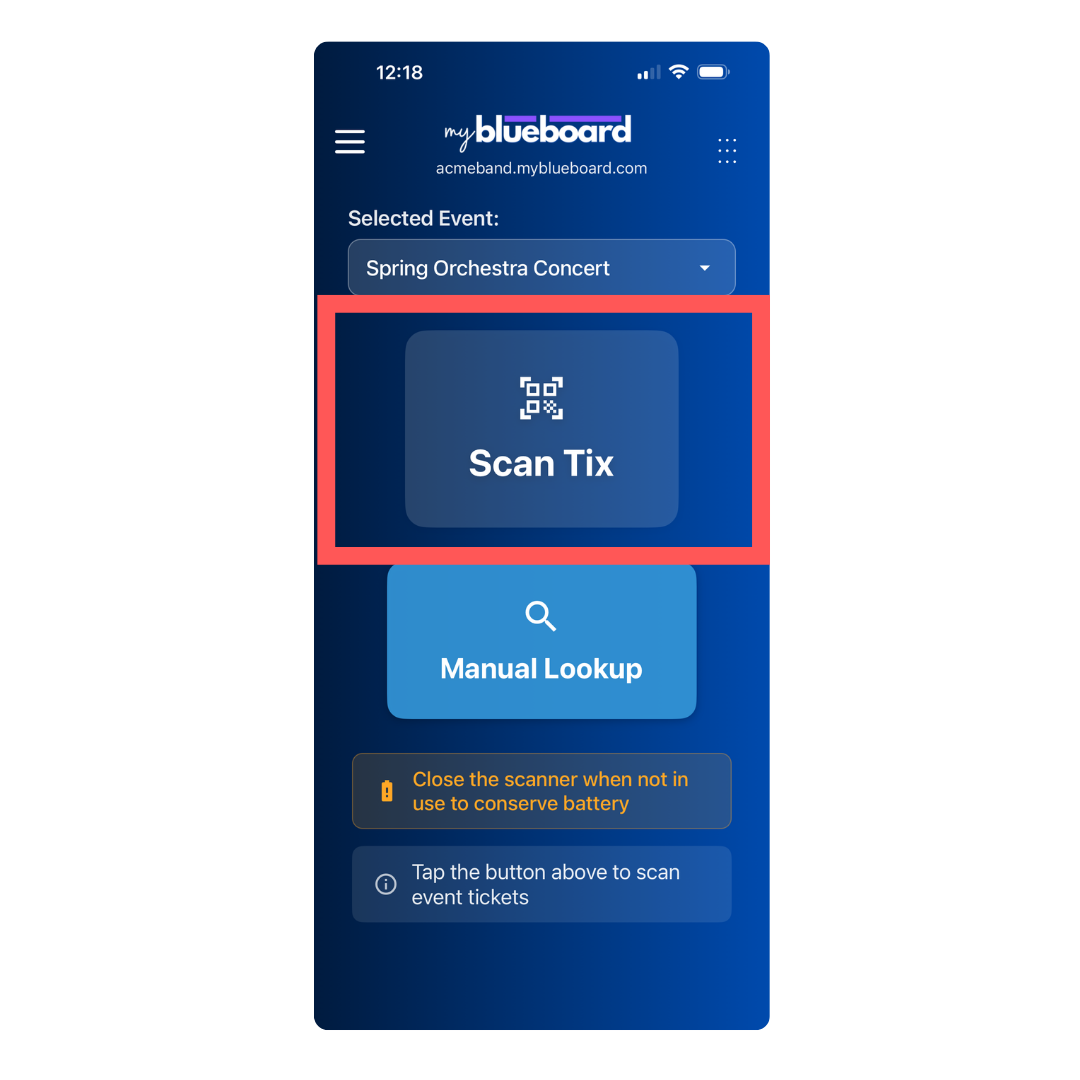
- To scan a QR code, select the Scan Tix button (Image 23), which will open your camera.
- Scan QR code.
- ✅ Valid - Green confirmation, ticket checked in
- • ❌ Already Used - Red warning, ticket already scanned
- • ❌ Invalid - Red error, ticket not found or cancelled
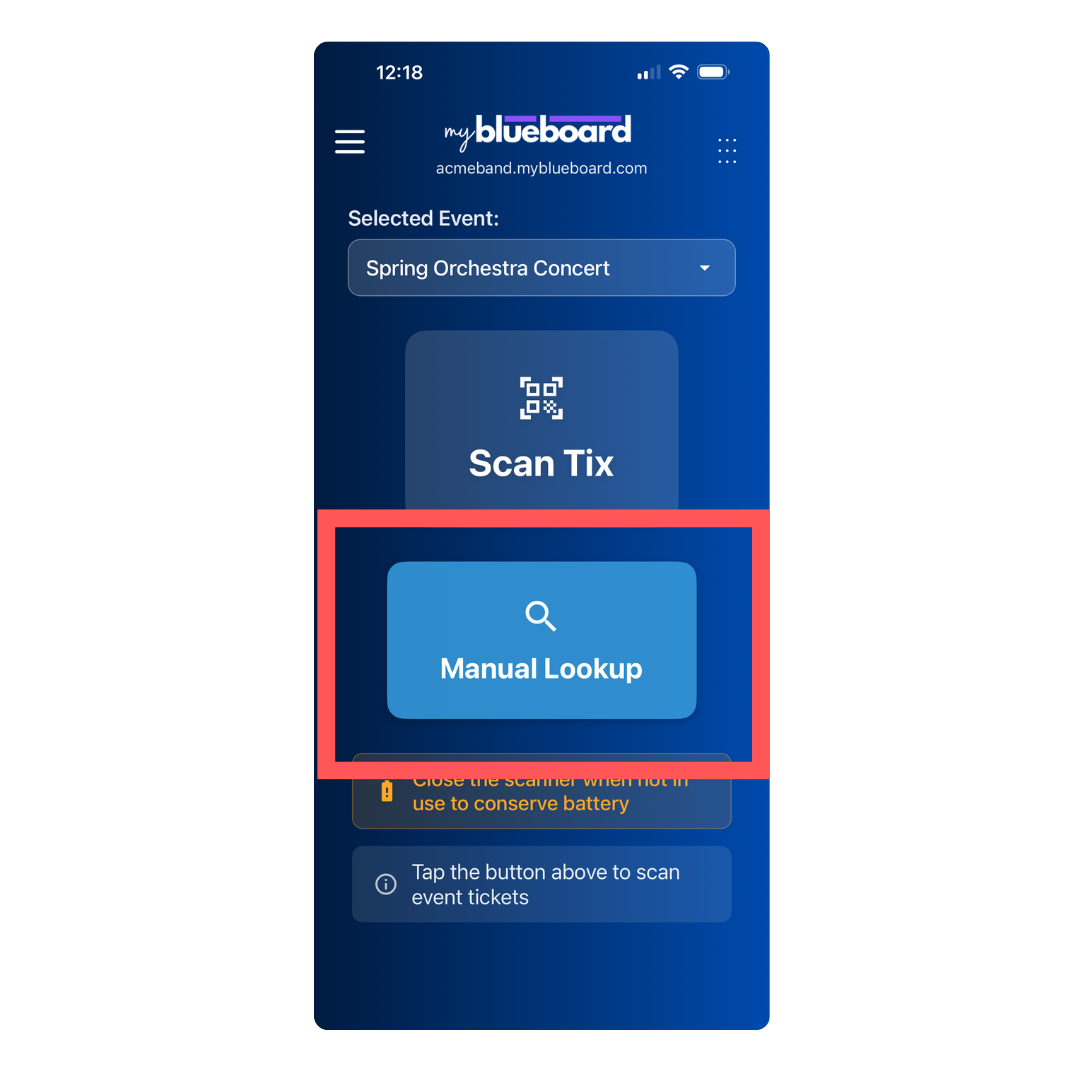
- To look up a ticket by name, email, or ticket number, select the Manual Lookup button (Image 24) and type the information into the search. bar. Select the appropriate ticket.
Troubleshooting Scanning Issues
QR Code Won’t Scan:
– Increase screen brightness
– Ensure good lighting
– Hold steady 6-12 inches from camera
– Try manual entry with ticket number
Invalid Ticket:
– Verify it’s for the correct event
– Check the ticket is confirmed/paid
– Contact event organizer
Already Used:
– Person may have been checked in already
– Check for duplicate tickets
– Contact event organizer
Managing Events
- Select the myTickets tab from the left sidebar menu to access your Events Dashboard.
- Select your event from the event listings.
- From the events management homepage (Image 25), you can edit your event, view key statistics (total ticket types, tickets sold, and revenue), preview or email a test ticket, and delete your event.