
Onboarding Students & Parents
Quick Links
Last updated on August 24, 2025
What is the easiest way to onboard accounts?
It really depends on your situation and preference.
Self-Registration
- This process is idea if you have all or most of your students and or parents in a room for a class or meeting.
- They can use their phones or tablets to create their account, which will send an email to directors requesting their approval.
- Directors/admins can approve everyones account with one click in Admin Tasks.
Mass Importing
- This is idea if you already have everyones email address and information in a spreadsheet.
- Use the handy "Excel import builder" file to organize the information, save the contents to a new CSV file, and upload on the Admin Tasks page.
Adding individual accounts
- Directors/admins can individually add student, parent, and director accounts by navigating to the respecitve account page under "Accounts" on the left side menu.
What are the required fields for mass importing?
The following are the required fields for ALL accounts.
- Type (Student, Parent, or Director)
- Complete Email address
- First and last name
- Grade (student accounts only)
- Section (student accounts only)
- Prefix (Mr, Mrs, Ms, Miss, Dr for Director Accounts only)
For more information please view our "Importing and Exporting Accounts" support page.
Can parents and students use the same account?
Technically yes, but it's highly not recommended.
Why not?
- Parents are automatically CC'd on all comunication to their child.
- Resettings and remembering passwords can be difficult.
- Directors may want to only communicate (email, message) parents for collecting fees, asking for volunteers, and/or desiminating booster information.
- Some parents may need elevated privileges which student accounts cannot possess.
- You can't assign multiple email addresses to an account.
How do I connect student and parent accounts?
There are several ways to connect accounts.
Once students and parents have an account, they or admins can do one of the following.
- Parents can connect their childs account (or multiple accounts) by entering the childs 4-digit code on their dashboard in the "myFamily" section.
- If parents know their childs 4-digit code on the self-registration page but it's not required.
- Directors/admins can connect accounts by clicking the "Add/Modify Relationships" button in Student or Parent account view.
- Directors/admins can export the account information via the Admin Tasks page, connect the accounts in the spreadsheet and import the account data.
For more information please view our "Connecting Student and Parent Accounts" support page.
What if I get stuck or need help?
No problem! Just shoot us an email at support@myblueboard.com and we'll be more than happy to help!
How to register students and parents (self-registration)
Student/Parent Process
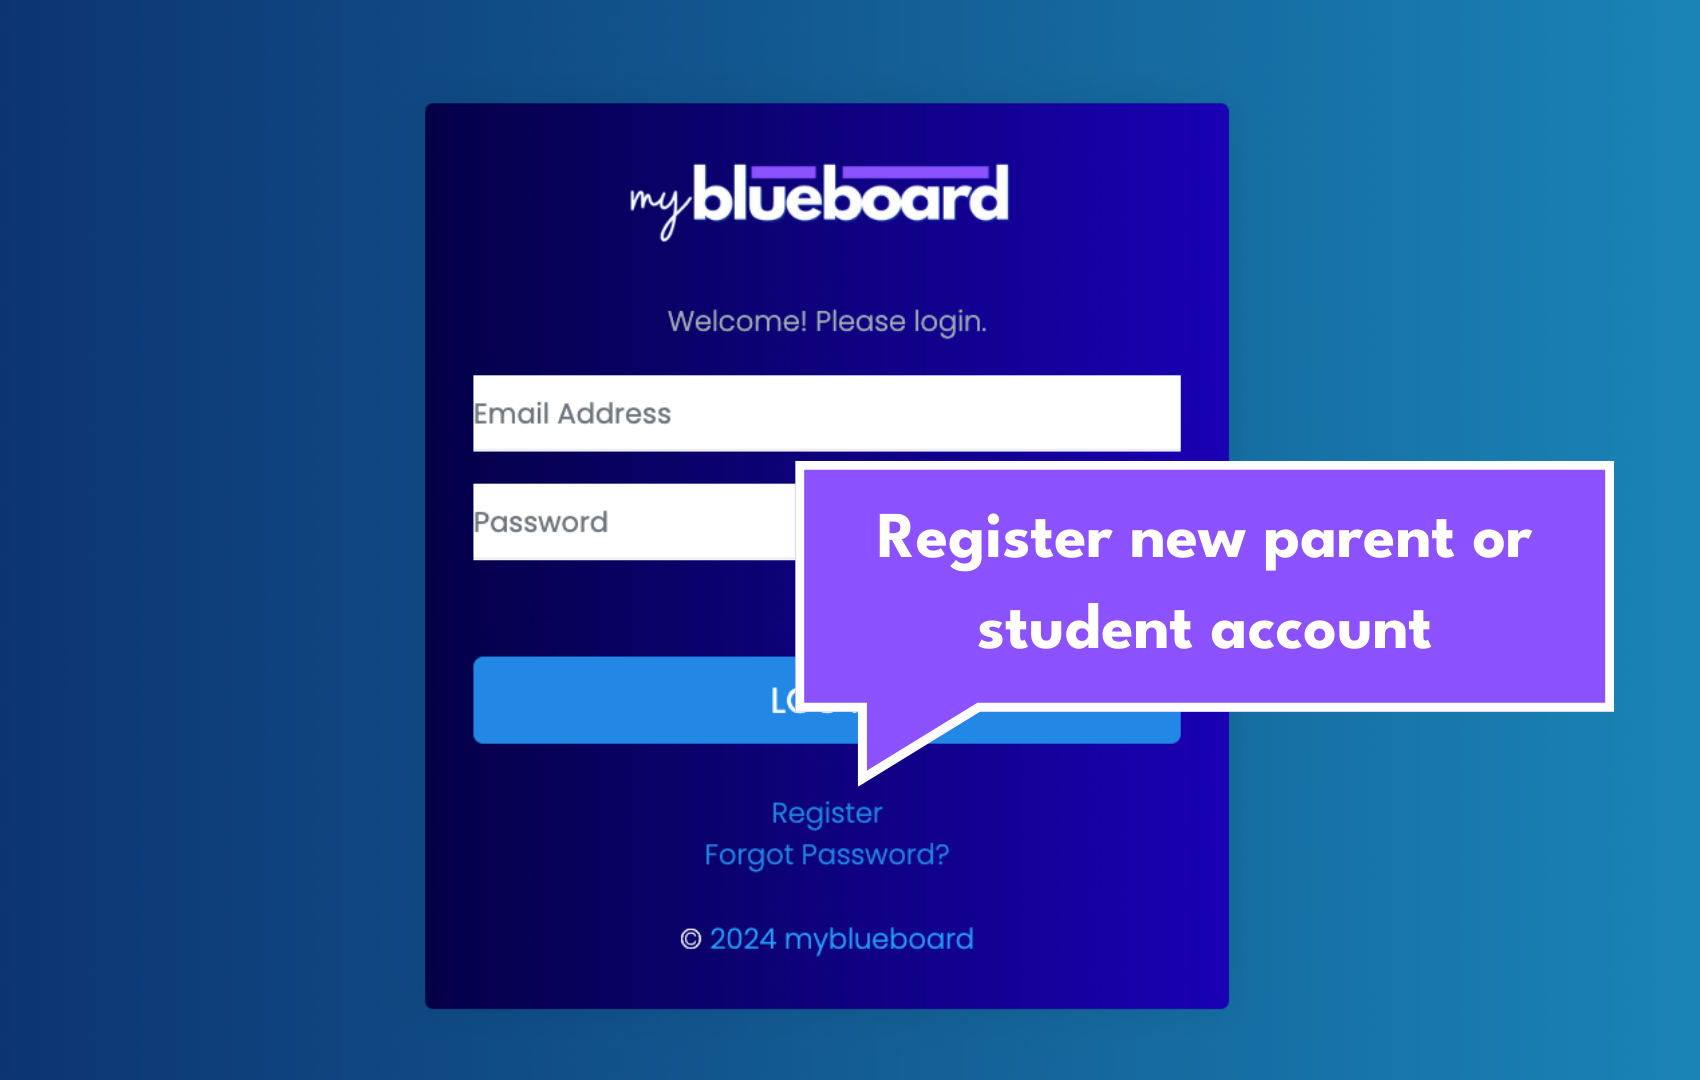
- Click "register" on login screen
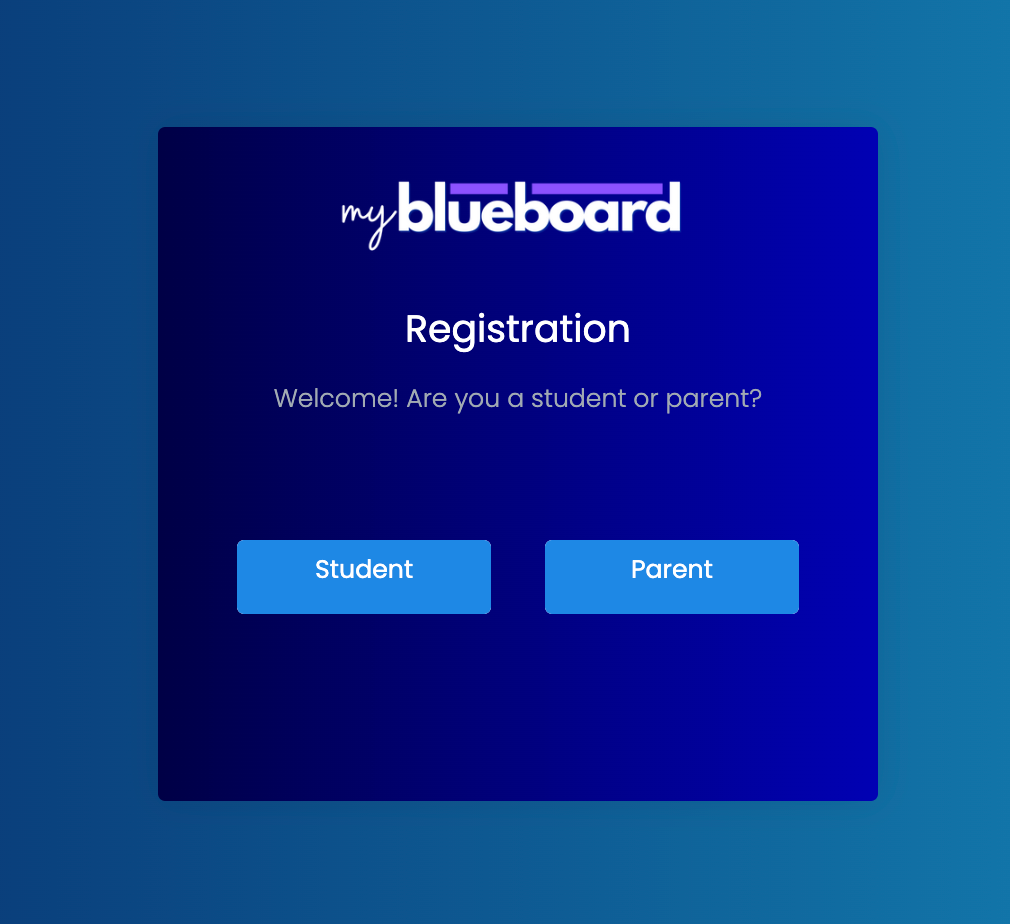
- Select "Student" or "Parent" account type
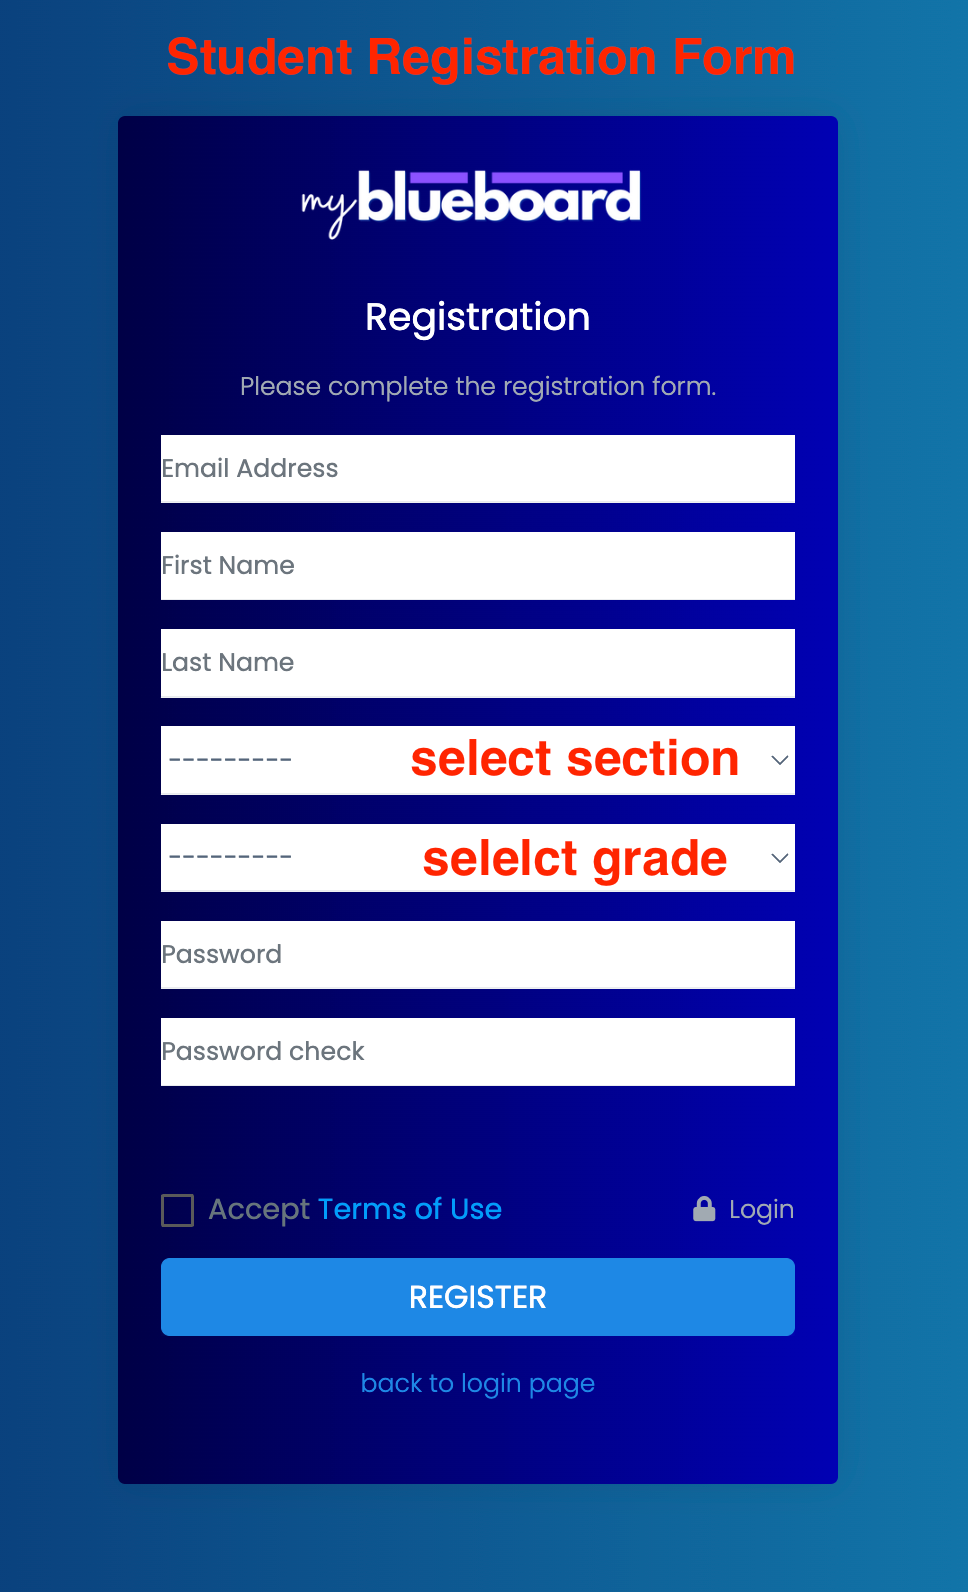
- Complete & submit the form.
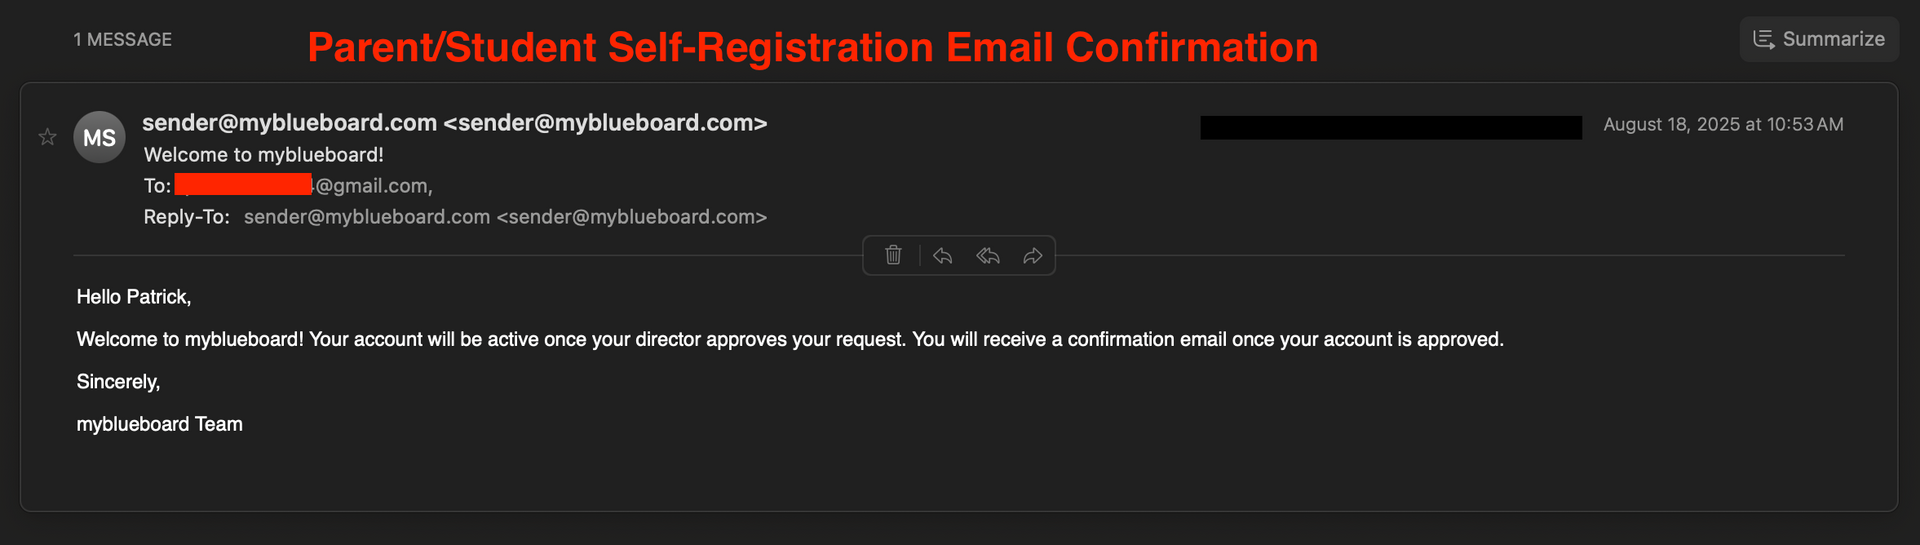
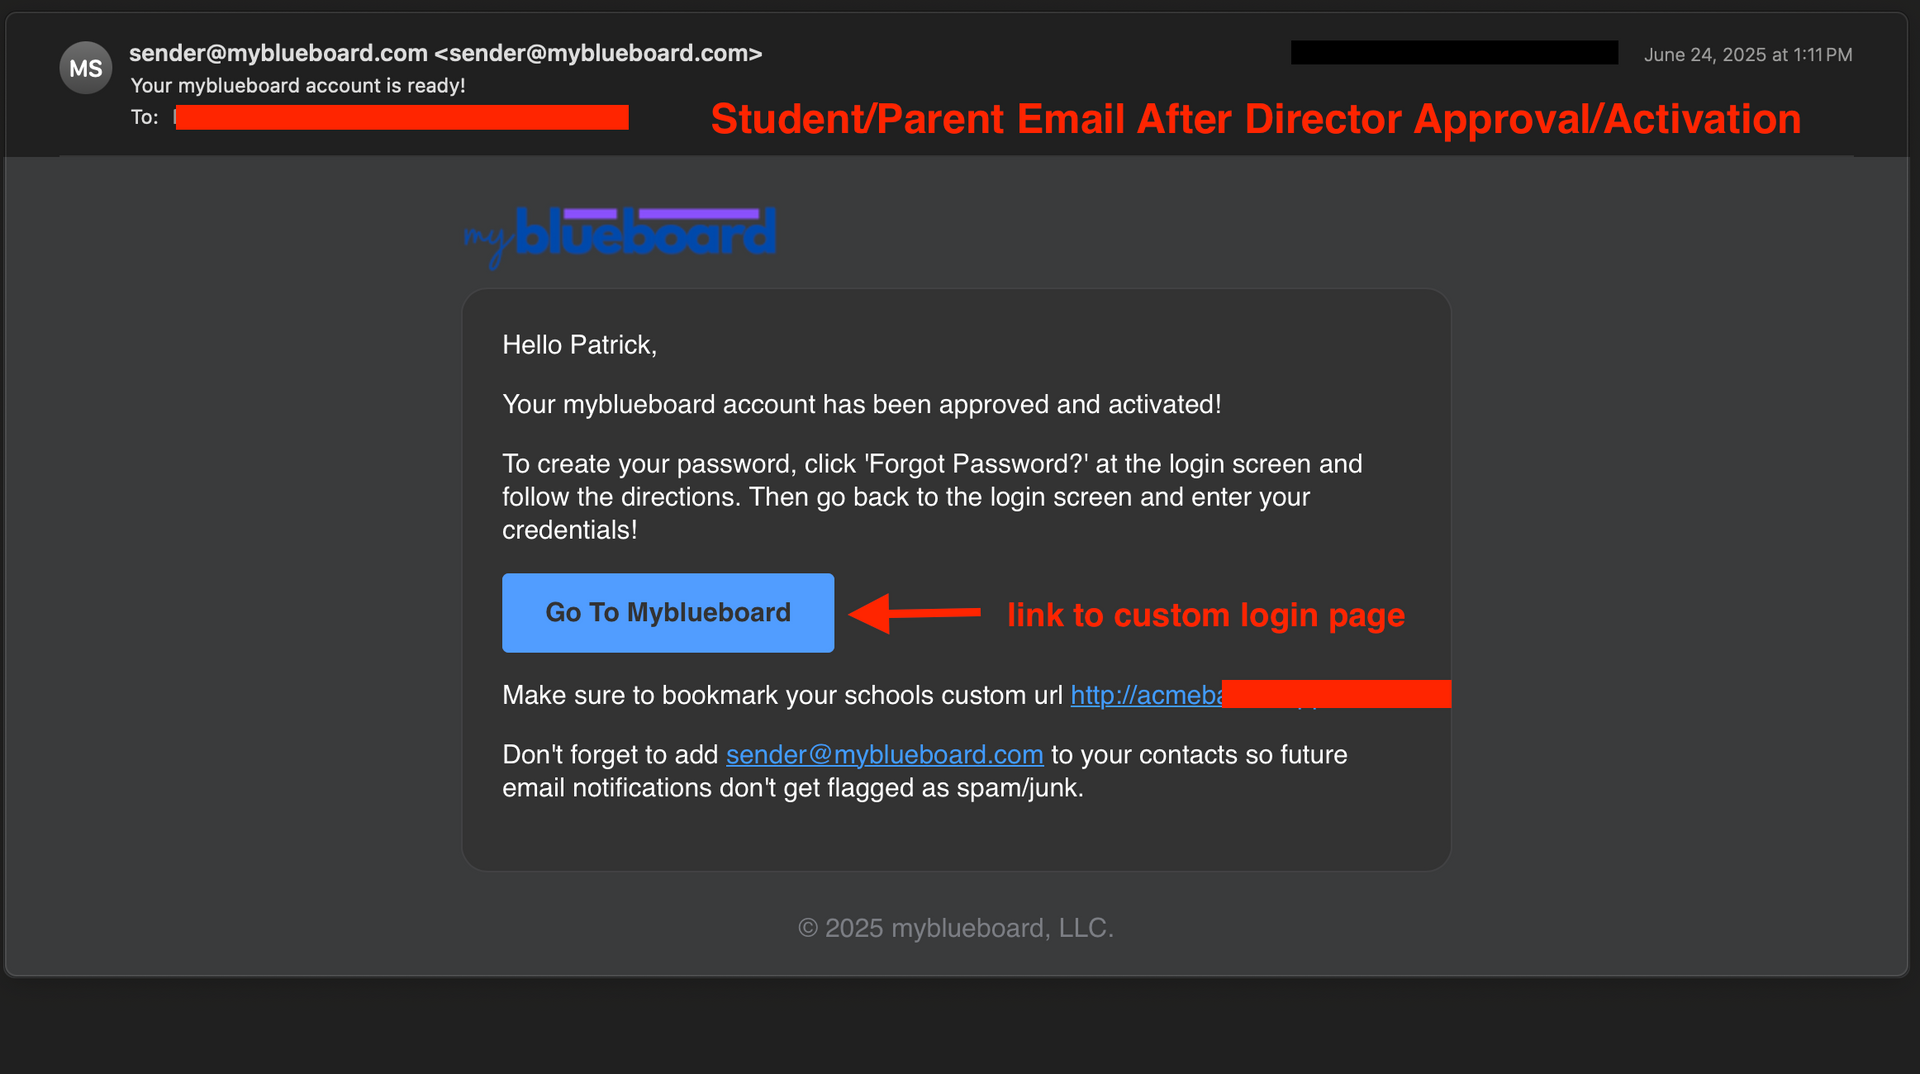
- Check email inbox welcome email & activated email
- See "Student/Parent Confirmation Email" & "Student/Parent Approved/Activated Email"
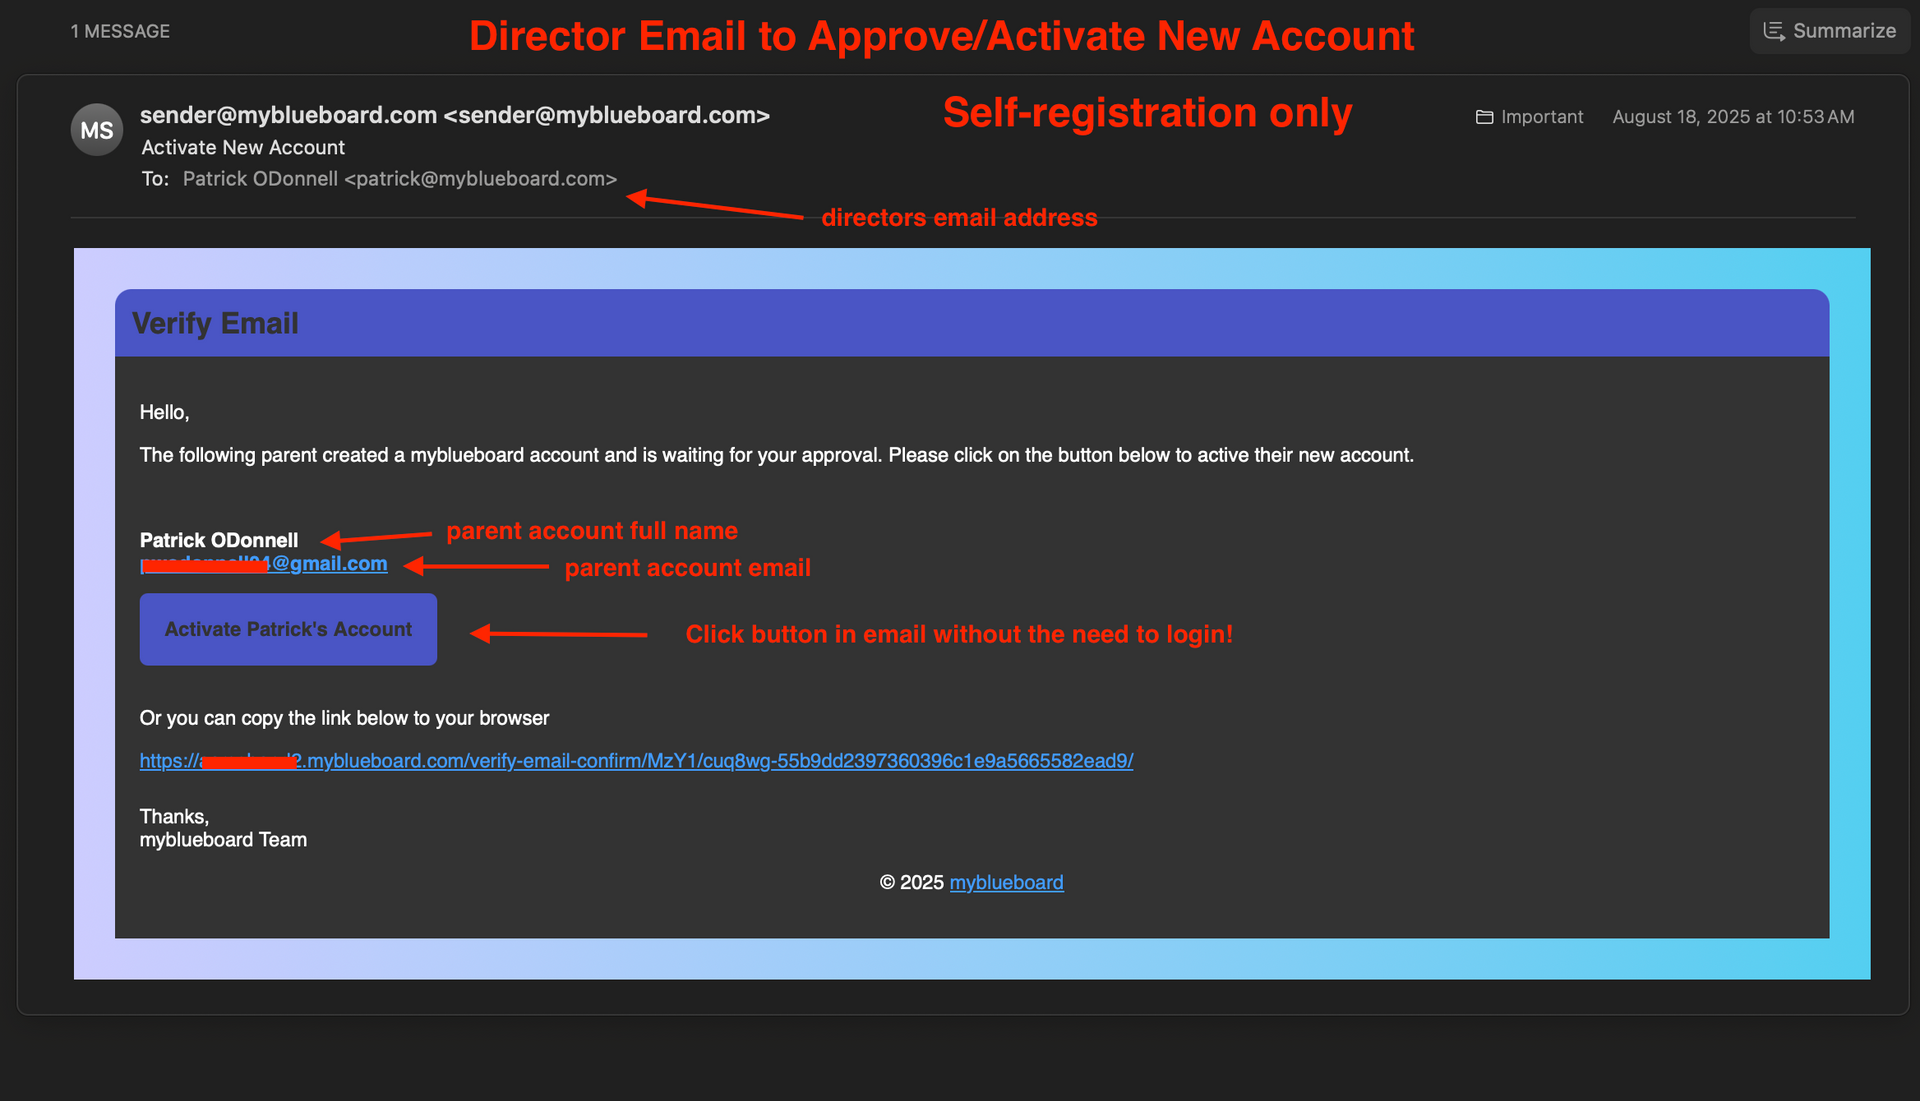
Directors:
- Simply click the link provided in the email to approve/activate the new account.
- see "DIrector Approval/Activate Email"
More Info
- Students and parents can self-register at your custom url login page.
- All new accounts must verify their email unless they are manually added.
- New accounts will receive a verification email when they register.
- Directors or Admins can manually add accounts by navigating to Accounts > Student Accounts or Accounts > Parent Accounts, and selecting the Add Student or Add Parent button at the top of your dashboard.

Approving New Accounts
Important Note
- All new student and parent accounts must be approved.
- Only directors can approve accounts.
How to approve new accounts:
- Directors receive an email for every new account registration.
- The account can be approved by clicking the link in the email.
- No need to login!
- To approve all accounts with one-click OR you did not receive the approval/activate email, you can approve accounts via the left sidebar:
Accounts >
Students or
Accounts >
Parents. Find the account by scrolling or using the search bar. Click the yellow edit button and select
Enable Account.
Easy Onboarding Instructions
It's easy to onboard students and parents - we've made them a checklist and step-by-step instructions.
You can find this at myblueboard.com/students-and-parents or as a downloadable PDF:
Mass Importing New Accounts
Please go to our "Importing and Exporting Accounts" support page. We have detailed instructions to help guide you the entire way!
